Tag Archives: bread

Banana-Berry Fig Bread

wpid-DSC_0011-2011-07-14-10-45.jpg

Food lingo is interesting. I’m trying to learn the language of bread baking, much of which is French and therefore somewhat comprehensible to me since I took many years of French in school. Assigning names to dishes has it own peculiarities, though.

This bread, for example, contains one too many fruits (or maybe one too many syllables worth of fruit names) to include all of them in a nice-sounding title. Strawberry Banana Fig Bread just doesn’t sound right to me. How many ingredients is too many to include in a dish’s name, anyway? I would say 4. I can’t think of any name that lists more than 3 primary ingredients.
Then there’s the arrangement of those fruit names. Whenever strawberries and bananas are involved, strawberry banana forces itself into our brains.

Strawberry Banana Fig is the preferred order
Banana Strawberry Fig sounds wrong
Fig Strawberry Banana sounds very wrong

Chop the straw- off of strawberry and Banana – Berry (or even Berry-Banana) becomes acceptable.

I can’t really explain any of this. I remember just enough linguistics from school to get all dorky about it every once in a while but not enough to really give an informed explanation for what I find so fascinating.

wpid-DSC_0013-2011-07-14-10-45.jpg

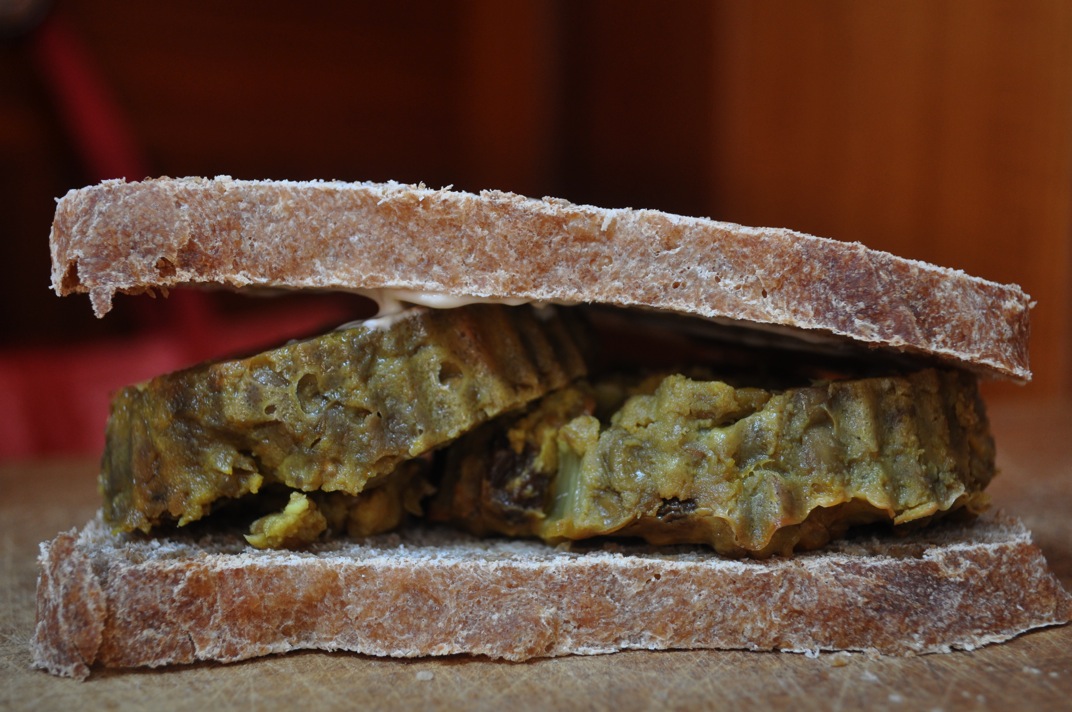
I promise this bread makes any naming confusion totally worth it. I was giddy with excitement at the one over-ripe banana I managed to hide from myself this week. It hung out with the other bananas on the counter (I really need a fruit bowl) until enough other ingredients presented themselves and the right recipe came along. The California figs I bought at Costco needed to go into something, asap. I’ve been keeping strawberries on hand at all times since returned to California (t’is the season!).

I’m not out to make fat-free baked goods, believe me. Any whole food is fine with me in moderation and healthy fats are definitely a must. That said, there are several ways to make a quick bread, muffin, cake, or cookie moist and delicious without copious amounts of butter or oil. Banana certainly helps, plus it adds sweetness. Applesauce is another good oil substitute. Yogurt is quite possibly my favorite. I always have a tub of some kind of plain yogurt in the fridge. This week I happen to have Trader Joe’s Plain Goat’s Milk Yogurt. YUM! It my sound weird but if you like goat cheese you must try goat’s milk yogurt. The taste is subtle and the yogurt is creamy without being overly rich. The bread I made today doesn’t taste like goat’s milk yogurt but I like knowing it’s in there.

wpid-DSC_0014-2011-07-14-10-45.jpg

Banana-Berry Fig Bread

Adapted from The Daily Garnish

1 cup all-purpose flour
1/2 cup whole wheat flour
1/2 cup wheat germ
2 teaspoons baking powder
1/2 teaspoon salt
1/2 cup brown sugar
2 eggs
1/2 cup plain yogurt
1 teaspoon vanilla extract
1 ripe banana
1 cup ripe figs, quartered
1/2 cup strawberries, diced

Combine flours, wheat germ, baking powder, and salt in a large bowl.
Peel the banana and mash it in a separate bowl.
Add the figs and mash them as well (they don’t have to be completely liquified – you can leave some fig hunks)
Beat the eggs into the banana-fig mixture
Add the brown sugar, yogurt, and vanilla. Stir until completely combined.
Pour the wet ingredients into the dry ingredients, stirring gently until barely mixed.
Fold in the strawberries.
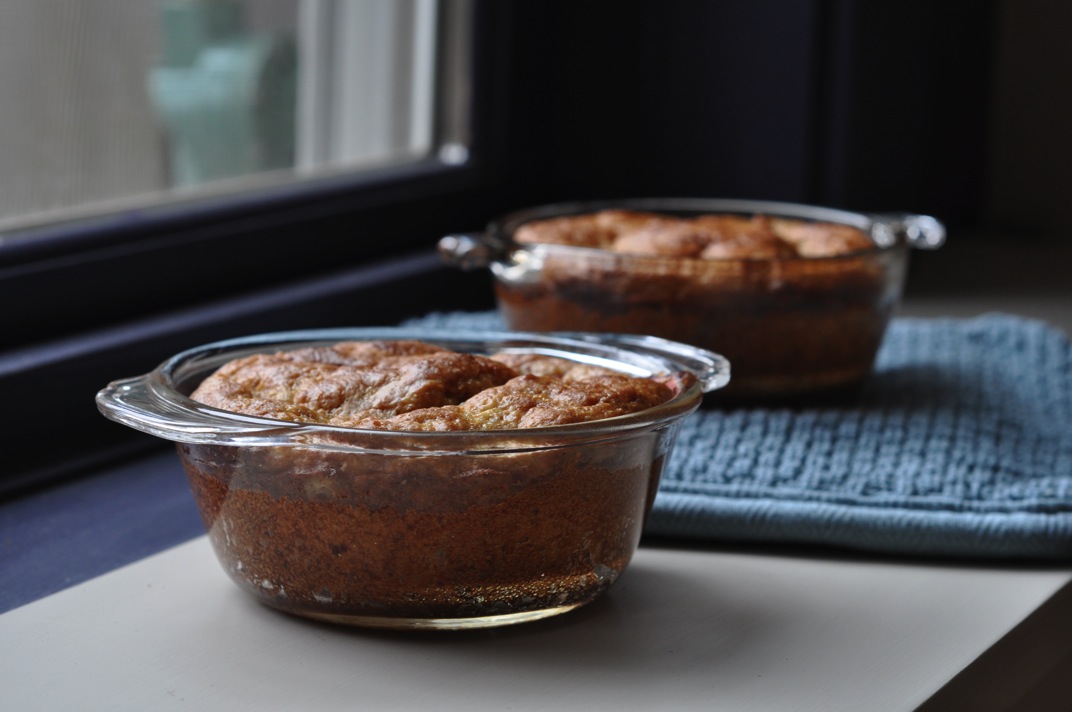
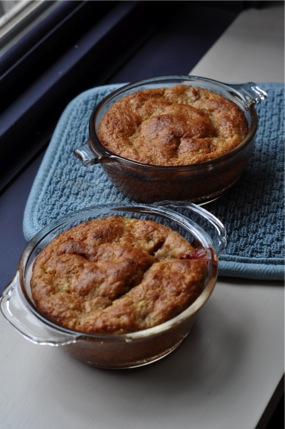
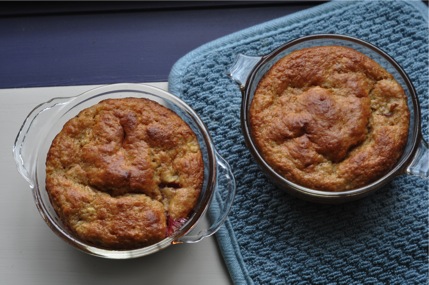
Pour the batter into one large loaf pan or 4 small loaf pans (I used 2 small loaf pans and 2 tiny baking dishes from my grandmother’s kitchen)

Bake at 350 for 45 min. (small loaves) to 1 hour (large loaf) or until lightly browned on top.
Cool on a wire rack, remove from pans, slice, and devour!

3 Comments

Filed under Bread

Sourdough English Muffins

wpid-DSC_0997-2011-07-9-15-58.jpg

Mmmmmmmuffins warm from the griddle.

My sourdough starter has done a lot of traveling since I received it as a gift last month. It came with me from Anacortes to Seattle and then survived the two day road trip from Seattle to Napa. In Napa, my started mostly hung out in the fridge. I knew I should be baking with it about once a week so I made a batch of improv loaves. They were tasty: tangy and spongy like sourdough! Then last weekend my starter moved to the city with Lee and me! It took up residence in a new fridge and waited patiently for me to have time to bake.

I didn’t know where to start with sourdough. I still don’t. I feel like my improv loaves didn’t count and these English muffins were a specialty recipe so I have yet to bake real bread with my starter. There is so much I don’t understand about bread baking. I get really, really overwhelmed when I read a bread cookbook that uses all kinds of fancy terms to describe artisan bread. I am ready and willing to learn, though, and I have to start somewhere!

Really, English muffins were a great place to start. This recipe came from a regular cookbook devoid of bread jargon. Cooking Emuffins’s is a simple process that I can control on the griddle. They’re also the perfect breakfast (or any time) bread to make sour. That extra flavor and chewy texture take an English muffin from good with butter and jam to great with butter and jam…and peanut butter, honey, marmalade, goat cheese, you name it!

I carried out the initial steps a little bit differently from what the recipe calls for. I had already grown my started with 1 cup water and 1 cup all-purpose flour so I just put away the amount that fits in my starter container and used the rest for the muffins. That meant I probably used more like a generous cup of starter rather than 3/4 cup. I therefore ended up with more dough (and possibly wetter dough since I don’t know if this recipe was written for a liquid starter like mine or a more solid one). None of that seemed to matter, though, which is a testament to just how easy this recipe is! If you have a starter in your fridge you have no excuse for not making these muffins!

wpid-DSC_0995-2011-07-9-15-58.jpg

Sourdough English Muffins
From Horn of the Moon Cookbook by Ginny Callan

Makes about 15 muffins

First day. The sponge:

3/4 cup sourdough starter (after removing the starter you will be using, feed the remaining starter with 1/2 cup water and 1/2 cup unbleached flour)
1 1/2 cups milk
1 1/2 cups whole wheat bread flour (I used regular whole wheat)
3/4 cup unbleached white flour

Mix all sponge ingredients together and beat for 100 strokes.
Cover and leave mixture out overnight if the room is cool or refrigerate after a few hours if the room is warm.

Second day. The dough:

1 1/2 teaspoons baking soda
1 1/2 teaspoons baking powder
1 1/2 teaspoons salt
1 1/2 tablespoons honey
2 cups unbleached white flour, or as needed (I used about half white, half wheat)
1 tablespoon vegetable oil
2 tablespoons cornmeal

Mix the baking soda, baking powder, and salt and stir this directly into the sponge.
Allow the mixture to sit for a few minutes until it begins to bubble.
Stir in enough flour (about 1 1/2 cups) to make a non-sticky dough.
Knead in the remaining flour on a floured surface, adding more if the dough remains sticky.
Cover dough and allow to rise for 1/2 hour.

Oil two cookie sheets and sprinkle them with cornmeal.
Roll dough out to 1/2-inch thickness on a lightly floured board.
Cut rounds about 3 1/2 inches in diameter (an empty, clean tuna can works well for this).
Re-roll the dough and cut more rounds, placing them on the cookie sheets, until you run out of dough.
Cover the cookie sheets with towels and leave the muffins to rise for about 1 hour. (They won’t rise much)

wpid-DSC_0993-2011-07-9-15-58.jpg

Preheat a cast-iron griddle or pan over low heat (do not oil it).
Place as many muffins as you can on the griddle (I put mine cornmeal side down initially) and allow them to bake undisturbed until the bottoms are nicely browned (8-10 minutes).
Flip muffins and cook until the other sides are brown. This should take less time than the first side. (When cooking both sides, the muffins will puff up a lot. It’s fun to watch!)
When browned, place on wire racks to cool and continue cooking remaining muffins.

wpid-DSC_0988-2011-07-9-15-58.jpg

I ended up with 21 muffins (20 after I sampled one!).
Hey, English muffins aren’t just for breakfast! Last night I made vegetarian chili specifically so we could eat buttered muffins with dinner. Today Lee had egg sandwiches on two Emuffins for breakfast and I had one slathered with crunchy peanut butter for lunch.

7 Comments

Filed under Bread, muffins

Curried Lentil Muffin Loaves

wpid-DSC_0427-2011-03-7-07-41.jpg

Split in half on homemade bread – leftover lentil loaf sandwich.

        Laziness is the mother of invention. Last night I was a little slow to start fixing dinner. I wasn’t sure if we were having a potluck with our sailing buddies or not so I planned a dish that I felt good about serving to other people. Most things I make don’t fall into that category.
        I started cooking the lentils for a loaf I’d fixed and enjoyed a couple of times in the past. When we learned that a potluck was not on the agenda that night, Lee and I went for a swim and came back to a pot of cooked lentils. At that point, I was feeling very lazy about making the full-fledged lentil loaf. It was supposed to take at least 45 minutes to cook and I was hungry. Since I no longer had to worry about making my dinner presentable to others, I decided to have some fun. What are muffin cups for but to cut down on cooking time and make a meal fun?
        The first step was to spice up the recipe a bit. The previous times I had made this loaf, I was disappointed with the flavor and knew it wasn’t living up it it’s potential. The recipe already included raisins and nuts so curry powder seemed like the perfect spice to add. The spice combination I came up with is by no means traditional curry flavoring. I just pulled jars off the spice rack, adding what I liked and what I thought might taste good. Really, the spices and their amounts are up to your individual taste. I do, however, highly recommend the raisins and nuts. They may seem like strange ingredients to some but they add the perfect crunch and sweetness to the lentils. Unfortunately, I didn’t have any cashews on hand. I considered trying macadamia nuts, the only plain nuts I have right now, but decided to hoard my minimal supply instead.
        Lee downed three “Texas-sized” muffin loaves and I was satisfied with two. That left one to experiment with as leftovers (and a chance for me to take a picture during the daytime). The loaves were delicious and very filling with a side of random sauteed veggies. Lee and I split a baked plantain for dessert, my first foray into plantains. I’m definitely going to get more of this Caribbean staple at the market today! It might become a favorite dessert and I’m eager to try other plantain preparations.

Curried Lentil Muffin Loaves
Adapted from Food.com

1 cup dried lentils
3 cups water

1 medium brown onion, chopped
3 cloves garlic, crushed or minced
2-3 teaspoons curry powder
1 teaspoon cumin
1/4 teaspoon ginger
1/4 teaspoon turmeric
2 eggs, lightly beaten (or equivalent egg replacer for a vegan version)
2 tablespoons flour
1/2 cup raisins
1/2 cup unsalted cashews, if you’d like

Rinse and sort lentils.
Combine lentils and water in a medium saucepan and bring to a boil; reduce to simmer and cook for about 1 hour, or until the lentils are cooked and the mixture is thick.
Set lentils aside.
Preheat oven to 350 degrees F.
Saute garlic and onion in a skillet until the onion is translucent.
Add the onion mixture, spices, raisins, nuts (if using), flour, and eggs to the saucepan of lentils or combine all the ingredients in a large bowl if the saucepan is not big enough.
Mix thoroughly and pour into 6 lightly oiled jumbo muffin cups. You can also make one large loaf or 12 regular-sized muffins, just adjust the baking time accordingly.
Place muffin cups on a cookie sheet if using silicon cups and bake in 350 degree oven for 35-45 minutes (on the longer end of this range for larger cups and 45+ minutes for a loaf).

Remove from oven and allow to cool. Gently remove muffins from tin or individual cups and serve with chutney or any sauce that suites your fancy.

2 Comments

Filed under muffins, other goodies

Who is this person who bakes all the time?

wpid-DSC_0351-2011-02-27-19-04.jpg

        I love what I’m doing. I love being on the water and being free. That said, I really miss full-size kitchens, high-speed internet, and grocery stores. I’m torn between loving this life and trying to do things that don’t come easily on a boat.
        At least I have bread. I find comfort and redemption in my every-other-day baking routine. I may not be able to put together a fresh, green salad but I can bake a loaf of delicious bread. After two astoundingly successful loaves my bread ego has risen to match their lofty heights.
        What began as a cookbook recipe is now decidedly my own recipe. I’ve changed flour types, baking pans, and techniques to suit my taste and needs. After experimenting with the French Bread and Tuscan Loaf in Joy of Cooking, I found the most success with my Tuscan Loaf-inspired creation. With only my bare hands and some ingredients I carried here from Maine, I produced something with crust, springiness, chewiness, flavor, and nutrition!
        I don’t know what Lee and I love more: the smell of bread baking overpowering the usual boat smells or sandwiches made with fresh, warm slices. I like my first slices topped with tahini and Lee prefers butter.
        I’ll start with the original recipe, then give my own. When I made my loaf yesterday I weighed the flour so I am listing those weights as well.

wpid-DSC_0355-2011-02-27-19-04.jpg

Tuscan Loaf
From Joy of Cooking by Irma S. Rombauer and Marion Rombauer Becker

Mix in a large bowl:
        2 cups lukewarm water (85 F)
        1 cup whole wheat flour
        3/4 cup all-purpose flour
        1 package (2 1/2 teaspoons) active dry yeast
Cover the bowl with plastic wrap and let rise at room temperature for 8-12 hours.

Stir in:
        2 1/2 cups all-purpose flour
        1 tablespoon olive oil

Adding up to 1 cup more flour as needed, mix until a soft, slightly sticky dough forms.
Knead by hand for 15 minutes (dough should be very elastic but a little sticky).
Transfer dough to oiled bowl and turn once to coat.
Cover bowl with plastic wrap and let rise and room temperature until doubled in volume (2 hours).
Punch down dough and knead briefly.
Shape into an oval loaf by stretching and tucking dough underneath itself.
Lightly oil a baking sheet and sprinkle it with cornmeal.
Place loaf on baking sheet, brush surface with oil and cover with plastic wrap.
Let rise at room temperature until more than doubled (1 1/2 hours).
When the imprints of your fingers remain in the loaf when pressed, it is ready to bake.
Preheat oven to 425 F. Set a baking pan on the lowest oven rack.
Score the top of the loaf with a crosshatch pattern and place it in the oven.
Immediately add 1 cup hot water to the baking pan and close the oven.
Bake until the bottom of the loaf sounds hollow when tapped (about 40 min).
Cool completely on a rack.

wpid-DSC_0360-2011-02-27-19-04.jpg

(I still can’t believe I can make bread) Bread
Adapted from Tuscan Loaf above

Mix in a large bowl:
        2 cups lukewarm water (85 F)
        1 cup whole wheat flour (4 oz)
        3/4 cup all-purpose flour (3.8 oz)
        1 package (2 1/2 teaspoons) active dry yeast
        2 teaspoons vital wheat gluten
Cover the bowl with plastic wrap and let rise at room temperature overnight. (I put mine in a cupboard that gets quite warm during the day)

The next morning, stir last nights mixture and add:
        1 cup wheat flour (4 oz)
        1 cup all-purpose flour (4.2 oz)
        1/2 cup buckwheat flour (3.7 oz)
        2 teaspoons vital wheat gluten
        1 tablespoon olive oil

Adding up to 1 cup more flour (I added 4-5 oz this time) as needed, mix until you have soft, sticky dough.
Knead by hand for 15 minutes. The dough should not quite come un-stuck from your hand.
Transfer dough to oiled bowl and turn once to coat.
Cover bowl with plastic wrap and let rise in a warm place until doubled in volume (around 2 hours – I’ve left it for less and more time).
Punch down dough and knead briefly.
Lightly oil a loaf pan and sprinkle a pinch of oats over the bottom.
Shape dough into a loaf and place in pan.
Brush the top of the loaf with oil, cover lightly with plastic wrap, and leave in a warm place to rise until the top of the loaf is 1/2 to 1 inch above the edge of the pan.
Preheat oven to 425 degrees F.
Place loaf on center rack and bake for about 40 minutes, or until the top and bottom sound hollow when tapped.
Remove bread from pan and cool on a wire rack.

8 Comments

Filed under other goodies