Monthly Archives: November 2010

Millet pudding in the pressure cooker

wpid-CIMG2703-2010-11-22-07-51.jpg

Me, pondering half a milk crate on Assateague Island.

I really need one of these to carry groceries on my bike!

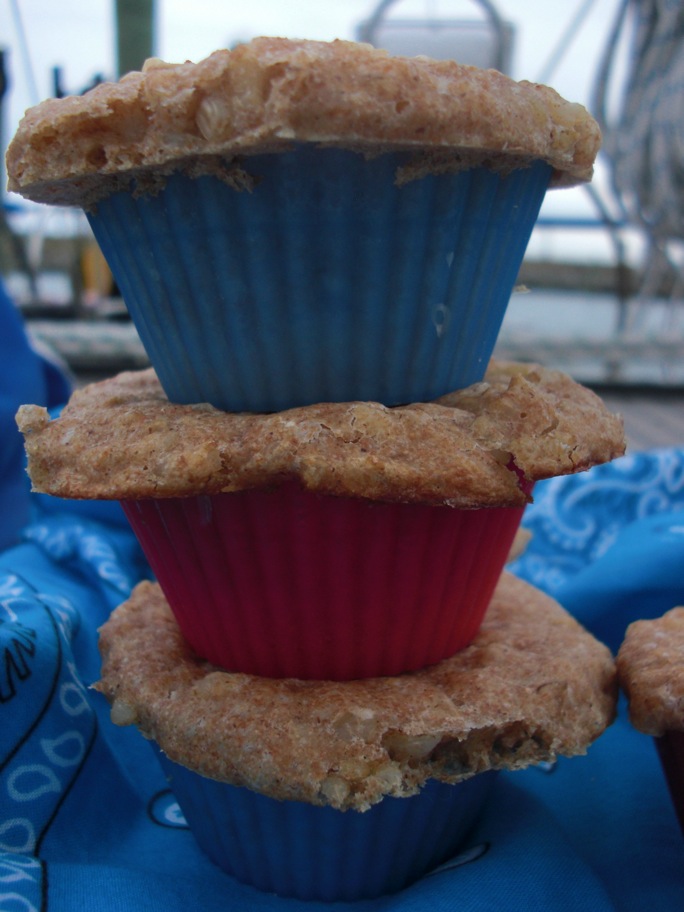
        I’d like to invent a new meal, like brunch, but not quite. If brunch is somewhere between breakfast and lunch, what would you call a breakfast-dessert combination? I realize that several other meals come between breakfast and dessert so they’re not adjacent time wise. Still, many of us like to start and end the day with something sweet. Among these sweet dishes, a few gems can show up on either the breakfast table or the dessert tray: coffee cakes, pastries, waffles…okay, so maybe there are a lot of really unhealthy breakfasts out there that are actually just dessert in disguise. There are also treats nutritious enough to be morning fuel and stand in as healthful, sweet-tooth satisfying desserts.

wpid-CIMG2725-2010-11-22-07-51.jpg

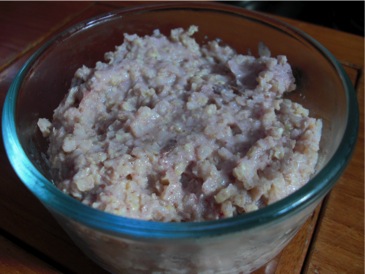
        This pudding is one such treat. A creamy, whole-grain, slightly sweet bowl of mush may not sound like dessert but believe me, it’s heavenly. It’s not particularly photogenic, as you can see, but it tastes much better than it looks! Rice pudding lovers everywhere must give millet a try. With extra cooking and plenty of liquid, millet breaks down into a starchy soup that naturally congeals to make a perfect pudding. It’s nutty flavor pairs well with warm spices and milk – dairy and non-dairy alike. I’ve never made rice pudding but it’s been on my list for a while. Yesterday I was craving something different in the pudding category and remembered a millet congee I’d made last winter. While not a dessert, the congee had an amazing texture and could have gone in either a sweet or savory direction. Couldn’t millet make a nice a pudding, too? After a little research, I came up with a millet pudding recipe that uses a pressure cooker. With a little adaptation, I had a version that suited me and my ingredients.

        I am just beginning to explore the joys of my pressure cooker. It was a birthday present from Lee, who knows the benefits of quick, efficient cooking. I have successfully made a couple batches of brown rice that came out beautifully, required a fraction of the conventional cooking time, and freed up the stove top for me to prepare the rest of the meal. The amount of time it takes for the pressure to drop after cooking is just enough for a stir fry.

        The pressure cooker worked very well for this pudding. The rice pudding recipe in the booklet that came with the cooker does things a little differently. It calls for cooking the rice in one pressure session, then adding the milk, raisins, etc. and pressure cooking everything to make the pudding. That seemed like an overly involved process for a simple dessert and I’m getting stingy with the propane as our cylinder gets low. I went with a throw everything in the pot and cook it once technique. I’ll try making a non-pressure cooker version and post the conventional method when I do.

        I intended to add a cinnamon stick to the mixture before cooking but completely forgot until the pot was all sealed up. Instead, I stirred in a teaspoon of cinnamon after the pudding was cooked and it added a perfect hit of spice. Add a cinnamon stick as I originally intended or put the ground spice in at the beginning if you’d like. The pudding gets just a bit of sweetness from the dates. It was just about perfect for me but adding a few more dates would bump up the natural sweetness. Lee topped his pudding with agave nectar so we both got our dessert the way we liked it.

Millet Pudding for dessert or breakfast)
Adapted from
Makes 4 servings

2/3 cup millet
1 cup milk of choice
1/2 cup water
3 pitted dates, chopped (or more, for a sweeter result)
1 1/2 teaspoons vanilla extract
1 teaspoon cinnamon

Rinse millet and place it in a large metal bowl that will fit inside your pressure cooker.
Add milk, water, vanilla, and dates, stirring everything together.
Add 1 cup of water to the pressure cooker and place the rack in the bottom (my P.C. slightly elevated metal grate for elevating things off the bottom of the pot).
Cover the bowl securely with foil and place it on the rack in the pressure cooker.
Secure the lid on the cooker, put the pressure regulator on top, and place over a high heat burner.
When the pressure regulator begins to rock slightly, start a timer for 11 minutes. Adjust heat down or up to keep regulator rocking gently.
After 11 minutes, turn off the heat and remove the pressure cooker from the burner. Let it cool on it’s own (on mine, the release valve for the lid pops up when the cooker has cooled sufficiently).
Remove the pressure regulator, carefully open the lid and use tongs or hot pad holders to take out the inner bowl.
Stir in the cinnamon and mush up the pudding to help break up the millet and dates, distributing the fruit sweetness throughout and making the dish more pudding-like.
Spoon into individual bowls and top with something tasty (whipped cream, a sprinkle of cinnamon and/or nutmeg, chopped nuts, coconut butter, agave nectar, honey, maple syrup…the list of possible toppings goes on and on). Refrigerate individual servings to save them for later. I think I like mine cold!

10 Comments

Filed under desserts

Everyone’s Muffins

wpid-CIMG2637-2010-11-16-16-02.jpg

        It’s a grey, blustery day in Maryland (hence the sky replacement for the poorly lit pictures I’m not too happy with). I woke up indecisive about what to bake. With Thanksgiving fast approaching something suited to that holiday seemed appropriate but I’m just not in the holiday mood quite yet. Maybe it’s because this will be the first Thanksgiving I spend away from family. It’s time for Lee and I to start our own traditions!

wpid-CIMG2674-2010-11-16-16-02.jpg

        I guess I’m working my way up to Thanksgiving because today’s muffins are dinner table appropriate, or a great start to a long day in the kitchen. As an added bonus (or a requirement at some tables), these muffins are vegan. Laurel’s Kitchen included vegan recipes back when even vegetarians were still considered wackos. Everyone’s Muffins were so named for their acceptability to all diets, even those that exclude milk and eggs. Hey, they’re also great when you’re in Maryland and you haven’t been to the grocery store since New York! Actually, I went to the store yesterday but I still really wanted to make these muffins!
        This is the second time I’ve made Everyone’s Muffins. I followed the recipe exactly the first time but tweaked one ingredient for this batch. The leftover brown rice in the ice box caught my eye and was much more accessible than the master supply of oats I’d need to raid since I just emptied the container in the galley. Cooked brown rice seems like a nice addition to bread. It adds that chewy rice texture, fiber, and protein. In retrospect, though, I should have adjusted the amount of liquid in the original recipe because my muffins turned out very. very moist. They will probably be better after sitting overnight but the rice obviously didn’t absorb as much liquid as uncooked oats would have.
        Oh well. They taste good and they’re good for us. I love “un-sweet” muffins like these. You can butter them up and slather them with jam (or cranberry conserve, perhaps). Eat one for breakfast, serve them with dinner, make muffin sandwiches – these are as versatile as muffins get.

Everyone’s Muffins (Oatmeal Variety)
From Laurel’s Kitchen by Laurel Robertson, Carol Flinders, and Bronwen Godfrey
Makes 12

1 1/2 cups warm water*
1 tablespoon active dry yeast
1 1/2 teaspoons salt
1 3/4 cups whole wheat flour
2 tablespoons oil
2 tablespoons brown sugar
1 1/2 cups rolled oats*
2 pinches nutmeg

*I replaced the oats with the same amount of cooked brown rice. If you do the same, try decreasing the amount of water by 1/4 cup or so.

Dissolve the yeast in the water in a large bowl.
Add the salt, oil, sugar, and whole wheat flour and beat well.
Add the oats and nutmeg and beat vigorously (you’ll have a batter not a dough).
Cover the bowl with a towel and leave it to rise in a warm place for at least an hour.
Stir down the batter and spoon it into lightly greased muffin tins (or use silicone cups in a muffin tin. I think paper would stick).
Let the muffins rise for about another hour.
Preheat the oven to 400 degrees F. and bake muffins for about 20 minutes. The tops will be brown and crusty.

If I make these with rice again I’ll decrease the liquid and maybe increase the baking time. Maybe I’ll just try the other variety of Everyone’s Muffins – Buckwheat! Now I need to focus on more pressing matters…

Any suggestions for a vegetarian Thanksgiving for two?

6 Comments

Filed under muffins

Chewy granola bars

When life gives you smashed bananas, bake something!

wpid-CIMG2649-2010-11-12-08-29.jpg

That’s my new favorite saying and these are my new favorite thing to make with smashed bananas. In June, when I was hit by a car on my bike in Annapolis, MD, I made banana bread with the battered bananas that had been in my backpack. This is probably the easiest way to produce baking-worthy bananas around here, since I eat them up faster than they can ripen.
This time the beautiful bunch of perfect fruit I bought at Trader Joe’s in Manhattan went for quite a ride in our latest sailing disaster. By the way, I was so excited to find my favorite store blocks from where we were moored. I stocked up all my usual TJ’s fare. The sailing disaster was the scariest experience of my life so far. I’ll give the short version here but the full account is on my other blog, Pirat.
It was 6pm, very dark, and Lee and I were finishing our dinner in the cockpit. I looked over my shoulder to see a breaking wave about to hit our boat. Chaos ensued. We had come upon an uncharted shoal off the coast of New Jersey (Who knew New Jersey could be so treacherous!). Several walls of whitewater knocked our boat on it’s side and the keel (heavy thing on bottom of boat) thunked against the bottom a couple of times. I thought we were going to be smashed to bits and have to be rescued. We made it off, though, and pulled into Atlantic City, where we’d been heading in the first place, within a couple of hours.
Among the things to go flying down below was the bunch of bananas. I think Lee stepped on them while they were on the floor. I just stepped in the remains of my sweet potato from dinner. Yum.

On to the baking! These granola bars were next on my list of things to make anyway so I was actually kind of excited to have all the ingredients ready. It was very satisfying and therapeutic to whip up a sweet treat during our recover day.
I based my bars on quite a few granola bar recipes from all over the place. As with granola, finding the perfect recipe seemed impossible. I’m too picky about what goes into a good granola bar. I did like the idea of using mashed bananas and they made the end product fabulously soft and chewy. After enjoying the tasty combination of banana and coconut oil in my Banana Bran Scones, I opted to use coconut oil in the granola bars as well. It’s flavor is much stronger than in the scones and I love the banana-coconut fragrance these gave off when baking.
Nut and fruit additions are totally customizable. I used slivered almonds and no dried fruit but I think chopped dates and walnuts or pecans would be delicious. I may try toasting the nuts for more flavor next time and adding a little vanilla or almond exratact.

wpid-CIMG2644-2010-11-12-08-29.jpg

Featured on Baking is Hot

Chewy Granola Bars
Makes about 12 bars

Dry Ingredients
2 3/4 cup rolled oats
1/3 cup flaxseed meal
1/2 teaspoon cinnamon
1/4 teaspoon nutmeg
1/4 teaspoon allspice
Wet ingredients
1/4 cup coconut oil
1/4 cup agave syrup or honey
2 soft bananas
1 egg (or egg replacer equivalent for vegan version)
Additions
1/2 cup slivered almonds
optional: 1/4 – 1/2 cup dried fruit

Preheat oven to 350 degrees F.
Combine dry ingredients in a bowl and set aside.
Melt coconut oil in a medium-sized saucepan over very low heat.
When it is completely liquified, add bananas and mash them thoroughly.
Add agave and egg and beat well till everything is combined.
Pour the oatmeal mix into the saucepan with the wet ingredients, stir everything up, and add the nuts and fruit (if using).

Time to get messy!
Scoop about 1/4 – 1/3 cup of the mixture into your hands. Shape it into an oblong bar (I found cupping my palms together worked well) and place it on cookie sheet with a non-stick baking surface (silicone mat or parchment).
I got 13 bars of about the same size out of my mixture but you can make them as big or small as you want. They also don’t have to be bar-shaped – make them round and they look like cookies! I do think shaping them rather than spreading the whole mixture in a pan and cutting it after baking is a good idea. The bars seem crumbly but they firm up nicely.
Bake for 15 minutes at 350.
Place on a wire rack to cool, and try a bar right out of the oven. Yum!

8 Comments

Filed under other goodies

Peanut butter chocolate M&M bars

wpid-CIMG2594-2010-11-7-09-06.jpg

        I didn’t know what to call these. The recipe I started with but quickly departed from was for peanut butter blondies. Having made those once before, I knew they were more cake-like than blondie-like. I added chocolate to mine so are they brownies? I don’t think so – not fudgey enough. If I hadn’t baked them in my tiny quarter sheet pan these bars would be thicker and I’d call them cake. As is, I say these chocolatey, M&M studded squares of peanut butter heaven are good, whatever they are.

wpid-CIMG2597-2010-11-7-09-06.jpg

        This afternoon, when we rounded Manhatten and left the East River’s swift current behind, baking seemed like the best way to spend the rest of the trip. It was is bitterly cold and I’ve seen the shoreline along the Hudson before. I made sure Lee was good to last another hour on deck and hunkered down in the galley.

wpid-CIMG2579-2010-11-7-09-06.jpg

        Oooh, I almost forgot my ode to Pretzel M&M’s! Lee and I are addicted to them. I buy a bag whenever I see them and sneak them into movie theaters on the rare occasion that we visit one. I think they’re probably the best invention since the M&M…and the pretzel. They’re crunchy, slightly salty, slightly sweet, and chocolatey. We have kind of a surplus of Pretzel M&M’s right now so I decided to throw some into the bars, in addition to some regular M&M’s from some friends’ Halloween candy bowl. They’re awesome in these bars, as I knew they would be, and I can’t wait to bake them into something else!

        Of course we ran out of propane shortly after I put the bars in the oven and right as we were pulling into the boat basin. By run out, I mean the tiny propane tank on deck that powers the stove was empty. We have another, full-sized propane tank next to it but usually do all kinds of tank juggling to get them both stowed and the small one hooked up and filled. Lee quickly swapped tanks – placing the large one on the cockpit floor temporarily and attaching it to the supply line.
        I don’t think the oven really lost much heat before I relit it down below. I did give the bars a little extra time to bake, though. They made the whole boat smell like peanut butter cups!

wpid-CIMG2592-2010-11-7-09-06.jpg

Peanut Butter Chocolate M&M Bars

3/4 cup all-purpose flour
1/4 cup cocoa powder
1 teaspoon baking powder
1/2 teaspoon baking soda
1/2 teaspoon salt
1 egg
3/4 cup granulated sugar (or 1/2 cup liquid sweetener like honey or agave)
1/2 cup vanilla yogurt, nonfat or regular
1/2 cup peanut butter
About 1/2 cup (or more!) M&M’s of any type

Preheat the oven to 350 degrees F.
Sift flour, cocoa powder, baking powder, baking soda, and salt together in a bowl.
Beat egg, sugar, yogurt, and peanut butter together in a larger bowl.
Add the dry ingredients to the wet and stir till fully blended.
Stir in M&M’s (I added the regular ones this way and pressed the Pretzel M&M’s into the batter once it was in the pan).
Pour batter into a lightly oiled quarter sheet baking pan or 8×8 in. cake pan, spreading it all the way to the edges.
Add more M&M’s if you’d like.
Bake at 350 for 30 minutes or until the edges are starting to crisp and the center is springy.

Cool completely before cutting. Enjoy!

I’m so excited to be moored right next to New York City! We spent a few days here in the summer so we know where the closest subway station is etc. It’s time to do some urban exploring!

7 Comments

Filed under desserts