Tag Archives: coconut

Toll Houses

wpid-DSC_0253-2011-12-4-15-54.jpg

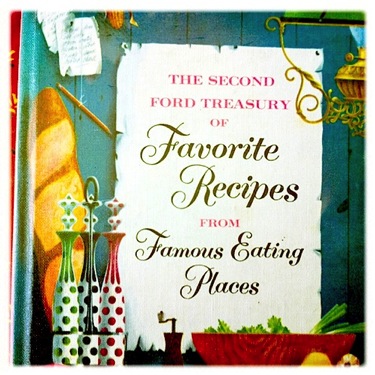
This month’s Recipe Swap recipe made me smile. It also appealed to my nerdyness with a little geographical and historical context lesson. Christianna at Burwell General Store decided to start the swaps second year with a new cookbook. A group of brave bloggers received this vintage recipe from a very unique cookbook:

wpid-recipeswap_ford_bookcover-2011-12-4-15-54.jpg

wpid-recipeswap_tollhouse-2011-12-4-15-54.jpg

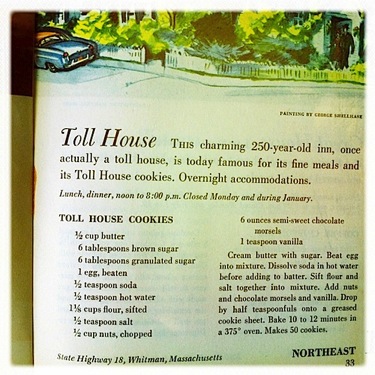
        I didn’t do a ton of baking as a kid but I do remember making Toll House chocolate chip cookies with my mom. I know they were Toll House because I remember reading the recipe off of the yellow bag. Though it didn’t happen often, for me cookie baking meant valuable lessons in how to use the stand mixer. It was big, heavy, more than a little scary with all those moving parts, and absolutely essential for perfect cookies.

Until very recently, I didn’t have a mixer of my own. My grandmother’s KitchenAid coming to live with me just happened to correspond with this cookie recipe swap. Creaming butter and sugar has never been so satisfying!
Oh but wait, I didn’t use butter in my Toll House cookies. There are two explanations for this:

  1. I wanted to use a “healthier” fat and just experiment with a different version of the traditional cookie.
  2. I forgot to buy butter.

I’d say the real reason is some combination of the above…but mostly number 2. Butter was on the grocery list. I meant to use it, really I did. I’m just not a big butter user so it didn’t make it into my basket. No problem. I had coconut oil! Since it’s solid at room temperature and has such a lovely flavor, I sometimes substitute coconut oil for butter in my baking. While it’s not the same as something made with butter, I think the flavor and texture of these cookies is outstanding.

wpid-DSC_0246-2011-12-4-15-54.jpg

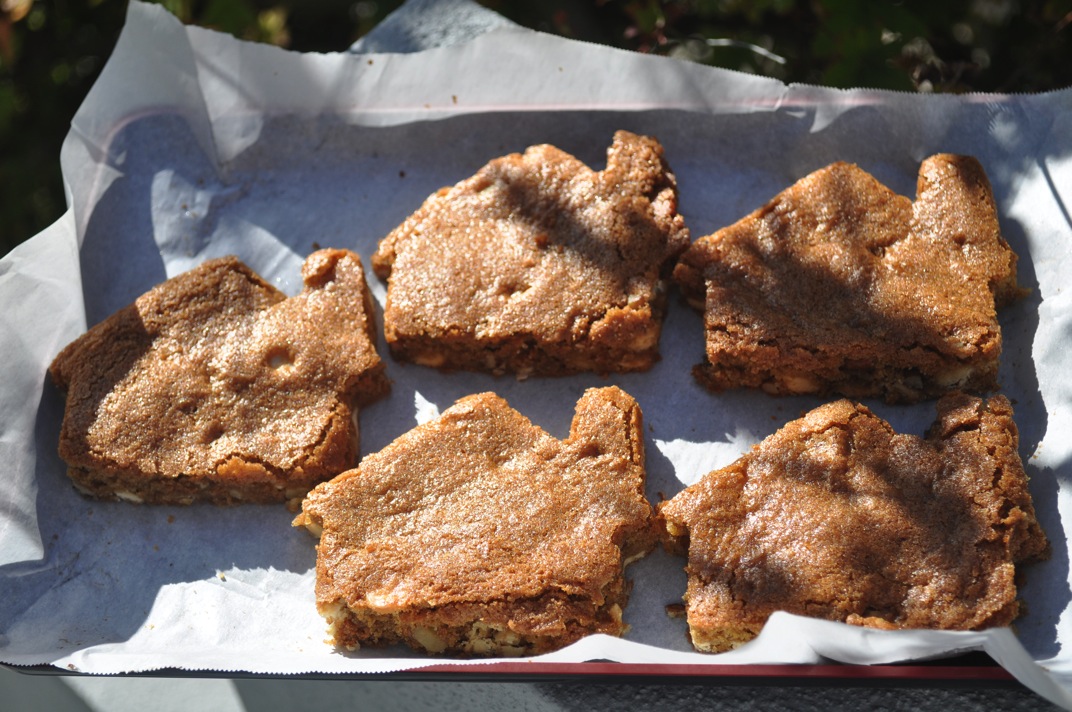
        Now comes the part where I explain the houses. You see, my husband is such a sweet guy, he randomly buys me cookie cutters (this just started recently). Last month he added a house-shaped cutter to my small collection. That, of course, made me smile because we were about to buy our first house! We moved in a week or so ago so I’m feeling very homey and grounded nowadays. The house cookie cutter came out as my play on Toll House cookies and to share a little of my new home love with everyone.

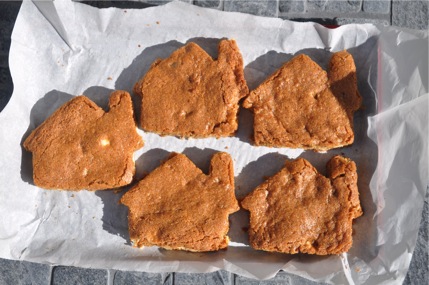
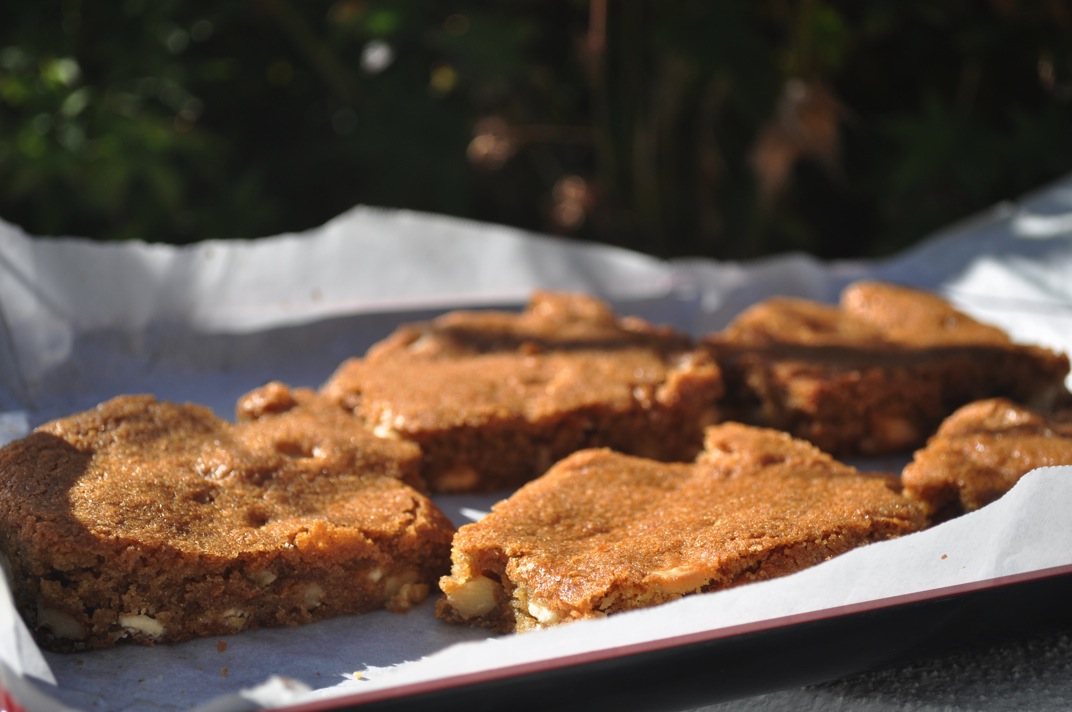
I changed a few other things besides the shape and fat in my cookies. I used white chocolate chips in place of regular, vanilla bean instead of vanilla extract, and whole wheat pastry flour instead of all-purpose. This recipe is small – a nice size for a cookie recipe (unless it’s Christmas and you’re trying to feed lots of people). I baked all the dough in a pyrex dish lined with parchment and then cut the houses out of the giant sheet cookie. This worked pretty well but only made 5 houses + trimmings. The house cookies are big. I’d share one with 1 or 2 other people. The trimmings are perfect for snacking on while you’re snapping your cookie pictures or for crumbling over ice cream…yum!

wpid-DSC_0248-2011-12-4-15-54.jpg


Toll House Houses
Adapted from The Second Ford Treasury of Favorite Recipes from Famous Eating Places

1/2 cup coconut oil
6 tablespoons brown sugar
6 tablespoons granulated sugar
1 egg, beaten
1/2 teaspoon baking soda
1/2 teaspoon hot water
1 1/8 cup flour, sifted (I used whole wheat pastry)
1/2 teaspoon salt
1/2 cup nuts, chopped (I used walnuts and pecans)
1/2 cup white chocolate morsels
1 teaspoon vanilla (I used the seeds scraped from 1 vanilla bean)
Cranberries would have been a good addition. Add some if you want! They’ll be pretty!

Preheat oven to 375 degrees F.
In the bowl of a stand mixer, cream together coconut oil and sugar.
Add egg and vanilla bean scrapings.
Dissolve baking soda in hot water and then add to batter.
Sift flour and salt together and add to mixer a little at a time until completely incorporated.
Stir in nuts and chocolate morsels.
Line a baking dish (mine is 11×7 in. but a bigger one would be better) with parchment paper.
Spread cookie dough over paper to cover the bottom of the dish. The dough will be relatively soft so this is actually pretty easy.
Bake at 375 for 15-20 minutes or until golden brown.
Remove from oven and let cool. You can lift the “cookie” out of the dish and onto a wire rack using the parchment paper.
Once the cookie is cooled, cut out house shapes in as efficient a pattern as possible.
Start looking for a giant milk moat for your houses!

16 Comments

Filed under desserts

Coconut Molasses Swirl Cornbread

Dear food blogging world,

I love you and I wish I could live in your warm, sweet-smelling world of cookies and spices, talented cooks and writers, brilliant photographers and intriguing recipes.

Sincerely,
Rachel

I’m feeling really, really connected all of a sudden. Maybe it’s the Burwell Recipe Swap. Maybe I’m still riding the Foodbuzz Festival high. In any case, I love life in this food blog world. Life in the real world is pretty good too. Lee and I will be the proud owners of our first house-home (as opposed to boat-home) in a few days and should be moving in by this time next week. Both of my museum internships are going swimmingly. They keep me intellectually fired-up and assure that my fingernails are always blue with clay. I have a whole slough of new friends and I’m starting to really, really appreciate this fabulous city.

This haze of happy feelings propelled me away from the computer to bake yesterday. I dug out Helen’s Texas cornbread recipe along with some special ingredients. I wanted to infuse this delicious but plain cornbread with a couple of flavors I’ve been loving lately: coconut and molasses.

The all-cornmeal bread became cornmeal+millet flour, which has a similar texture to cornmeal (and hey, that means it’s gluten free). Buttermilk became coconut milk+vinegar. Shredded coconut went perfectly with the gritty cornmeal texture and it only took a tablespoon of molasses to turn half the batter into a deep, dark molasses swirl. I am firmly in the “cornbread shouldn’t necessarily be sweet” camp but that doesn’t rule out ingredients more commonly found in sweets.

wpid-DSC_0132-2011-11-12-10-48.jpg

My only mistake was to follow Helen’s recipe in terms of salt. I know she loved her salt and tended to be a bit too liberal with it for mine and my mom’s taste. I thought I’d give her some credit when it came to cornbread, though, and added a full teaspoon of salt. Hah! The bread it still good but it would be a completely different kind of good with less than half that amount of salt. I think I’d like it better that way.

I think this cornbread would be beautiful on a holiday table or for breakfast with a smear of jam, like the homemade apricot I’m currently enjoying. I might even let some of it dry out in a paper bag and make something resembling Helen’s cornbread dressing, a holiday food institution in my family.

wpid-DSC_0141-2011-11-12-10-48.jpg

Coconut Molasses Swirl Cornbread (gluten and sugar free)

1/2 cup stoneground cornmeal
1/2 cup millet flour
1/2 cup light coconut milk
1 teaspoon baking powder
1/2 teaspoon baking soda
1/2 teaspoon salt (revised down from 1 teaspoon)
1/2 cup low-fat milk (or more coconut milk)
2 teaspoons vinegar
1 tablespoon blackstrap molasses
2 tablespoons unsweetened, shredded coconut

Preheat oven to 400 degrees F.
Oil a small baking dish/pie plate/cake pan, or, ideally, a cast iron skillet.
Combine the dry ingredients in a medium bowl.
In a separate bowl, beat together egg, milk and vinegar.
Add wet ingredients to dry, stirring until most lumps are gone.
Pour half of this batter into the baking dish or pan.
Add molasses to the rest of the batter, stirring until it is fully incorporated.
Pour this batter into the pan as well and stir gently to swirl both together.
Bake for 20-25 minutes, or until the center of the cornbread is firm.

4 Comments

Filed under Bread

California Fig Jam

wpid-DSC_0460-2011-09-8-15-02.jpg

I might as well call this California Fig Jam – both the figs and I are from and currently residing in CA. I’m very proud to say that this is the first thing I’ve preserved without a recipe (gasp!). Some may find that frightening, but fear not. I know the key ingredients and important steps for successful, safe canning. Let this jam serve as evidence!

This was not in the plan for today. I was driven to make it by the impending deadline to send out some jars for a jam exchange that Steph put together. Somewhere in the back of my mind I knew the date was coming up. I fretted about my meager preserving efforts this summer but continued to procrastinate. Finally, I checked the due date this morning. September 10th! I had to mail my jams by September 10th! That’s day after tomorrow! Whew, at least I realized that in time and happened to have a recently purchased more figs than a girl and her fig-hating husband can eat.

So, with this very basic, spontaneous canning outline from Food In Jars, I started chopping. My figs were perfectly, perfectly ripe. The timing could not have been better. I would have liked to use honey in this recipe but I don’t have any. I used brown sugar instead, hoping for the deep, caramelized sweetness it provides. A splash of lemon juice was the only other thing I needed to create this simple spread.

wpid-DSC_0478-2011-09-8-15-02.jpg

On fresh-baked bread with coconut butter (or off side of the pan when my jars were filled), this stuff is amazing. For my taste, it turned out a little on the sweet side. I erred on the side of caution with the sugar and took into account that most people like things sweeter than I do.

Simple Fig Jam

Approximately 3 cups chopped fresh figs
1 cup packed brown sugar
juice from 1 lemon

Combine ingredients in a medium-sized saucepan or large skillet and bring to a boil.
Reduce heat and simmer for about half an hour, or until the mixture thickens and does not immediately flow back together then you scrape a spatula across the bottom of the pan (here’s a great demonstration of this)
When the jam is ready, process it using your preferred method. You can read all about canning from this USDA source.
Don’t forget to heat your pot of water for processing the jars! I forgot that today but fortunately my pressure cooked boils water super fast!

As you may have gathered, I also made bread today. This was not just any bread, it was my first loaf from the Master Recipe in Healthy Bread in Five Minutes a Day. I bought the book a couple months ago when I saw it on sale a book store. I had been wanting a copy ever since it came out. I read and heard so many raves about Jeff Hertzberg, Zoe Francois and Mark Luinenburg’s first book, Artisan Bread in Five Minutes a Day. Some friends of mine took to baking their own bread all the time after receiving this book as a wedding present. I tried their bread. It was very, very good.

wpid-DSC_0474-2011-09-8-15-02.jpg

Francois and Luinenburg’s version, concentrating on healthful bread recipes, promises to be a much-used cookbook in my kitchen now that I’ve tried the first recipe. The dough was easy to mix and their whole bread making process made sense to me. The loaf I made today really did come together very quickly. I got it ready to put in the oven while my jam cooked and had fresh bread by lunch time! The flavor is awesome and I think I’m finally getting a hold of the oven-steaming crust procedure.

Bread, I love you, the making and the eating too. (Did I just write a poem about bread! Ha!)

wpid-DSC_0470-2011-09-8-15-02.jpg

11 Comments

Filed under condiments