Tag Archives: healthy

Yucca Fries

I am one of those people who never intentionally order french fries in a restaurant but almost always grabs a couple off of my dining companion’s plate. That’s only if I’m dining with someone like my husband or mother. I don’t take fries from strangers or mere acquaintances. Are you a fry snatcher?

It’s not that I don’t love a good french fry. Who doesn’t? When they’re crisp but not dry and not too greasy with a little bit of salt and pepper….ah, yum. I hate to turn them down. Hand over the ketchup and nobody gets hurt. The problem with fries is that, in my experience, they are rarely the picture of perfection I just described. They’re soggy, greasey, overly salty, and cold. Presented with a mountain of such fries, will I still eat them? Yes. I’m afraid that if I order fries with my sandwich I’ll eat the whole pile whether or not they’re really good and feel horrible about it afterwards. That’s just what fries do to me.

So, I snatch a few off of Lee’s plates, sampling the goods. If they’re tasty, then I’m content with my nibble. If not, then I’m more than happy that I have salad next to my (veggie)burger rather than fried potatoes.

There does come a time when every girl needs a plate of french fries, or rather, french fry-shaped things that are in fact rather good for you and safe to consume by the plateful. Enter the yucca fry.

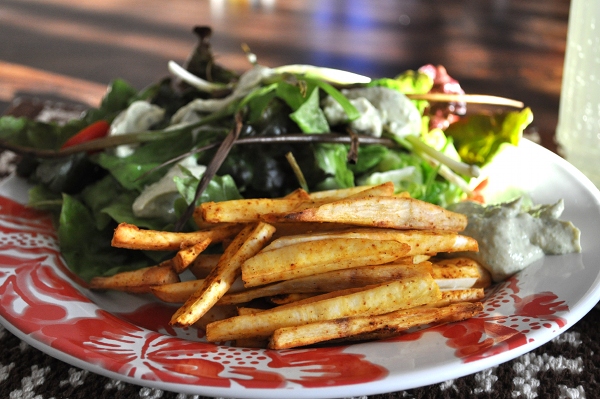
A balanced plate: fries+salad+tofu Lima bean sauce

Baked, not fried, these babies entered my dinner repertoire while we were sailing in the Bahamas. I think I ran across the idea of baking yucca (aka cassava) “fries” on Meals and Miles. The funky looking root was everywhere in the Bahamian markets and was undoubtedly the cheapest produce around. It’s naturally high in fiber and other good stuff like vitamin C.

While peeling and slicing yucca can be somewhat tricky (the outer skin has a waxy coating and the inside is alternately crumbly and hard), the result is worth it. Rather than becoming limp during baking, as baked potato “fries” sometimes do, yucca holds it’s shape well and gets crispy/chewy in the oven. I’m getting hungry just thinking about it!

Yucca Fries

Ingredients

  • 2 medium-sized yucca/cassava roots (easier to handle than the big guys)
  • Olive oil
  • Seasonings (whatever you want! This time around I used a little chili powder and garlic powder)
  • Your favorite french fry dips and sauces

Instructions

  1. Preheat oven to 400 degrees F.
  2. Get out a large, rimmed baking sheet
  3. Peel the yucca using a paring knife or vegetable peeler
  4. Cut eat root in half and then slices the halves into sticks of about the same width (1/4-1/2 inch)
  5. Toss yucca into a plastic bag with the olive oil and spices.
  6. Shake and massage the bag until the fries are evenly coated.
  7. Arrange yucca in a single layer on the baking sheet.
  8. Bake for 15-20 minutes, or until fries are gold-brown. You can stir them around part way through but this isn't necessary.
http://blog.muffinegg.com/2012/06/19/yucca-fries/

2 Comments

Filed under other goodies

Rosemary pine nut focaccia

It’s taken a while but this week I finally feel like I have a balance for my new work-life schedule. Spending three days a week at a desk and two evenings a week sailing makes me feel like all the time in between is taken up by meal prep and dishes. Oh, and working out goes in there somewhere almost every day too. Never mind that Lee works about three times as much as I do, takes a class that the community college, and has a gazillian side projects going at home.

Partly due to our busy schedules, Lee and I haven’t done anything too ambitious on the weekends recently. We’ve worked on projects around the house, visited family in Napa, and ventured North for a hike with Doc.

Doc likes the view.

This week my days off seemed much more productive than normal. Today I feel like an absolute superwoman. Do you know why? I baked bread. True, bread baking used to be a weekly occurrence in my household. I’ve hardly opened my oven (except to roast vegetables) since we got back from Curacao, though, so I’ve been lagging in the bread department.

This totally makes up for it. The Artisan Bread in Five Minutes a Day technique was made for busy schedules like mine. The timetable for this focaccia looked something like this.

  1. Yesterday, mid-day: mix dough and leave on counter to rise; go to the store and to pick up the CSA box
  2. Afternoon: put dough in the fridge along with more vegetables than I can count
  3. This morning: think about bread and look at cookbook; take Doc for a walk
  4. Later this morning: take dough out of fridge and pull off a hunk; flatten it out, top with toppings, and let it sit while the oven preheats
  5. Just before lunch: put bread in the oven; talk to Mom on Skype while it bakes
  6. Noon today: bread comes out of the oven; inhale deeply

There you have it. Technically this focaccia was about 24 hours in the making. I only put a few minutes a day of work into it, though, and I got a lot done in the intervening hours. The best part is that there’s still a bucket of dough in the fridge!

This recipe has been brewing in my mind for a while now. I saw this post from Cake Duchess the other day and immediately wanted to join in on the Bread Baking Society‘s fun. I don’t think I’ve ever set out to make focaccia before, although I’ve certainly made many-a-flat bread that resembled this traditional Italian loaf.

I love the toppings I chose and I love to think about where the inspiration for them came from. The giant rosemary sprig happily living in a jar of water in my fridge came from last week’s Mariquita Farm box. I’ve had pine nuts on the brain ever since reading a book on Native California Indian cooking I bought at work (it’s dangerous to work at  a museum with such an awesome gift store!).

The rosemary, pine nuts, and honey are delicious but so are many other things you could sprinkle on top of your focaccia. Let you mind wander and see what you come up with. I made a whole wheat crust because that’s what I’m into but here’s a more traditional crust from this month’s #BreakingBread hostess.

Rosemary pine nut focaccia (whole wheat)

Ingredients

    For the dough (makes enough for at least four 1 pound loaves)
  • 7 cups whole wheat flour
  • 1 1/2 tablespoons granulated yeast
  • 1 tablespoon kosher salt
  • 1/4 cup vital wheat gluten
  • 3 1/2 cups lukewarm water
  • 1/2 cup olive oil
  • For the Focaccia
  • 1 tablespoon fresh rosemary leaves
  • 1/4 cup pine nuts
  • Olive oil
  • Honey

Instructions

  1. Mix dry dough ingredients in a large bowl or coverable container.
  2. Add oil+water and stir until all flour is incorporated.
  3. Cover dough (not airtight) and leave at room temperature until it rises and collapses (2-3 hours)
  4. At this point, you can pull off some dough and proceed with your focaccia or place all the dough in the fridge and bake the following day. I like to do the latter because the dough is easier to work with when it's cold.
  5. Pull off a grapefuit-sized portion of dough using floured hands. Quickly shape it into a ball and place it on a lightly floured board.
  6. Using your hands or a rolliong pin, roll out the dough into a 1/2-3/4 inch thick oval.
  7. Coat a cookie sheet with oil, parchment, or a silicon mat and place the dough oval on it.
  8. Depending on how quickly your oven preheats and whether you're using a baking stone (not necessary when using a cookie sheet but requires half an hour of preheating time) you might want to turn your oven on to 425 degrees F. and place a roasting pan in the bottom now.
  9. Using the tip of your finger, make indentations all over the top of the focaccia. These will hold oil, honey, and pine nuts!
  10. Scatter rosemary and pine nuts over the dough. I pressed most of my pine nuts into the top a little.
  11. Sprinkle on honey and olive oil to taste, using more olive oil than honey.
  12. If you haven't already, turn on your oven to 425 F. after putting a roasting pan in thet bottom.
  13. Let the focaccia rest for 20 minutes, then place in the preheated oven, pour boiling water into the roasting pan, and quickly close the oven door. I boil water in the teakettle for this.
  14. Bake for 18-25 minutes depending on how thick your focaccia is. It's ready when the top is brown from the honey and the oil.
  15. Cool on a wire rack, slice, and savor.

Notes

Dough recipe for 100% Whole Wheat Bread with Olive Oil from Healthy Bread in Five Minutes a Day

http://blog.muffinegg.com/2012/05/11/rosemary-pine-nut-focaccia/

4 Comments

Filed under Bread

Banana-Berry Fig Bread

wpid-DSC_0011-2011-07-14-10-45.jpg

Food lingo is interesting. I’m trying to learn the language of bread baking, much of which is French and therefore somewhat comprehensible to me since I took many years of French in school. Assigning names to dishes has it own peculiarities, though.

This bread, for example, contains one too many fruits (or maybe one too many syllables worth of fruit names) to include all of them in a nice-sounding title. Strawberry Banana Fig Bread just doesn’t sound right to me. How many ingredients is too many to include in a dish’s name, anyway? I would say 4. I can’t think of any name that lists more than 3 primary ingredients.
Then there’s the arrangement of those fruit names. Whenever strawberries and bananas are involved, strawberry banana forces itself into our brains.

Strawberry Banana Fig is the preferred order
Banana Strawberry Fig sounds wrong
Fig Strawberry Banana sounds very wrong

Chop the straw- off of strawberry and Banana – Berry (or even Berry-Banana) becomes acceptable.

I can’t really explain any of this. I remember just enough linguistics from school to get all dorky about it every once in a while but not enough to really give an informed explanation for what I find so fascinating.

wpid-DSC_0013-2011-07-14-10-45.jpg

I promise this bread makes any naming confusion totally worth it. I was giddy with excitement at the one over-ripe banana I managed to hide from myself this week. It hung out with the other bananas on the counter (I really need a fruit bowl) until enough other ingredients presented themselves and the right recipe came along. The California figs I bought at Costco needed to go into something, asap. I’ve been keeping strawberries on hand at all times since returned to California (t’is the season!).

I’m not out to make fat-free baked goods, believe me. Any whole food is fine with me in moderation and healthy fats are definitely a must. That said, there are several ways to make a quick bread, muffin, cake, or cookie moist and delicious without copious amounts of butter or oil. Banana certainly helps, plus it adds sweetness. Applesauce is another good oil substitute. Yogurt is quite possibly my favorite. I always have a tub of some kind of plain yogurt in the fridge. This week I happen to have Trader Joe’s Plain Goat’s Milk Yogurt. YUM! It my sound weird but if you like goat cheese you must try goat’s milk yogurt. The taste is subtle and the yogurt is creamy without being overly rich. The bread I made today doesn’t taste like goat’s milk yogurt but I like knowing it’s in there.

wpid-DSC_0014-2011-07-14-10-45.jpg

Banana-Berry Fig Bread

Adapted from The Daily Garnish

1 cup all-purpose flour
1/2 cup whole wheat flour
1/2 cup wheat germ
2 teaspoons baking powder
1/2 teaspoon salt
1/2 cup brown sugar
2 eggs
1/2 cup plain yogurt
1 teaspoon vanilla extract
1 ripe banana
1 cup ripe figs, quartered
1/2 cup strawberries, diced

Combine flours, wheat germ, baking powder, and salt in a large bowl.
Peel the banana and mash it in a separate bowl.
Add the figs and mash them as well (they don’t have to be completely liquified – you can leave some fig hunks)
Beat the eggs into the banana-fig mixture
Add the brown sugar, yogurt, and vanilla. Stir until completely combined.
Pour the wet ingredients into the dry ingredients, stirring gently until barely mixed.
Fold in the strawberries.
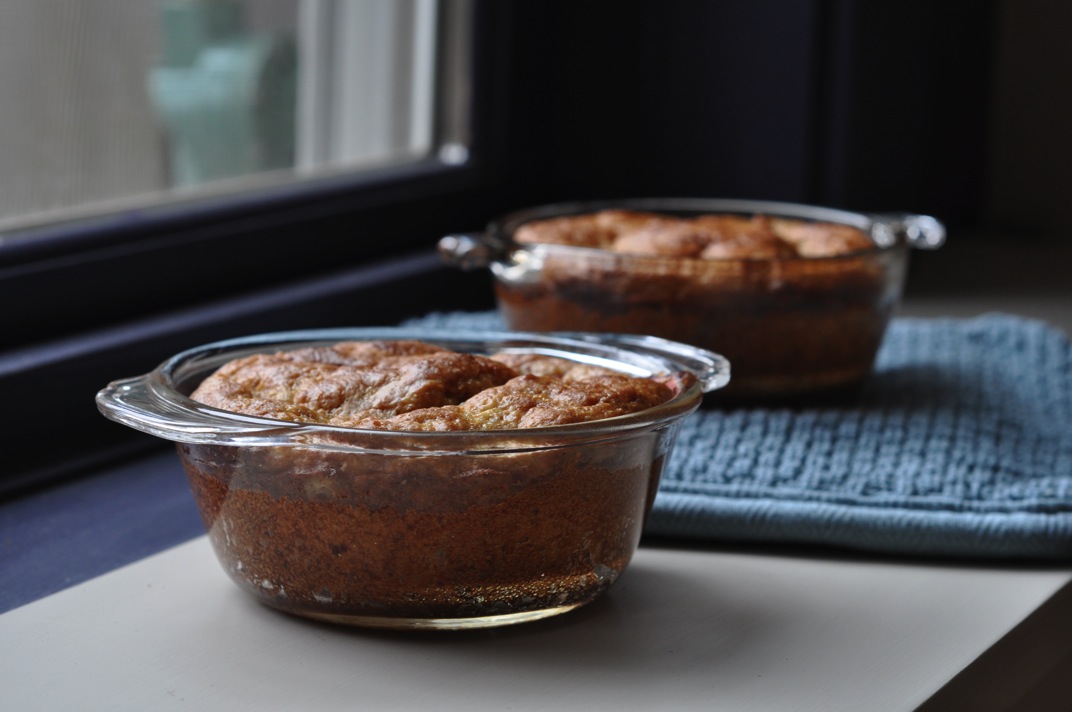
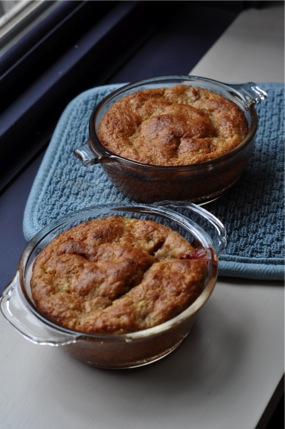
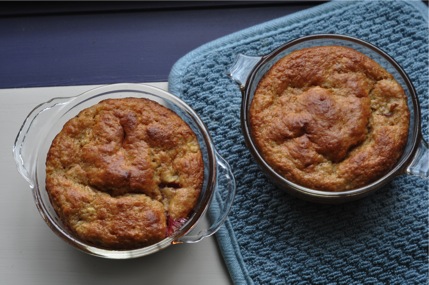
Pour the batter into one large loaf pan or 4 small loaf pans (I used 2 small loaf pans and 2 tiny baking dishes from my grandmother’s kitchen)

Bake at 350 for 45 min. (small loaves) to 1 hour (large loaf) or until lightly browned on top.
Cool on a wire rack, remove from pans, slice, and devour!

3 Comments

Filed under Bread

Sourdough English Muffins

wpid-DSC_0997-2011-07-9-15-58.jpg

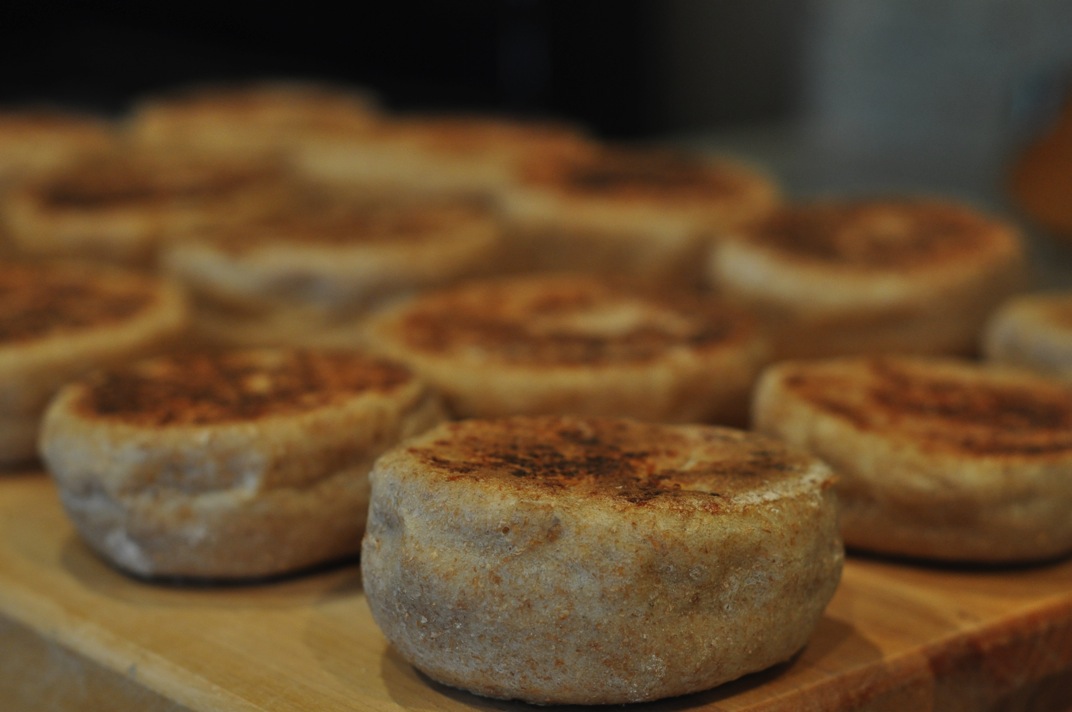
Mmmmmmmuffins warm from the griddle.

My sourdough starter has done a lot of traveling since I received it as a gift last month. It came with me from Anacortes to Seattle and then survived the two day road trip from Seattle to Napa. In Napa, my started mostly hung out in the fridge. I knew I should be baking with it about once a week so I made a batch of improv loaves. They were tasty: tangy and spongy like sourdough! Then last weekend my starter moved to the city with Lee and me! It took up residence in a new fridge and waited patiently for me to have time to bake.

I didn’t know where to start with sourdough. I still don’t. I feel like my improv loaves didn’t count and these English muffins were a specialty recipe so I have yet to bake real bread with my starter. There is so much I don’t understand about bread baking. I get really, really overwhelmed when I read a bread cookbook that uses all kinds of fancy terms to describe artisan bread. I am ready and willing to learn, though, and I have to start somewhere!

Really, English muffins were a great place to start. This recipe came from a regular cookbook devoid of bread jargon. Cooking Emuffins’s is a simple process that I can control on the griddle. They’re also the perfect breakfast (or any time) bread to make sour. That extra flavor and chewy texture take an English muffin from good with butter and jam to great with butter and jam…and peanut butter, honey, marmalade, goat cheese, you name it!

I carried out the initial steps a little bit differently from what the recipe calls for. I had already grown my started with 1 cup water and 1 cup all-purpose flour so I just put away the amount that fits in my starter container and used the rest for the muffins. That meant I probably used more like a generous cup of starter rather than 3/4 cup. I therefore ended up with more dough (and possibly wetter dough since I don’t know if this recipe was written for a liquid starter like mine or a more solid one). None of that seemed to matter, though, which is a testament to just how easy this recipe is! If you have a starter in your fridge you have no excuse for not making these muffins!

wpid-DSC_0995-2011-07-9-15-58.jpg

Sourdough English Muffins
From Horn of the Moon Cookbook by Ginny Callan

Makes about 15 muffins

First day. The sponge:

3/4 cup sourdough starter (after removing the starter you will be using, feed the remaining starter with 1/2 cup water and 1/2 cup unbleached flour)
1 1/2 cups milk
1 1/2 cups whole wheat bread flour (I used regular whole wheat)
3/4 cup unbleached white flour

Mix all sponge ingredients together and beat for 100 strokes.
Cover and leave mixture out overnight if the room is cool or refrigerate after a few hours if the room is warm.

Second day. The dough:

1 1/2 teaspoons baking soda
1 1/2 teaspoons baking powder
1 1/2 teaspoons salt
1 1/2 tablespoons honey
2 cups unbleached white flour, or as needed (I used about half white, half wheat)
1 tablespoon vegetable oil
2 tablespoons cornmeal

Mix the baking soda, baking powder, and salt and stir this directly into the sponge.
Allow the mixture to sit for a few minutes until it begins to bubble.
Stir in enough flour (about 1 1/2 cups) to make a non-sticky dough.
Knead in the remaining flour on a floured surface, adding more if the dough remains sticky.
Cover dough and allow to rise for 1/2 hour.

Oil two cookie sheets and sprinkle them with cornmeal.
Roll dough out to 1/2-inch thickness on a lightly floured board.
Cut rounds about 3 1/2 inches in diameter (an empty, clean tuna can works well for this).
Re-roll the dough and cut more rounds, placing them on the cookie sheets, until you run out of dough.
Cover the cookie sheets with towels and leave the muffins to rise for about 1 hour. (They won’t rise much)

wpid-DSC_0993-2011-07-9-15-58.jpg

Preheat a cast-iron griddle or pan over low heat (do not oil it).
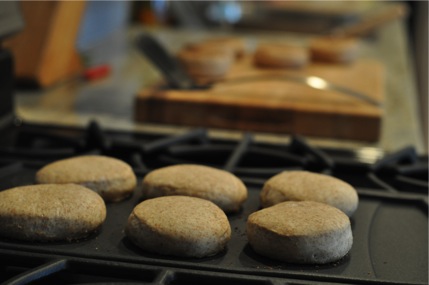
Place as many muffins as you can on the griddle (I put mine cornmeal side down initially) and allow them to bake undisturbed until the bottoms are nicely browned (8-10 minutes).
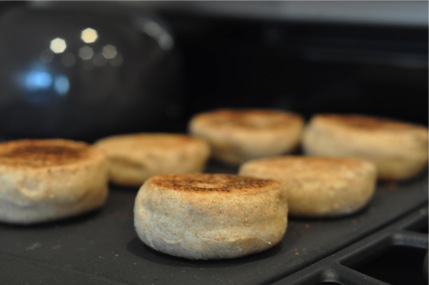
Flip muffins and cook until the other sides are brown. This should take less time than the first side. (When cooking both sides, the muffins will puff up a lot. It’s fun to watch!)
When browned, place on wire racks to cool and continue cooking remaining muffins.

wpid-DSC_0988-2011-07-9-15-58.jpg

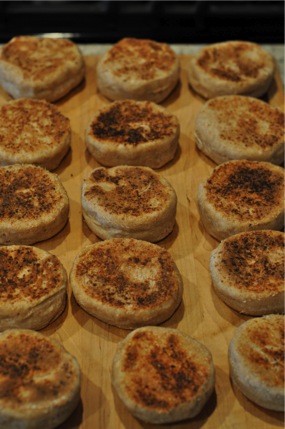
I ended up with 21 muffins (20 after I sampled one!).
Hey, English muffins aren’t just for breakfast! Last night I made vegetarian chili specifically so we could eat buttered muffins with dinner. Today Lee had egg sandwiches on two Emuffins for breakfast and I had one slathered with crunchy peanut butter for lunch.

7 Comments

Filed under Bread, muffins