Tag Archives: dessert

Carrot…pie? A Recipe Swap and a giveaway!

Perhaps I reacted to this month’s Burwell General Store Recipe Swap recipe a little differently than most people. I was ready to cook up some carrots and bake a pie! Carrot pie sounded like another delicious variation of some of my favorite pies: pumpkin and sweet potato. Could carrot pie be even better because of what it has in common with carrot cake (my absolute favorite)?

I wanted to find out whether another orange vegetable would make a lovely, fall-flavored pie so I decided to stick closely to the original recipe. That turned out to be pretty easy, since the recipe was so vague that I didn’t have a rigid ingredient list to follow. It reads something like an oral history gathered by some culinary folklorist. Can I have that job, please?

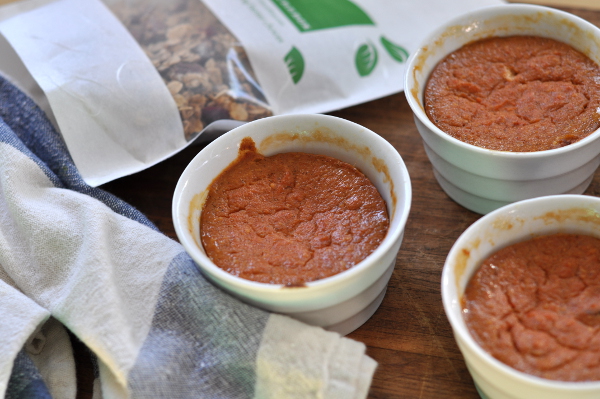
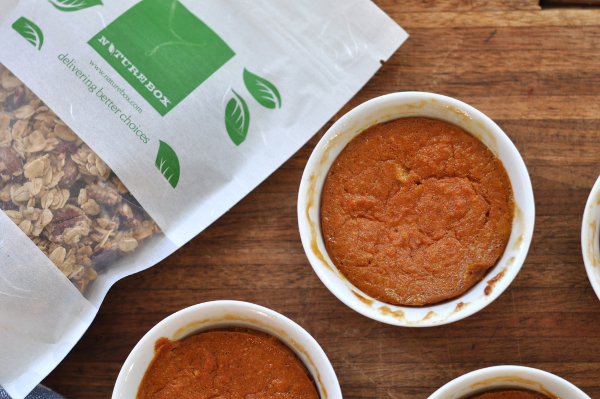
I steamed “the carrots”, added them to milk and eggs, sweetened them with sugar, and added cinnamon for spice. That wasn’t all, of course. The full recipe is at the bottom of this post. My take on carrot pie includes ricotta cheese and allspice but no crust. I gave up baking custard pies in crust long ago. All I want is the filling so baking that in little ramekins or muffin cups makes dessert much more enjoyable to me.

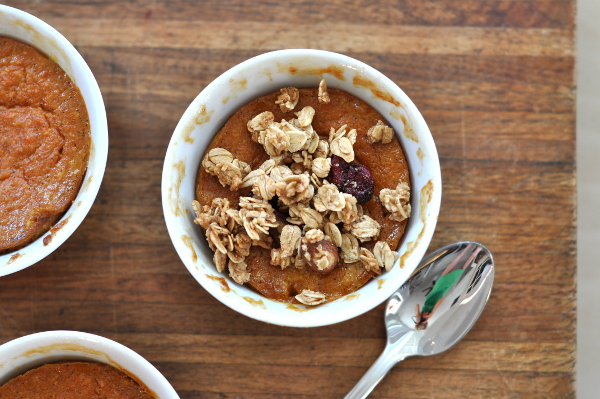
Individual custard cups may not be quite as pretty as a whole pie and sometimes it’s nice to have some crunch with your silky-smooth filling. That’s where this bag of granola comes in!

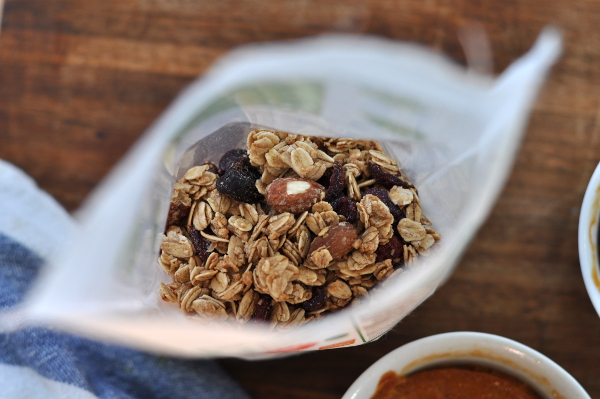
I happened to have a bag of Cherry Berry Granola in my pantry from the NatureBox each blogger received as part of the Foodbuzz Festival gift bag. NatureBox delivers a monthly package of healthy snacks anywhere you need them (in the U.S.). They come in neat little resealable pouches and have already saved me from a snack black hole at least once. I love the dried fruit, nut mix, and Blueberry Almond Bites but I’m especially excited about the granola, since it’s on the light side – just how I like granola – with a good ratio of oats to whole almonds and dried berries.

The crunchy granola was a perfect topping for my carrot custard, which was still warm and gooey when I snacked on it yesterday afternoon. It was reminiscent of pumpkin or sweet potato pie but with more substance, thanks to the ricotta cheese, and plenty of flavor from the vanilla bean and spices. Lee and I did a bike/run brick workout that morning so I snacked for the rest of the day. The rest of my little carrot pies went in the fridge for weeknight desserts.


If you’d like to try some healthy, convenient snacks for yourself, NatureBox has generously offered one of their future month’s boxes to one of my lucky readers! All you have to do is comment on this post telling my where and when you most need a snack during the day. The winner will be chosen at random from those comments. One entry per person, please. I will announce the winner in 1 week. At this time, NatureBox can only deliver to U.S. addresses and cannot customize box contents. Be sure to check out the NatureBox Blog for delicious recipes and snack ideas!

You’ll also find inventive recipes inspired by carrot pie from my fellow recipe swappers below.


Little Crustless Carrot Pies

Prep Time: 15 minutes

Cook Time: 30 minutes

Yield: 6 half-cup ramekins

Ingredients

  • 3 medium-sized carrots
  • 1 cup ricotta cheese*
  • 1/4 cup milk (dairy or non-dairy)
  • 2 eggs
  • 1/3 cup coconut sugar, brown sugar, or other sweetener of choice
  • 1/4 teaspoon cinnamon
  • 1/4 teaspoon allspice
  • 1/4 teaspoon salt
  • Seeds scraped from 1 vanilla bean or 1/2 teaspoon vanilla extract

Instructions

  1. Preheat oven to 350 degrees F.
  2. Cut carrots into 1 inch chunks and steam until tender.
  3. Puree carrots in a food processor or using a hand blender.
  4. In a large bowl, beat the eggs.
  5. Add ricotta cheese, milk, sugar, spices, salt, and vanilla, stirring with a whisk until well blended.
  6. Add carrots and stir until combined.
  7. Pour batter into ramekins coated with a little oil or silicone muffin liners. Place these on a baking sheet.
  8. Bake at 350 for 30-40 minutes or until the center of each pie is solid and the edges begin to pull away from the dish.
  9. Cool on a wire rack until ready to eat.
  10. Pies may be served warm or chilled, topped with granola, cookie crumbs, or even whipped cream. If using muffin cups, you may remove pies form the cups before serving as long as they are significantly cooled.

Notes

* Yogurt or pureed tofu may be substituted for ricotta.

http://blog.muffinegg.com/2012/11/05/carrot-pie-a-recipe-swap-and-a-giveaway/

27 Comments

Filed under desserts, Recipe Swaps, snacks

Upside-Down Fig Rosemary Cornmeal Cake

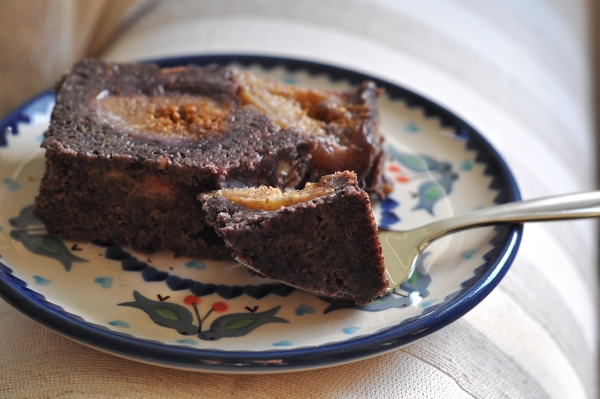
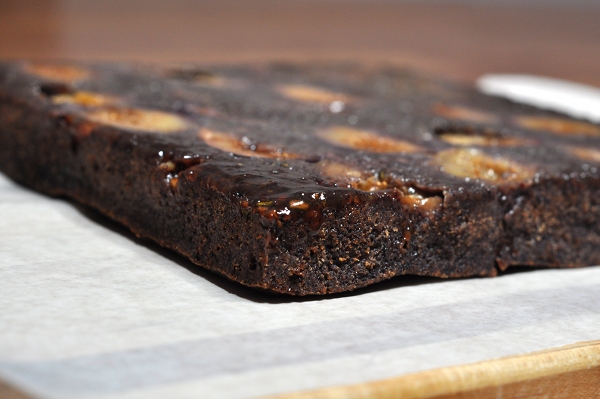
I wish there was still some of this cake in the kitchen. Sadly, it’s long gone. Lee and his sister polished it off with ice cream on Monday night. Oh I got my share. I tasted the sticky corners of the pan after I first inverted the cake onto a plate. I had a nice, big slice the night after our second triathlon. It was exactly what I needed and I was so glad I’d baked the day before. This is the best thing I’ve baked for a long time: it’s fruity, herby, sweet and nutty without being overpowering. It’s dense but still dessert.

I made this for the figs. They practically begged me to do it. I have this problem with figs, you see. When the short-but-sweet fig season finally gets going I have to buy them. I buy them en masse and then remember that I’m the only one in this household that actually likes figs. I vaguely remember giving Lee one once, long ago, and having him say “Is this supposed to taste good?” Ha!

So, we have figs. Then there’s the rosemary and cornmeal, and not just any cornmeal but purple cornmeal. I came across this recipe (the second one) while searching for an upside-down fig cake and the thought of rosemary and walnuts with my gooey fruit was captivating. I also happen to have fresh rosemary from the CSA box in my fridge and walnuts in my pantry. This kind of ingredient alignment almost never happens to me!

I used rosemary and walnuts from the above recipe but found my cornmeal inspiration from Cake Duchess and her Peach and Cornmeal Upside-Down Cake. I almost recruited the peaches from my fruit drawer at the sight of this beauty and went right for the purple cornmeal I’d bought for some other grand plan a while back.

I should have taken a picture while I was mixing the batter. The purple color was incredibly intense. It darkened as the cake baked but I still like the dark purple notes in the finished product. Wouldn’t a yellow and purple swirl be fun?

I promise this is the last thing. There’s two things I learned when baking this cake:

  1. Even though it may seem like the butter-sugar concoction you’re coating your pan with is going to cook itself into a stuck-on mess it really isn’t. Everything is going to be fine. Butter is magical, even in reasonable quantities.
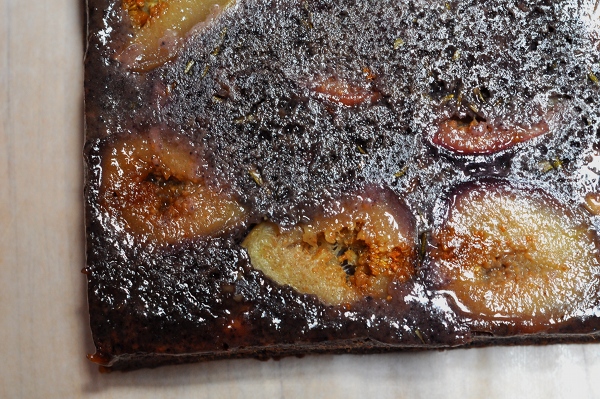
  2. Don’t invert your upside down cake out of the pan until you’re ready to serve it. I couldn’t wait to see mine to I flipped it as soon as it had cooled and I think the glossy topping soaked into the cake by the time I sliced it the next day. It might have soaked in even if I’d left the cake upside down but I’m guessing it would hold up better.
  3. I lied! I learned 3 things! Make a cake with cornmeal and fruit and you can eat it for breakfast without feeling like you’re eating cake for breakfast!


Upside-Down Fig Rosemary Cornmeal Cake

Ingredients

  • 8-10 ripe figs, halved and stems removed
  • 1 cup cornmeal, preferably stone ground but only purple if you feel like it. Yellow would be lovely too.
  • 3/4 cup flour of choice. I used barley flour.
  • 1 teaspoon baking powder
  • 1 1/4 teaspoon salt
  • 2 eggs
  • 1/4 cup applesauce (or another egg)
  • 1/2 cup milk
  • 1 teaspoon vanilla extract
  • 1/2 cup + 1/4 cup brown sugar
  • 1/4 cup coconut oil
  • 2 tablespoons butter
  • 2-3 teaspoons chopped rosemary
  • 1/4 cup chopped walnuts (optional)

Instructions

  1. Turn the oven on to 350 degrees F.
  2. Place butter in a square or circular cake pan or a 10 inch cast-iron skillet and place this in the oven for a few minutes till the butter has melted.
  3. When the butter is melted, add 1/4 cup brown sugar and stir to combine and evenly distribute the mixture.
  4. Place halved figs on top of the sugar/butter layer cut side down so that they cover at least most of the bottom of the pan. Sprinkled rosemary and walnuts over between figs. Set the pan aside.
  5. In a medium bowl, sift/whisk together cornmeal, flour, baking powder, and salt.
  6. In the bowl of a stand mixer or by hand, beat coconut oil and remaining brown sugar until well blended.
  7. Add eggs to the oil+sugar. Reduce mixer speed to medium, if using, and beat well.
  8. Mix in milk, applesauce, and vanilla.
  9. Slowly add dry ingredients to wet, mixing on low until just combined.
  10. Pour batter into pan/skillet, distributing it evenly over the figs.
  11. Bake for 20-25 minutes or until a toothpick inserted in the center of the cake comes out clean.
  12. Allow cake to cool completely in the pan on a wire rack. To remove it from the pan, run a plastic knife or spatula around the edges of the cake. Place a tray, plate, or cutting board on top of the cake pan. Holding the edges, quickly flip the pan and the tray so that the tray is not on the bottom. You might need to shake the pan a little to get the cake to fall out but it should come out smoothly. You might want to wait till shortly before serving it to invert the cake so it keeps that fresh, glossy look.

Notes

http://blog.muffinegg.com/2012/07/26/upside-down-fig-rosemary-cornmeal-cake/


3 Comments

Filed under desserts

Apricot-Plum Cobbler

Fruit finds it way into my house in waves. Some days there is seemingly too much for a family of two, even two enthusiastic fruit-eaters, to consume. Lee and I always manage to polish it all off somehow.

Bananas are easy. One goes in my breakfast every morning. Two or three of whatever else is around go towards my lunch and snacks. Lee gets his two to 3 fruit a day whether he likes it or not, assuming he eats the lunch I pack him.

Lately, stone fruit rules my countertop, fruit basket, and fridge. I feel like I have cherry pits coming out my ears and had to take a break from apricots after a total apricot overload last week. My one complaint about summer fruit is this: Why is it all so soft and delicate that transporting ripe fruit in a lunch box leads to a squished mess? You can’t just throw a plum or a fig or a handful of blackberries in a bag and go. These things require armored protection. My lunches away from home are bulky and heavy thanks to all the necessary fruit containers.

Enough ranting about summer fruit’s annoyances. Lets talk about damage control, and by that, I mean dessert. Last week I found myself with a bag of plums from a generous co-worker’s tree and a fridge full of half-smashed hand-me-down apricots (they came to my aunt’s house via a friend who brought them for a jam-making session and then to me when the jam making was over and there were STILL apricots rolling around).

These were good apricots and exceptionally delicious plums – juicy with barely sour skin and bright pink insides. I probably would have eaten all of them as-is if Lee and I hadn’t gone out-of-town last weekend. I wanted to use up some food before we left. July 4th came along and I thought there might be people around to help us eat a giant dessert.

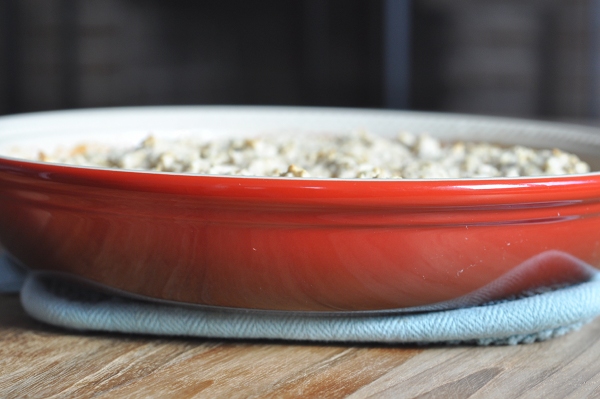
I threw this cobbler together without a recipe, which meant I got to leave the sugar out of the filling and forego making the topping from scratch. Trader Joe’s Multigrain Baking Mix served nicely and I swear we didn’t miss the extra sweetness in our fruit. As one test subject observed, vanilla ice cream balanced out the slightly sour plum skins in the filling (For some reason, those skins actually increased in sourness when cooked!).


How about a crude formula rather than a recipe?

roughly 6 cups plums and apricots, pitted and cut into quarters + 1 teaspoon tapioca starch (or equivalent corn starch) + maybe 2 tablespoons honey

+ your favorite biscuit mix or recipe for the crust

preheat to 350, mix fruit etc. in one bowl, crust in another bowl, pour fruit into prepped baking dish, spread crust on top, BAKE

mine took about 25 minutes

serve with ice cream. yum


I got to test out my giant Le Creuset pie dish for the first time. This beautiful, red dish needs to come out of the cupboard more often!

Now, why did I just buy tons of figs, peaches, cherries, and a honeydew melon? I’ve already baked something with the cherries, coming here soon.

Leave a Comment

Filed under desserts, Uncategorized

Toll Houses

wpid-DSC_0253-2011-12-4-15-54.jpg

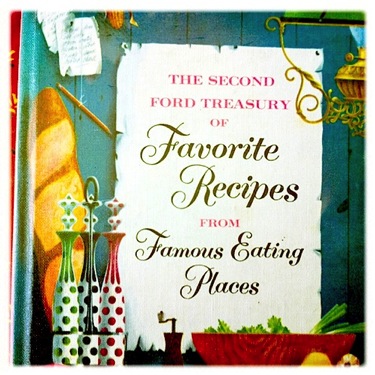
This month’s Recipe Swap recipe made me smile. It also appealed to my nerdyness with a little geographical and historical context lesson. Christianna at Burwell General Store decided to start the swaps second year with a new cookbook. A group of brave bloggers received this vintage recipe from a very unique cookbook:

wpid-recipeswap_ford_bookcover-2011-12-4-15-54.jpg

wpid-recipeswap_tollhouse-2011-12-4-15-54.jpg

        I didn’t do a ton of baking as a kid but I do remember making Toll House chocolate chip cookies with my mom. I know they were Toll House because I remember reading the recipe off of the yellow bag. Though it didn’t happen often, for me cookie baking meant valuable lessons in how to use the stand mixer. It was big, heavy, more than a little scary with all those moving parts, and absolutely essential for perfect cookies.

Until very recently, I didn’t have a mixer of my own. My grandmother’s KitchenAid coming to live with me just happened to correspond with this cookie recipe swap. Creaming butter and sugar has never been so satisfying!
Oh but wait, I didn’t use butter in my Toll House cookies. There are two explanations for this:

  1. I wanted to use a “healthier” fat and just experiment with a different version of the traditional cookie.
  2. I forgot to buy butter.

I’d say the real reason is some combination of the above…but mostly number 2. Butter was on the grocery list. I meant to use it, really I did. I’m just not a big butter user so it didn’t make it into my basket. No problem. I had coconut oil! Since it’s solid at room temperature and has such a lovely flavor, I sometimes substitute coconut oil for butter in my baking. While it’s not the same as something made with butter, I think the flavor and texture of these cookies is outstanding.

wpid-DSC_0246-2011-12-4-15-54.jpg

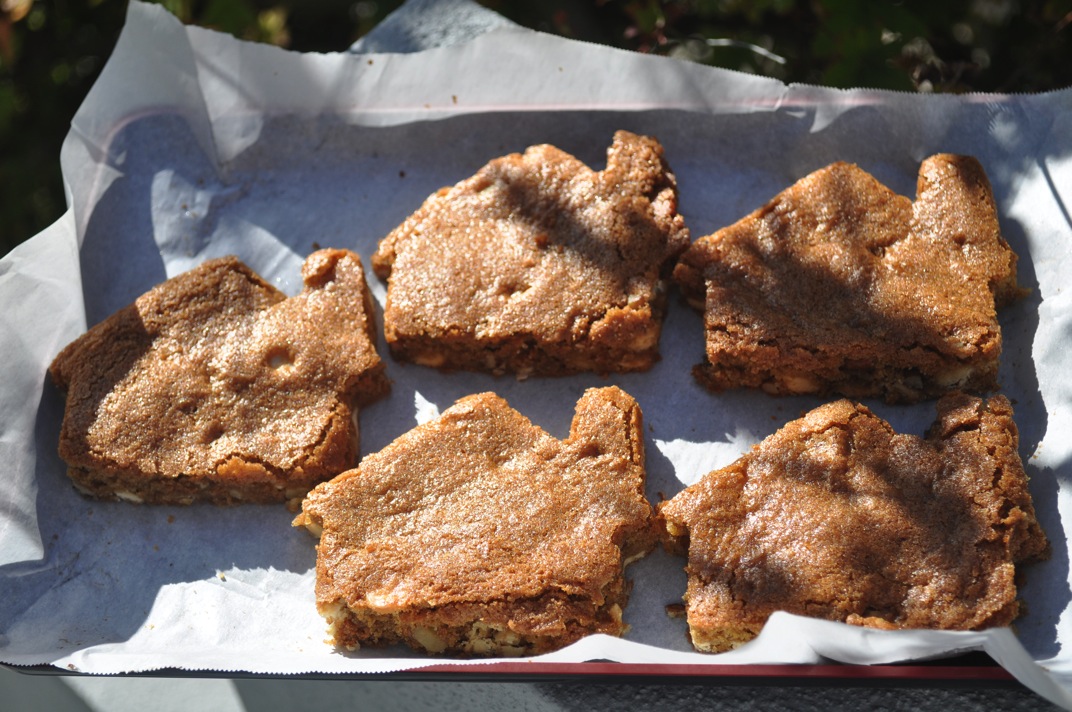
        Now comes the part where I explain the houses. You see, my husband is such a sweet guy, he randomly buys me cookie cutters (this just started recently). Last month he added a house-shaped cutter to my small collection. That, of course, made me smile because we were about to buy our first house! We moved in a week or so ago so I’m feeling very homey and grounded nowadays. The house cookie cutter came out as my play on Toll House cookies and to share a little of my new home love with everyone.

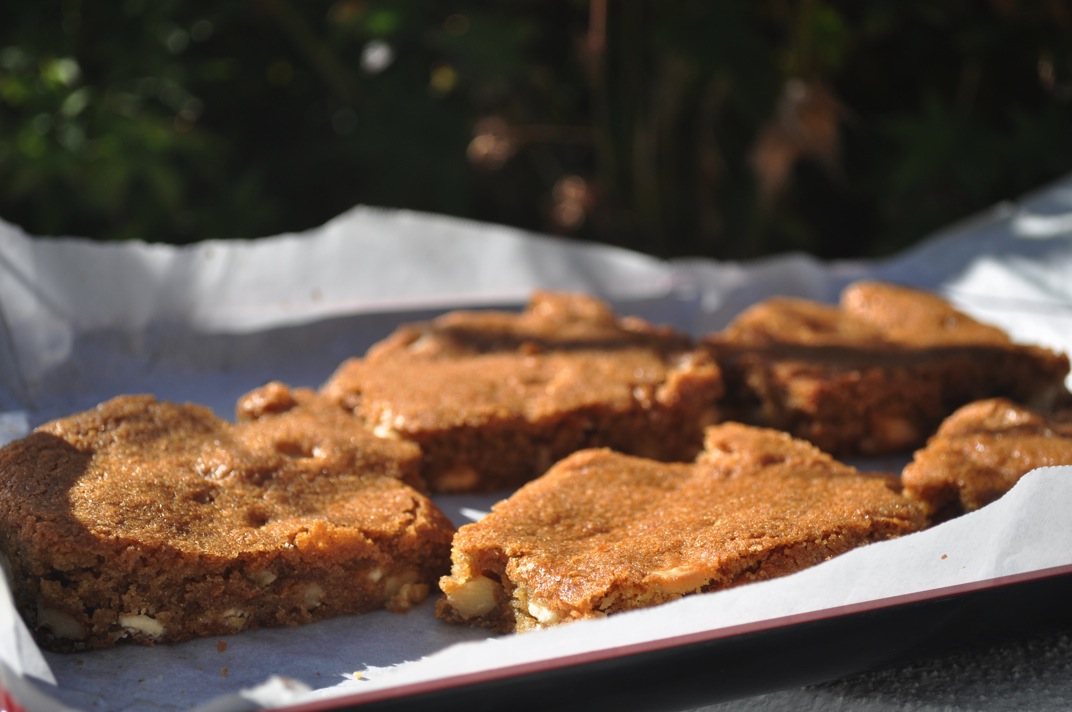
I changed a few other things besides the shape and fat in my cookies. I used white chocolate chips in place of regular, vanilla bean instead of vanilla extract, and whole wheat pastry flour instead of all-purpose. This recipe is small – a nice size for a cookie recipe (unless it’s Christmas and you’re trying to feed lots of people). I baked all the dough in a pyrex dish lined with parchment and then cut the houses out of the giant sheet cookie. This worked pretty well but only made 5 houses + trimmings. The house cookies are big. I’d share one with 1 or 2 other people. The trimmings are perfect for snacking on while you’re snapping your cookie pictures or for crumbling over ice cream…yum!

wpid-DSC_0248-2011-12-4-15-54.jpg


Toll House Houses
Adapted from The Second Ford Treasury of Favorite Recipes from Famous Eating Places

1/2 cup coconut oil
6 tablespoons brown sugar
6 tablespoons granulated sugar
1 egg, beaten
1/2 teaspoon baking soda
1/2 teaspoon hot water
1 1/8 cup flour, sifted (I used whole wheat pastry)
1/2 teaspoon salt
1/2 cup nuts, chopped (I used walnuts and pecans)
1/2 cup white chocolate morsels
1 teaspoon vanilla (I used the seeds scraped from 1 vanilla bean)
Cranberries would have been a good addition. Add some if you want! They’ll be pretty!

Preheat oven to 375 degrees F.
In the bowl of a stand mixer, cream together coconut oil and sugar.
Add egg and vanilla bean scrapings.
Dissolve baking soda in hot water and then add to batter.
Sift flour and salt together and add to mixer a little at a time until completely incorporated.
Stir in nuts and chocolate morsels.
Line a baking dish (mine is 11×7 in. but a bigger one would be better) with parchment paper.
Spread cookie dough over paper to cover the bottom of the dish. The dough will be relatively soft so this is actually pretty easy.
Bake at 375 for 15-20 minutes or until golden brown.
Remove from oven and let cool. You can lift the “cookie” out of the dish and onto a wire rack using the parchment paper.
Once the cookie is cooled, cut out house shapes in as efficient a pattern as possible.
Start looking for a giant milk moat for your houses!

16 Comments

Filed under desserts