Tag Archives: bread

Rosemary pine nut focaccia

It’s taken a while but this week I finally feel like I have a balance for my new work-life schedule. Spending three days a week at a desk and two evenings a week sailing makes me feel like all the time in between is taken up by meal prep and dishes. Oh, and working out goes in there somewhere almost every day too. Never mind that Lee works about three times as much as I do, takes a class that the community college, and has a gazillian side projects going at home.

Partly due to our busy schedules, Lee and I haven’t done anything too ambitious on the weekends recently. We’ve worked on projects around the house, visited family in Napa, and ventured North for a hike with Doc.

Doc likes the view.

This week my days off seemed much more productive than normal. Today I feel like an absolute superwoman. Do you know why? I baked bread. True, bread baking used to be a weekly occurrence in my household. I’ve hardly opened my oven (except to roast vegetables) since we got back from Curacao, though, so I’ve been lagging in the bread department.

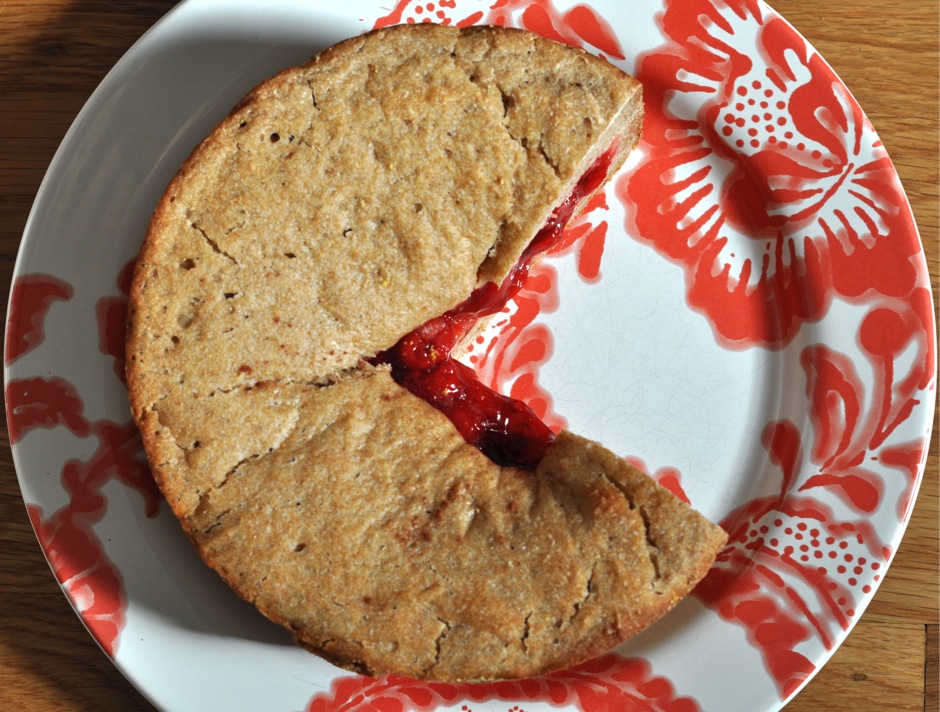
This totally makes up for it. The Artisan Bread in Five Minutes a Day technique was made for busy schedules like mine. The timetable for this focaccia looked something like this.

  1. Yesterday, mid-day: mix dough and leave on counter to rise; go to the store and to pick up the CSA box
  2. Afternoon: put dough in the fridge along with more vegetables than I can count
  3. This morning: think about bread and look at cookbook; take Doc for a walk
  4. Later this morning: take dough out of fridge and pull off a hunk; flatten it out, top with toppings, and let it sit while the oven preheats
  5. Just before lunch: put bread in the oven; talk to Mom on Skype while it bakes
  6. Noon today: bread comes out of the oven; inhale deeply

There you have it. Technically this focaccia was about 24 hours in the making. I only put a few minutes a day of work into it, though, and I got a lot done in the intervening hours. The best part is that there’s still a bucket of dough in the fridge!

This recipe has been brewing in my mind for a while now. I saw this post from Cake Duchess the other day and immediately wanted to join in on the Bread Baking Society‘s fun. I don’t think I’ve ever set out to make focaccia before, although I’ve certainly made many-a-flat bread that resembled this traditional Italian loaf.

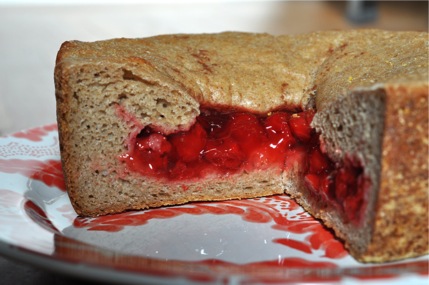
I love the toppings I chose and I love to think about where the inspiration for them came from. The giant rosemary sprig happily living in a jar of water in my fridge came from last week’s Mariquita Farm box. I’ve had pine nuts on the brain ever since reading a book on Native California Indian cooking I bought at work (it’s dangerous to work at  a museum with such an awesome gift store!).

The rosemary, pine nuts, and honey are delicious but so are many other things you could sprinkle on top of your focaccia. Let you mind wander and see what you come up with. I made a whole wheat crust because that’s what I’m into but here’s a more traditional crust from this month’s #BreakingBread hostess.

Rosemary pine nut focaccia (whole wheat)

Ingredients

    For the dough (makes enough for at least four 1 pound loaves)
  • 7 cups whole wheat flour
  • 1 1/2 tablespoons granulated yeast
  • 1 tablespoon kosher salt
  • 1/4 cup vital wheat gluten
  • 3 1/2 cups lukewarm water
  • 1/2 cup olive oil
  • For the Focaccia
  • 1 tablespoon fresh rosemary leaves
  • 1/4 cup pine nuts
  • Olive oil
  • Honey

Instructions

  1. Mix dry dough ingredients in a large bowl or coverable container.
  2. Add oil+water and stir until all flour is incorporated.
  3. Cover dough (not airtight) and leave at room temperature until it rises and collapses (2-3 hours)
  4. At this point, you can pull off some dough and proceed with your focaccia or place all the dough in the fridge and bake the following day. I like to do the latter because the dough is easier to work with when it's cold.
  5. Pull off a grapefuit-sized portion of dough using floured hands. Quickly shape it into a ball and place it on a lightly floured board.
  6. Using your hands or a rolliong pin, roll out the dough into a 1/2-3/4 inch thick oval.
  7. Coat a cookie sheet with oil, parchment, or a silicon mat and place the dough oval on it.
  8. Depending on how quickly your oven preheats and whether you're using a baking stone (not necessary when using a cookie sheet but requires half an hour of preheating time) you might want to turn your oven on to 425 degrees F. and place a roasting pan in the bottom now.
  9. Using the tip of your finger, make indentations all over the top of the focaccia. These will hold oil, honey, and pine nuts!
  10. Scatter rosemary and pine nuts over the dough. I pressed most of my pine nuts into the top a little.
  11. Sprinkle on honey and olive oil to taste, using more olive oil than honey.
  12. If you haven't already, turn on your oven to 425 F. after putting a roasting pan in thet bottom.
  13. Let the focaccia rest for 20 minutes, then place in the preheated oven, pour boiling water into the roasting pan, and quickly close the oven door. I boil water in the teakettle for this.
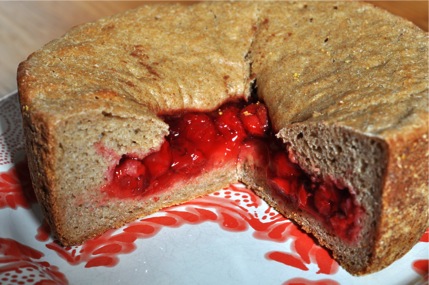
  14. Bake for 18-25 minutes depending on how thick your focaccia is. It's ready when the top is brown from the honey and the oil.
  15. Cool on a wire rack, slice, and savor.

Notes

Dough recipe for 100% Whole Wheat Bread with Olive Oil from Healthy Bread in Five Minutes a Day

http://blog.muffinegg.com/2012/05/11/rosemary-pine-nut-focaccia/

4 Comments

Filed under Bread

Cherry-Filled Sourdough

wpid-DSC_0287-2011-12-7-13-28.jpg

        I have a lot of food boundaries. Some of them are more like barriers (I think this term has a slightly negative connotation) and some are lines that I think it’s better not to cross. I spend a lit of time breaking down the barriers and testing the boundaries of my cooking and eating habits. Comparing now to my eating disordered past, I think I only have my big toe dipped in the food restriction waters, while I was up to my neck several years ago.
        Still, old barriers remain and I chip away at them every day. Take cheese, for example. I used to eat the most processed, light, fat-free, bleugh cheese ever, and then only in minuscule amounts. Right now, I have exactly 5 kinds of cheese in my refrigerator…wait, make that 4. I finished the feta for lunch today. I love cheese and I’ve learned to eat real-food kind of cheeses (no more nasty processed stuff) in reasonable amounts.
        I could go on but I think one confession is enough for one post. Oh, but then there’s the whole reason I started talking about boundaries/barriers in the first place: Pie filling! You know the stuff in the can that you can just pour into a crust and voila, you have a pie? I don’t think I had ever bought or baked with canned pie filling until Duncan Hines sent me coupons for their baking mixes as well as Comstock Wilderness Fruit Fillings through the Foodbuzz Tastemaker program last month.
        Canned pie filling was on the other side of pretty much every food boundary I have. First and foremost it’s a non-homemade route for baking, which I try to avoid. Second, it’s got to be loaded with high-fructose corn syrup and probably doesn’t have much real fruit in it anyway. Third, fruit pies aren’t my favorite. I’m a pumpkin girl all the way.
        As soon as I brought myself to pie filling level in front of the supermarket shelves (on the floor), Comstock surprised me. Some of the cans looked newer and were labeled “More Fruit” and “No high-fructose corn syrup”. What? Really? Huh, maybe this stuff isn’t that bad after all.
        I chose a can of Cherry “More Fruit” filling and immediately started thinking of how I was going to use it. Pie was too obvious. I wanted to make bread, sourdough bread to be specific. It struck me that the sweet, gooey fruit filling would be a perfectly odd partner for tangy, dense sourdough. Thus, the cherry-filled sourdough loaf was born!

wpid-DSC_0277-2011-12-7-13-28.jpg

        It may look like a cherry pie collided with a loaf of bread to produce this bizarre offspring. I like to imagine both things flying through the air in my kitchen…but that would be messy. Instead, I simply made a small batch of wet dough with my sourdough starter, layered half of it on the bottom of a round baking dish, poured in about half the can of fruit filling, and then made a ring around the edge of the filling with the remaining dough. After some more rising and some oven time, I had a sweet, doughy thing that I didn’t know how to eat. Fork? Hands? Hands won but it was messy.
        The sourdough is very sour (I used a lot of starter) and the cherries are very sweet. Together, though, they are the perfect winter breakfast or brunch flavors. One reason I chose the cherry filling was that cherries are no longer in season so I can’t actually make a cherry pie from scratch right now. That’s the perfect excuse for using a canned convenience food, in my opinion. Cherry pie filling is such a Christmasy color that it’s nice to have it around this time of year, even if it isn’t made from seasonal produce.
This isn’t really a recipe, since I totally improvised the sourdough bread and I think everyone who makes sourdough has their own way of doing it. If you have a starter, make a whole grain dough with a high moisture content and open a can of pie filling. If you don’t have a starter, put it on your Christmas list!

wpid-DSC_0280-2011-12-7-13-28.jpg

Hearty Cherry-Filled Sourdough Bread

1 batch of your favorite sourdough, made with a little less flour or more water so it’s wet enough to spread over the bottom of a pan.
1 can Comstock Wilderness Fruit Filling (More Fruit, no high fructose corn syrup!)

Prepare dough, allow it to rise once. Punch down.
Coat the inside of a baking dish with oil and then stone-ground cornmeal, semolina flour, or regular flour.
Divide dough in half and gently spread half of it over the bottom of the baking dish.
Spoon about half of the can into the center of the dough in the dish, leaving at least an inch of dough around the edge of the filling.
Lay the rest of the dough all the way around the edge of the filling so that it makes kind of a barricade between the fruit and the sides of the baking dish.
Cover dish and allow bread to rise for another couple of hours, or until the top dough circle has expanded to almost cover the filling underneath.
Preaheat oven to 425 degrees F. Bake bread for 25-30 minutes, or until it’s golden-brown on top and the edges have pulled away from the dish somewhat.
Cool on a wire rack until the dish is no longer hot to the touch, and the fruit filling is somewhat set (not too liquidy). Then remove loaf from dish and continue to cool on rack.
Slice like a pie and serve!

The only thing that would have made this better is chocolate. Why didn’t I think to add chocolate? You could always spread some Nutella on each slice or sprinkle dark chocolate chips onto the bottom dough layer before adding the cherries. Now that would be decadent!

4 Comments

Filed under Bread

Coconut Molasses Swirl Cornbread

Dear food blogging world,

I love you and I wish I could live in your warm, sweet-smelling world of cookies and spices, talented cooks and writers, brilliant photographers and intriguing recipes.

Sincerely,
Rachel

I’m feeling really, really connected all of a sudden. Maybe it’s the Burwell Recipe Swap. Maybe I’m still riding the Foodbuzz Festival high. In any case, I love life in this food blog world. Life in the real world is pretty good too. Lee and I will be the proud owners of our first house-home (as opposed to boat-home) in a few days and should be moving in by this time next week. Both of my museum internships are going swimmingly. They keep me intellectually fired-up and assure that my fingernails are always blue with clay. I have a whole slough of new friends and I’m starting to really, really appreciate this fabulous city.

This haze of happy feelings propelled me away from the computer to bake yesterday. I dug out Helen’s Texas cornbread recipe along with some special ingredients. I wanted to infuse this delicious but plain cornbread with a couple of flavors I’ve been loving lately: coconut and molasses.

The all-cornmeal bread became cornmeal+millet flour, which has a similar texture to cornmeal (and hey, that means it’s gluten free). Buttermilk became coconut milk+vinegar. Shredded coconut went perfectly with the gritty cornmeal texture and it only took a tablespoon of molasses to turn half the batter into a deep, dark molasses swirl. I am firmly in the “cornbread shouldn’t necessarily be sweet” camp but that doesn’t rule out ingredients more commonly found in sweets.

wpid-DSC_0132-2011-11-12-10-48.jpg

My only mistake was to follow Helen’s recipe in terms of salt. I know she loved her salt and tended to be a bit too liberal with it for mine and my mom’s taste. I thought I’d give her some credit when it came to cornbread, though, and added a full teaspoon of salt. Hah! The bread it still good but it would be a completely different kind of good with less than half that amount of salt. I think I’d like it better that way.

I think this cornbread would be beautiful on a holiday table or for breakfast with a smear of jam, like the homemade apricot I’m currently enjoying. I might even let some of it dry out in a paper bag and make something resembling Helen’s cornbread dressing, a holiday food institution in my family.

wpid-DSC_0141-2011-11-12-10-48.jpg

Coconut Molasses Swirl Cornbread (gluten and sugar free)

1/2 cup stoneground cornmeal
1/2 cup millet flour
1/2 cup light coconut milk
1 teaspoon baking powder
1/2 teaspoon baking soda
1/2 teaspoon salt (revised down from 1 teaspoon)
1/2 cup low-fat milk (or more coconut milk)
2 teaspoons vinegar
1 tablespoon blackstrap molasses
2 tablespoons unsweetened, shredded coconut

Preheat oven to 400 degrees F.
Oil a small baking dish/pie plate/cake pan, or, ideally, a cast iron skillet.
Combine the dry ingredients in a medium bowl.
In a separate bowl, beat together egg, milk and vinegar.
Add wet ingredients to dry, stirring until most lumps are gone.
Pour half of this batter into the baking dish or pan.
Add molasses to the rest of the batter, stirring until it is fully incorporated.
Pour this batter into the pan as well and stir gently to swirl both together.
Bake for 20-25 minutes, or until the center of the cornbread is firm.

4 Comments

Filed under Bread

Corn Stew with Bagel Croutons

I did two things that I’m very proud of last week. Really, I’m sure I did more but these two graced my kitchen in one night and were particularly memorable. First, I found an inventive way to use the last of the leftover bagels from my brief stint as a bagel-baker. They had been in the freezer for weeks and Lee had declared them inedible.

Second, I made something in a pot that didn’t turn into chili, as do so many of my would-be soups and stews. This stew spawned from necessity and boredom. I was bored with making the same old things night after night and my dad was coming over for dinner so I wanted to serve him something somewhat special. Still, that special dish needed to be easy and use ingredients I had on hand, since I was getting ready to go out of town. It’s a good thing there were 4 ears of fresh corn in the fridge! I wasn’t about to let those go to waste.

The stew came out thick (thanks to the pumpkin) and chunky (thanks to the corn and squash). I loved the bright red tomatoes against the yellow corn. My dad, Lee, and I really enjoyed it as an early fall dinner that captured some of the sweetness of end-of-summer corn. The bagel croutons were perfect and unique. Unlike regular croutons, they have quite a crust on them, which returns to it’s chewy bagel state when soaked in hot stew for a few minutes. The result was an almost meaty texture that stopped my spoon from gobbling the stew too quickly.

wpid-DSC_0635-2011-09-20-10-49.jpg

Corn Stew

4 ears fresh, sweet corn, husked
1 medium-sized brown onion, chopped
3 cloves garlic, minced
1-2 tablespoons olive oil
1 tablespoon each fresh chives, marjoram, and thyme, finely chopped (adjust to taste)
1 cup canned pumpkin puree
5-6 medium-sized pattypan squash, cut into 1 inch pieces
1 cup frozen, shelled edamame
4 Roma tomatoes, roasted (see below)
4 cups vegetable broth
1/2 teaspoon allspice
1 teaspoon chili powder
Freshly ground black pepper and salt, to taste
1 small avocado, sliced

To roast the tomatoes:
Preheat the oven to 375 degrees F.
Cut tomatoes in half and place them, skin side down, on a lightly-oiled baking sheet. I suggest lining the pan with aluminum foil, as the tomatoes tend to be rather messy.
Bake in the oven for 45 minutes to 1 hour, or until the tomatoes are shriveled and juicy.
Remove from oven and set aside to cool.
When cool, cut each half into two or 3 pieces and set aside. You will add them near the end of cooking the stew.

For the stew:
Cut corn off cobs, gathering it on a cutting board or in a bowl.
Meanwhile, preheat a large saucepan or pot. Add olive oil to coat the bottom of the pan.
Add onions and garlic, cooking until the onion is soft and translucent.
Add corn and continue to cook, partially covered for about 5 minutes, stirring occasionally.
Add herbs, allspice, chili powder, salt, and pepper. Cook about two minutes.
Add broth and pumpkin puree and pattypan squash, stirring well to blend everything together.
Reduce heat to simmer and cook for 10-15 minutes.
Add edamame and roasted tomatoes and cook for 5 minutes, or until edamame are heated through.
Spoon stew into bowls, top with sliced avocado, and serve with bagel croutons or crusty bread.

Bagel Croutons

Day-old (or older) bagels, chopped into 1/2 inch pieces
olive oil
Your preferred spices, or none at all: garlic powder, black pepper, salt, etc.

Preheat oven to 375 degrees F.
Place bagel pieces on a lightly oiled baking sheet.
Use an oil mister to spray pieces with olive oil.
Sprinkle spices, if using over bagel pieces.
(Alternatively, place bagel pieces in a plastic bag. Sprinkle a little olive oil on top, close the bag, and shake it to distribute the oil. Then re-open the bag, add spices, close and shake again.)

Place baking sheet in oven and bake for 10-15 minutes, or until bagel pieces are crisp but not burned. They will continue to crisp-up as they cool.
Allow them to cool on the baking sheet. Store in a sealed container or use immediately on stew.

4 Comments

Filed under other goodies