Monthly Archives: February 2011

Who is this person who bakes all the time?

wpid-DSC_0351-2011-02-27-19-04.jpg

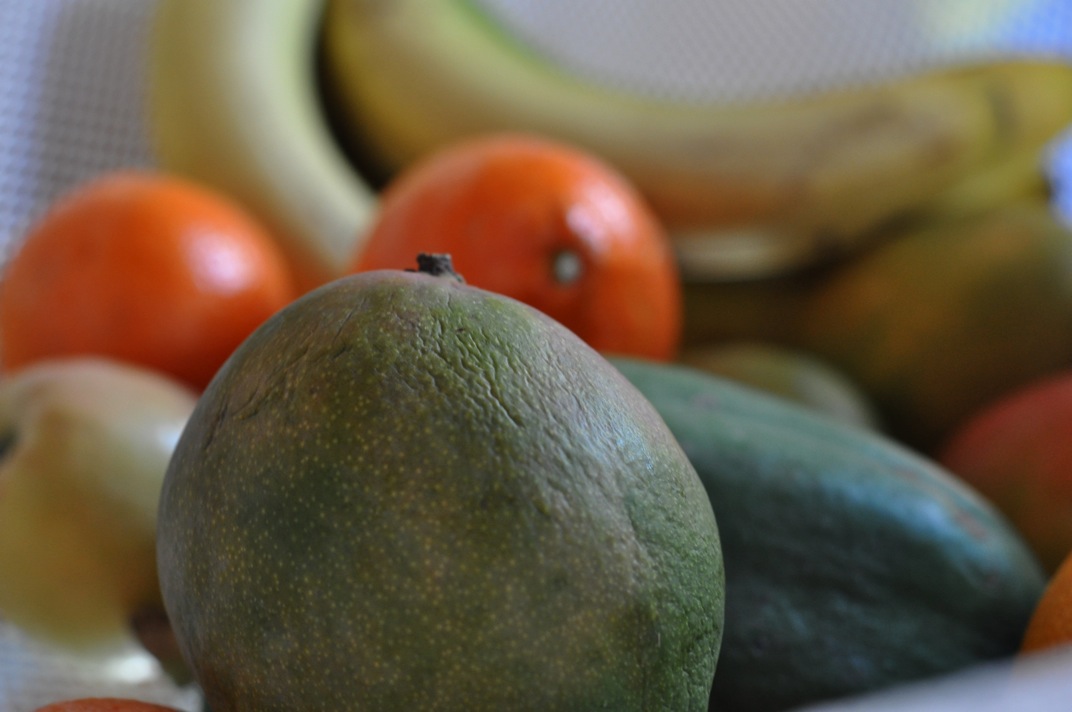
        I love what I’m doing. I love being on the water and being free. That said, I really miss full-size kitchens, high-speed internet, and grocery stores. I’m torn between loving this life and trying to do things that don’t come easily on a boat.
        At least I have bread. I find comfort and redemption in my every-other-day baking routine. I may not be able to put together a fresh, green salad but I can bake a loaf of delicious bread. After two astoundingly successful loaves my bread ego has risen to match their lofty heights.
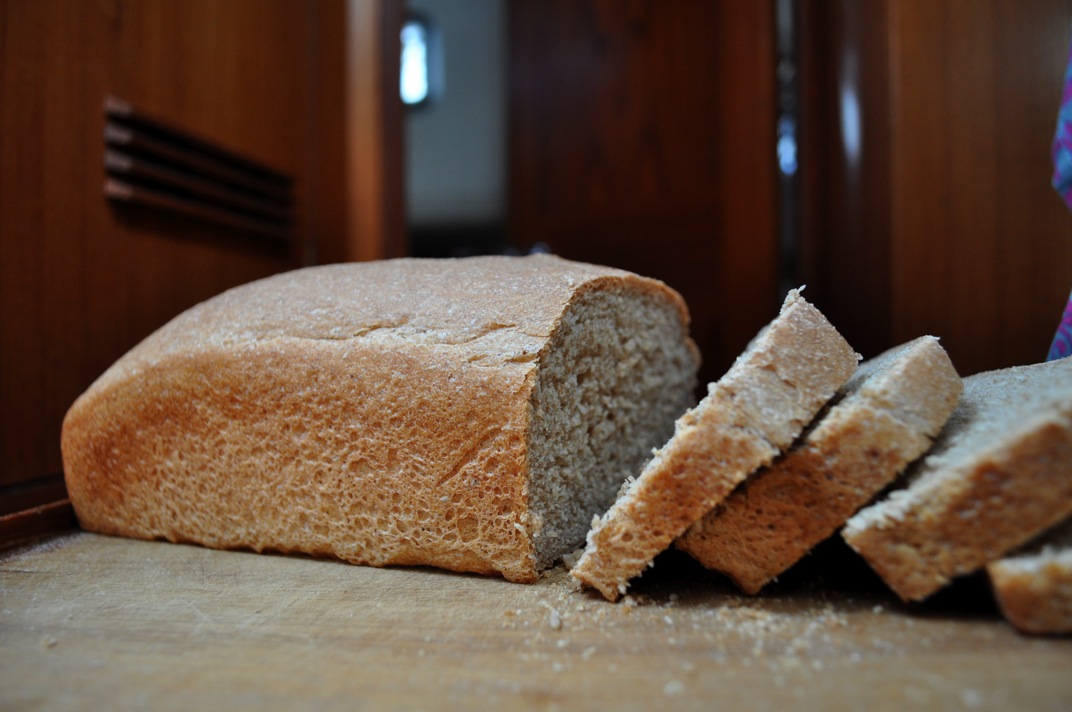
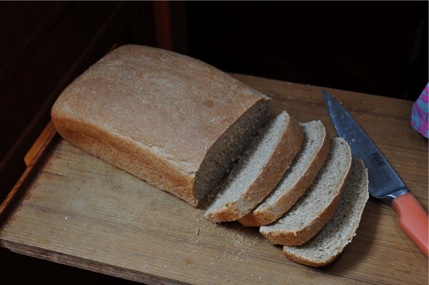
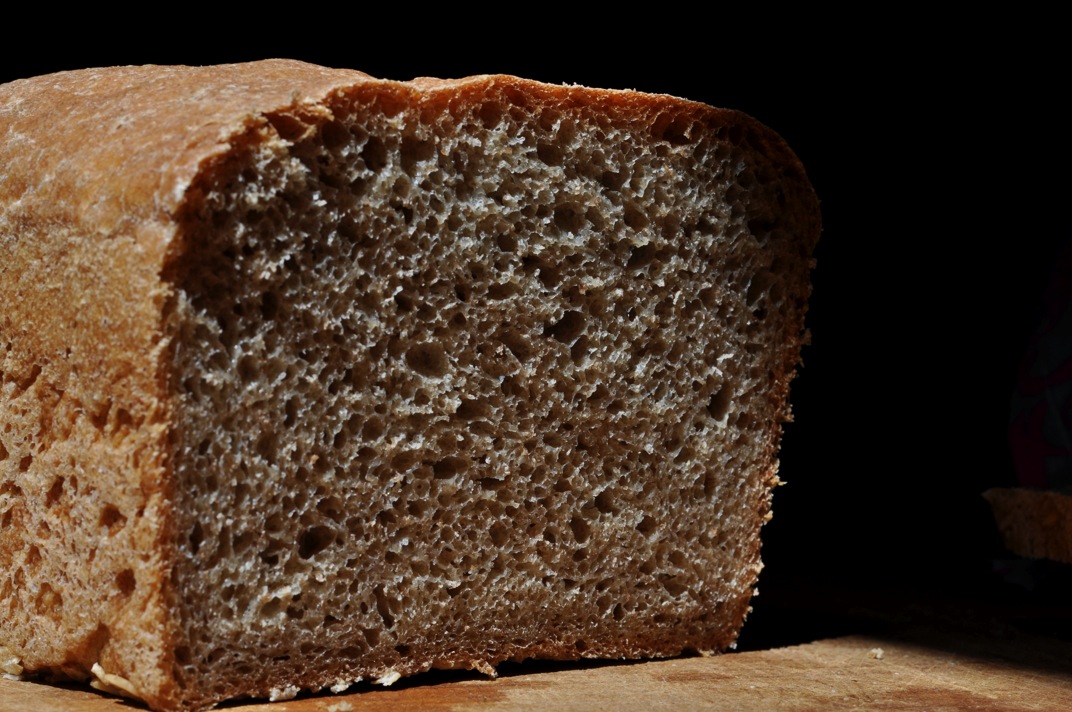
        What began as a cookbook recipe is now decidedly my own recipe. I’ve changed flour types, baking pans, and techniques to suit my taste and needs. After experimenting with the French Bread and Tuscan Loaf in Joy of Cooking, I found the most success with my Tuscan Loaf-inspired creation. With only my bare hands and some ingredients I carried here from Maine, I produced something with crust, springiness, chewiness, flavor, and nutrition!
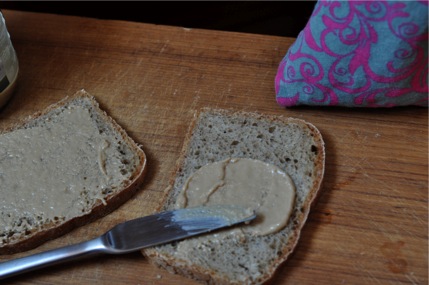
        I don’t know what Lee and I love more: the smell of bread baking overpowering the usual boat smells or sandwiches made with fresh, warm slices. I like my first slices topped with tahini and Lee prefers butter.
        I’ll start with the original recipe, then give my own. When I made my loaf yesterday I weighed the flour so I am listing those weights as well.

wpid-DSC_0355-2011-02-27-19-04.jpg

Tuscan Loaf
From Joy of Cooking by Irma S. Rombauer and Marion Rombauer Becker

Mix in a large bowl:
        2 cups lukewarm water (85 F)
        1 cup whole wheat flour
        3/4 cup all-purpose flour
        1 package (2 1/2 teaspoons) active dry yeast
Cover the bowl with plastic wrap and let rise at room temperature for 8-12 hours.

Stir in:
        2 1/2 cups all-purpose flour
        1 tablespoon olive oil

Adding up to 1 cup more flour as needed, mix until a soft, slightly sticky dough forms.
Knead by hand for 15 minutes (dough should be very elastic but a little sticky).
Transfer dough to oiled bowl and turn once to coat.
Cover bowl with plastic wrap and let rise and room temperature until doubled in volume (2 hours).
Punch down dough and knead briefly.
Shape into an oval loaf by stretching and tucking dough underneath itself.
Lightly oil a baking sheet and sprinkle it with cornmeal.
Place loaf on baking sheet, brush surface with oil and cover with plastic wrap.
Let rise at room temperature until more than doubled (1 1/2 hours).
When the imprints of your fingers remain in the loaf when pressed, it is ready to bake.
Preheat oven to 425 F. Set a baking pan on the lowest oven rack.
Score the top of the loaf with a crosshatch pattern and place it in the oven.
Immediately add 1 cup hot water to the baking pan and close the oven.
Bake until the bottom of the loaf sounds hollow when tapped (about 40 min).
Cool completely on a rack.

wpid-DSC_0360-2011-02-27-19-04.jpg

(I still can’t believe I can make bread) Bread
Adapted from Tuscan Loaf above

Mix in a large bowl:
        2 cups lukewarm water (85 F)
        1 cup whole wheat flour (4 oz)
        3/4 cup all-purpose flour (3.8 oz)
        1 package (2 1/2 teaspoons) active dry yeast
        2 teaspoons vital wheat gluten
Cover the bowl with plastic wrap and let rise at room temperature overnight. (I put mine in a cupboard that gets quite warm during the day)

The next morning, stir last nights mixture and add:
        1 cup wheat flour (4 oz)
        1 cup all-purpose flour (4.2 oz)
        1/2 cup buckwheat flour (3.7 oz)
        2 teaspoons vital wheat gluten
        1 tablespoon olive oil

Adding up to 1 cup more flour (I added 4-5 oz this time) as needed, mix until you have soft, sticky dough.
Knead by hand for 15 minutes. The dough should not quite come un-stuck from your hand.
Transfer dough to oiled bowl and turn once to coat.
Cover bowl with plastic wrap and let rise in a warm place until doubled in volume (around 2 hours – I’ve left it for less and more time).
Punch down dough and knead briefly.
Lightly oil a loaf pan and sprinkle a pinch of oats over the bottom.
Shape dough into a loaf and place in pan.
Brush the top of the loaf with oil, cover lightly with plastic wrap, and leave in a warm place to rise until the top of the loaf is 1/2 to 1 inch above the edge of the pan.
Preheat oven to 425 degrees F.
Place loaf on center rack and bake for about 40 minutes, or until the top and bottom sound hollow when tapped.
Remove bread from pan and cool on a wire rack.

8 Comments

Filed under other goodies

Bread of Necessity

wpid-DSC_0289-2011-02-17-19-02.jpg

I know that homemade bread used to be, and for many still is, a necessity. When there’s no place to buy a loaf of bread there is only one option if you want a sandwich: make your own! I now find myself forced to develop my bread-baking skills or go without one of my favorite foods.
A couple of weeks ago I attempted French baguettes. The dough was a success but the loaves didn’t fit in my tiny boat oven. They were short, fat, and smooshed together on the baking sheet. I liked the way the dough went together so much, though, that I went back to the recipe when our store-bought bread ran out this week. However, this time I threw the whole hunk into a loaf pan that easily fit in the oven.
After mixing, kneading, waiting, kneading more, waiting more, and finally baking, I pulled my best loaf to date out of the oven. This is the first time my bread has actually developed a crust! The rich brown, wheat loaf had a genuinely crunchy/chewy exterior and nicely textured crumb. It was still a little on the short side, perhaps because I insist on using whole wheat flour and perhaps because I didn’t wait long enough for the second rise.
At any rate, Lee and I fresh, hot slices of bread with butter as part of our lunch yesterday. We also shared a couple slices with visiting sailors and they were especially impressed by the crust. When they asked how I’d done it, I could only say that I had followed the directions…sort of. I did not pour boiled water into a pan in the bottom of the oven as the Joy of Cooking suggests. I did, however, put my bread into a 400-degree oven for 15 minutes and then turn the temperature down to 350 for another 30 minutes of baking. I suppose that’s where the crust came from!
I think what I like most about this recipe is that I don’t have to worry about water temperature or proofing the yeast. The water in our boat’s tanks is as room temperature as it gets. Everything just goes together in a big bowl. I don’t mind the kneading as long as the dough isn’t to sticky.
Now that this loaf is almost gone I have a sponge starter in the warm galley cabinet all ready for a new and different bread!

wpid-DSC_0286-2011-02-17-19-02.jpg

French Bread
From Joy of Cooking

Makes 2 baguettes (or one large loaf)

Combine
4 cups all-purpose flour (I got away with 2 cups wheat flour and 2 cups white wheat flour)
2 teaspoons salt
1 package (2 1/2 teaspoons) active dry yeast

Make a well in the center of these ingredients and pour in
1 1/2 cups water, at room temperature

Stir thoroughly until the dough is soft and elastic, about 12 minutes on low in a mixer (I kneaded mine for 12-15 minutes).
Cover dough with a clean cloth or place in an oiled bowl, turning once to coat with oil and then covering with plastic wrap.
Let rise in a warm place (75-85 degrees F) until doubled in bulk (about 2 hours).
Punch down the dough and shape into baguettes or into one loaf.
To shape baguettes, divide the dough in half on a floured surface and shape into 2 rectangles. Roll each rectangle away from you, pressing outward at the same time, to form a long, thin loaf.
Place baguettes on a greased cookie sheet, leaving room for them to double in size, cover with a clean, floured cloth and let rise in a warm place until somewhat less than doubled. Score the tops of the loaves.
If you are making a single loaf, shape the dough accordingly and place in a lightly oiled loaf pan.

Preheat oven to 400 degrees F
Preheat a baking pan in the bottom of the oven and fill it with 1 cup of steaming hot water.
Bake bread on center rack for 15 minutes, then reduce the heat to 350 and make for about another 30 minutes, or until the crust is golden brown and the bottom of the loaf sounds hollow when tapped.
Five minutes or so before the bread is done, brush the top with 1 egg white beaten with 1 tablespoon cold water (I skipped this; no egg whites to spare).
Remove loaf/loaves from oven and let cool completely on a rack.

1 Comment

Filed under other goodies

Tropical Interlude

wpid-DSC_0234-2011-02-14-14-21.jpg

There’s nothing like a fruit net full of mangoes, papayas, bananas, and tangerines! I may be making something with this sucker next.

        Welcome to week 2 (or is this week 3?) of my time in the Bahamas. Is it so wrong that being here has kept me from blogging? There are cays to visit, treacherous passages to sail, and island ways to learn.
        Since crossing the gulf stream into this otherworldly place, Lee and I have visited Grand Bahama Island, a couple of spots in the Berry Islands, and Nassau. We actually arrived in the bustling capital more than a week ago but needed to accomplish a long list of things before moving on. Tomorrow, hopefully, we will cross the banks to the Exumas and spend the remaining month or so before our wedding exploring those fabled isles.
        Food wise, the Bahamas are fascinating. Big, beautiful Conch shells lie in heaps as evidence of the local obsession with their meat. Conch fritters, burgers, salad, and fried Conch are sold in ramshackle stands on Nassau’s Potters Cay and in restaurants serving local cuisine.
        I’m a little embarrassed to admit that I have not tried any preparation of the Bahamians favorite mollusk yet. Conch salad, a raw, ceviche-like concoction, appeals to me the most. I know we will encounter local joints selling it in the Exumas so I’ll work up the courage to try some.
        Other than Conch, fresh seafood available includes Grouper and lots of Snapper. Lee and I bought a Snapper and had it fileted at the Potters Cay market (where fishing boats come to sell their catch and produce arrives from the out-islands). We cooked it on the grill with some of the sour oranges that a produce vendor recommended as a seafood marinade. It was delicious!
        Peas and rice is the side dish of choice on the islands. As a vegetarian, I have to wonder whether there’s ham involved. Macaroni and cheese is another stand by and I hear great things about island-style bread.
        The supermarkets in Nassau and Freeport are similar to US stores but their stock is limited. I could only find one carton of plain yogurt on my main provisioning trip but when I went back the next day they were stocking the shelves with a new shipment.

        Baking…yes, I’ve done some of that. I made cinnamon rolls the other day but they did not turn out well enough to be blog-worthy. I know today is Valentines day and I have some chocolate cupcakes planned for my valentine!
        The recipe I have to share today is not a local dish or my usual baked fare. It is so simple that I’m sure I’m one of the last kitchen-oriented people to make it. Still, I am so proud of myself for pulling this off. I made plain old vanilla pudding from scratch!

wpid-DSC_0223-2011-02-14-14-21.jpg

        That may sound ridiculously easy but for someone who has never done it before and has limited experience with cornstarch pudding is a great feat. I’m a bit of a pudding addict (when there’s no ice cream around) so I carry lots of instant Jello pudding packs on the boat. Still, it seems silly to make instant pudding when all it takes to make it from scratch is milk, corn starch, salt, sugar, and some flavoring.
        I went with plain vanilla flavor and stuck to a simple cornstarch thickened recipe. Adding eggs for richness is the next step. I’ll move on to that when I’ve perfected this formula!
        There are a zillion recipes for pudding out there. I consulted Joy of Cooking but went with the recipe in Laurel’s Kitchen.

Vanilla Pudding
Serves 3-4
From Laurel’s Kitchen by Laurel Robertson, Carol Flinders, and Bronwen Godfrey

2 cups fresh milk (I made mine with powdered milk)
2 tablespoons cornstarch or arrowroot
1/4 cup brown sugar
1/8 teaspoon salt
1 teaspoon vanilla

Optional
2 well-beaten eggs
Toasted coconut
Chopped nuts

Gently heat 1.5 cups of the milk in a heavy pan or double boiler.
Combine cornstarch or arrowroot with reserved milk, adding this mixture to the pan when the milk is hot.
Stir in sugar, salt, and vanilla and cook over low heat until thick.
Reduce heat further and cook gently for about 8 more minutes.

Optional richer version
Mix 1 cup of the pudding with 2 eggs, then return to the pan and continue cooking, stirring constantly.

Serve warm or pour into bowls and chill. Garnish with toasted coconut and/or chopped nuts (fresh fruit would be excellent too!).

        I poured my pudding into 3 dishes, covered them, and chilled them till dessert time. Mine was not particularly thick when I stopped cooking it and I was worried that I’d somehow screwed up. The pudding had thickened by the time we ate it that evening, though. I love this simple, smooth vanilla dessert with a dollop of whipped cream!

Leave a Comment

Filed under desserts

In lieu of food, I give you islands

I haven’t had much time to bake and blog recently.  Going without internet for a week was both difficult and fabulous! While I did make bread when we ran out (not quite a failure but not quite right) and scrumptious banana brownies (boxed mix plus surplus ripe bananas) I didn’t take any pictures of either!

Here, instead, I have pictures of our Bahamian travels so far! These are also on my sailing blog.

Great Bahama, Berry Islands, Nassau

Leave a Comment

Filed under Uncategorized