Monthly Archives: September 2011

Cabbage Pie: Recipe Swap

wpid-DSC_0837-2011-09-30-15-16.jpg

I am thrilled to be participating in Burwell General Store’s Recipe Swap for the first time this month. I’ve seen many creative dishes come out of this group in the past and I’m honored to be able to join in!
wpid-recipeswap_slaw-2011-09-30-15-16.jpg

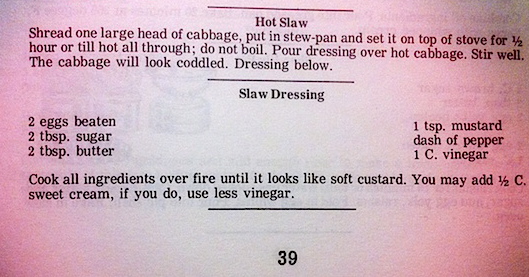
The original recipe from All-Day Singin’ and Dinner on the Ground

For the swap, everyone had to start with the above recipe for Hot Slaw and make their own version, that is, one that changed/added/deleted some ingredients or maybe tweaked the technique. When I first saw the recipe I thought it sounded oddly appealing. I guess it helps that I like cabbage. It reminded me of a Mexican restaurant’s not-quite-cooked cabbage slaw that my mom and I have always loved. The sweet and sour elements of the dressing were familiar but cooking it into a custard was not.

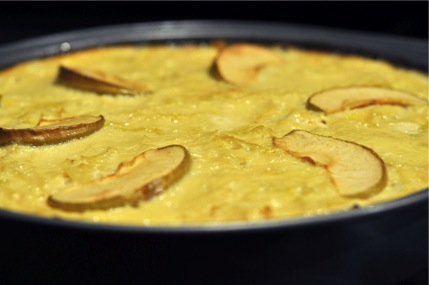
I’ve never actually made custard on the stovetop before. I know, I know, I should really do something about that but this didn’t seem like the right recipe for testing my whisking skills. Instead, I thought, why not make a custard with which I’m familiar: a pie. Pumpkin pie is custard, right? That’s how my chain of logic went, anyway.
wpid-DSC_0822-2011-09-30-15-16.jpg

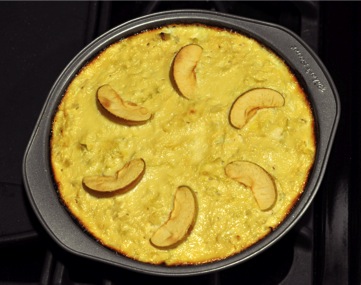
It helped that the recipe gave cooks an option to add cream, which, in my mind, was essential to turning this slaw into a pie. The most difficult thing to decide was how much vinegar to retain in my baked custard. I wasn’t sure if too much vinegar would keep the pie from setting or make it too bitter. I also had a tough time deciding on a crust. I don’t make a lot of pies and mostly steer clear of buttery pie shells. I opted for a crust from a tofu quiche recipe I once made. It uses cooked bulgar and made a very nice crust for the quiche. It didn’t turn out quite as well with this pie, however. I think I needed to bake it longer or just go for a regular-old, traditional crust.
wpid-DSC_0820-2011-09-30-15-16.jpg

I could go on about how skeptical my mom, who visited last week, was about turning a slaw into a pie. I reiterate that my husband tries not to eat dairy but tell you that he made an exception in the that department for the sake of pie experimentation. Someone had to help me eat this thing! You get the picture. There’s a lot to say about this pie but I’m going to stop myself and present the recipe before I go on and on.
wpid-DSC_0845-2011-09-30-15-16.jpg

Cabbage Pie

1/2 a small to medium-sized head of green cabbage, finely chopped
1 apple, chopped except for a few slices for the top of the pie
1 can evaporated milk (I used 2%)
2 eggs
2 tablespoons sugar
1/4 teaspoon nutmeg
1/3 cup white or apple cider vinegar

For the crust:
1/2 cup bulgar
1 cup water

Bring water for bulgar to a boil in a small saucepan.
Add grains and cook, covered, on low for 15 minutes, or until all the water is absorbed.
Towards the end of the cooking time, preheat oven to 375 degrees F.
When bulgar is cooked, pour it into an oiled pie plate and press it down with your fingers and/or the back of a spoon to for a crust over the bottom and up the edges of the pan. It’s okay if you can’t get it all the way up the edges.
Place pie plate in oven and bake for 10-15 minutes, or until the crust is crisp and slightly brown.

Meanwhile, add chopped cabbage to a large skillet or saucepan over medium-high heat. Cover and cook, stirring occasionally, until the cabbage is tender.
Add chopped apple and nutmeg to cabbage, cook for another couple of minutes, then remove from heat and set aside to cool.
In a bowl, beat eggs and add milk, sugar, and vinegar, beating everything together well.
Your crust should be out of the oven at this point – pour the cabbage into the pie crust, spreading it evenly throughout the pan.
Pour milk mixture over cabbage, distributing it evenly.
Place 6-8 apple slices on top of the pie before placing it in the oven.
Bake at 375 degrees F for about 45 minutes, or until the center of the pie is set and the top is golden brown.
Slice and serve!

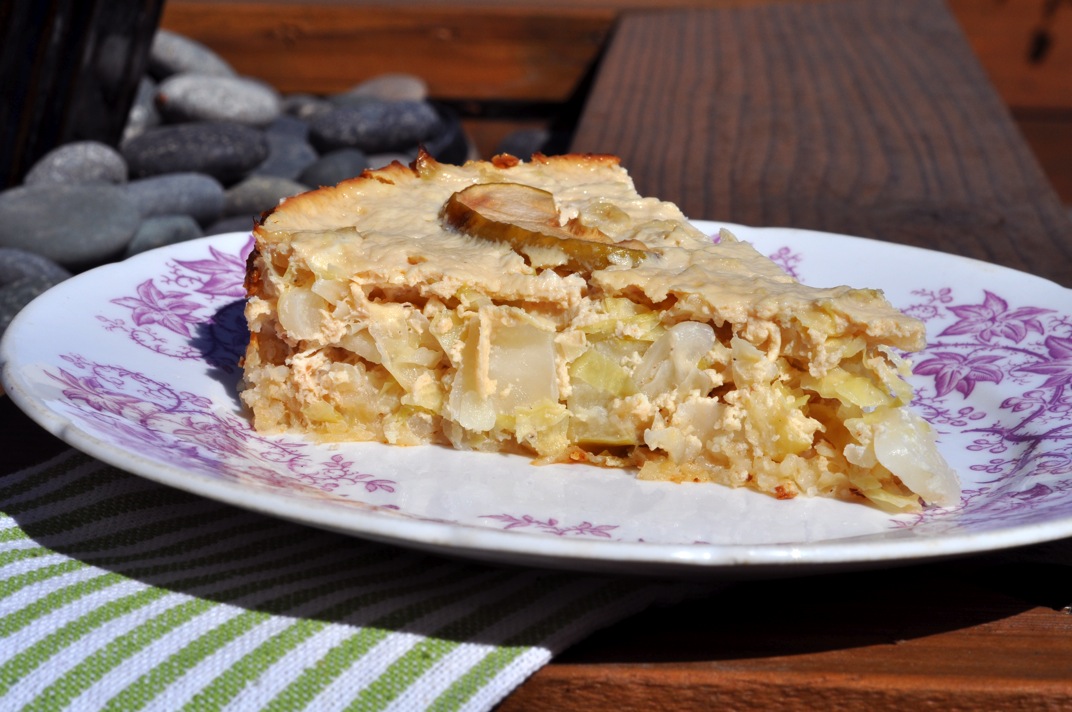
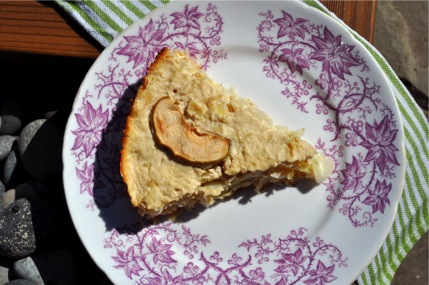
To be honest, I had no idea how this would taste. If it was completely inedible I was going to change some things and make it again. Happily, the pie was more than edible – it was good! The pie was surprisingly sweet, which makes me think more vinegar would be a good idea. The texture and flavor was fantastic, though. It really tasted like slaw in a pie! The apple was a nice addition and I’m glad I added nutmeg, a spice that always pairs well with greens.

You may encounter skepticism if you serve this pie to friends and family. Don’t let them deter you! Cabbage pie is a novel, healthy, vegetarian main dish that is perfect for a chilly fall night.

19 Comments

Filed under other goodies

Apple Maple Muffins (With Millet Flour)

wpid-DSC_0786-2011-09-28-11-33.jpg

If you ask me what my favorite season is, I will promptly answer “Fall”, without a doubt. Why, then, am I resisting fall’s arrival this year? I’m still buying summer squash, stone fruit, and corn. Hey, these things stay in season a lot longer here in California. Maybe my resistance comes from San Francisco’s goofy summer weather. Our warm, sunny days just started last week and will be gone by early October. Cool, foggy mornings and brisk afternoon breezes were the norm all summer long. I don’t have a problem with that, especially after living in the oppressive Caribbean heat for several months. I just can’t get into fall until it really feels like fall.

Something about visiting the East Coast last week made me crave fall apples like nothing else. Lee and I made a last minute trip for his grandmother’s memorial service but managed to visit three states in a short amount of time. We flew into Boston, spent the night in a nearby hotel with Lee’s family, and spent the next day at the service and post-service gathering in the Connecticut. The Connecticut countryside feels almost mystical to me. The grass is so green and the little stone walls are so quaint. It’s about at foreign as landscapes get to a Californian.

The next day, my 26th birthday, we were all the way up in Maine at Lee’s parents house. We lived there for a few months last summer so it truly felt like home. I must say, Maine was having better weather than SF. It was sunny and warm. The trees had not started changing yet. Still, something in the air smelled or felt like fall.

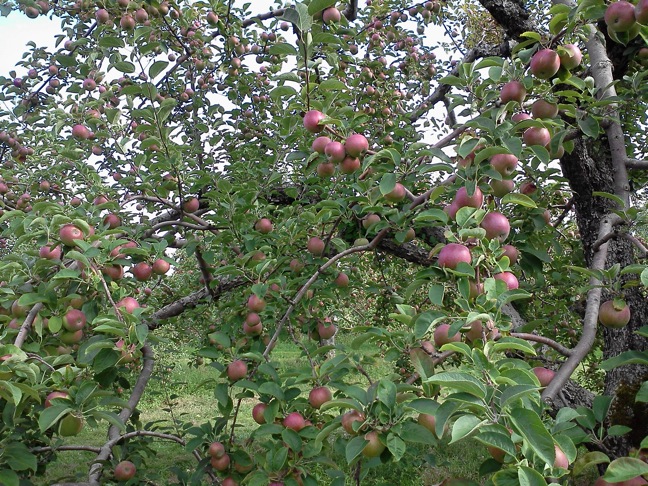
Lee and I were driving his MGB down a winding country road when I exclaimed that it would be fun to pick apples on my birthday and it was too bad apple season hadn’t started yet. It hadn’t? The next curve we rounded brought us to the local orchard and we pulled off as soon as we saw the you-pick sign for apples.

wpid-0918111540a-2011-09-28-11-33.jpg

The trees were loaded. I mean loaded. The branches were heavy with apples and the air smelled sweet. The early season Macintosh and Cortland apples were a little tart but I like them that way. We tried really hard not to pick too many, knowing we’d be leaving in a couple days anyway, but it was so hard not to fill our bags. We left with 13 pounds of apples and vowed to eat as many as possible before our flight home.

One can only eat so many apples in one day. When it came time to pack our things, I just couldn’t leave our bounty behind. We boarded the plane with a bag of apples nestled in a carry-on.

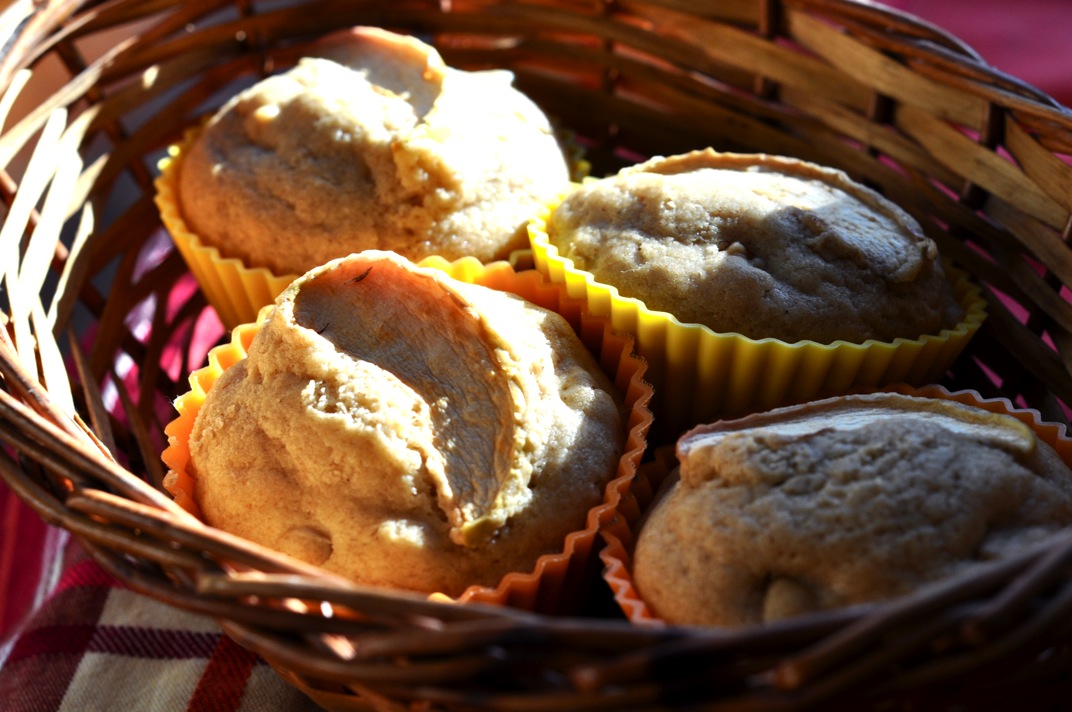
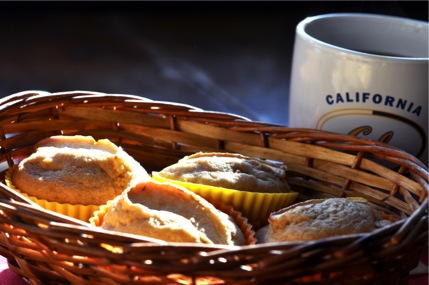
I knew I had to bake something with the country-crossing apples. I guess this is an admission that fall has arrived to some part of my being. I started with a recipe from one of my thrift store cookbooks and adapted it to suit my pantry and my laziness. The millet flour was an experiment with a happy result. I expected these muffins to turn out dense and dry because of it but they surprised me with their fluffy texture. They are a bit crumbly, almost like corn muffins, and have that sandy, grainy texture as well. The millet flavor is sweet and subtle. It goes nicely with maple, I think. All in all, I’m excited about millet flour’s prospects as an addition to my baked goods.

wpid-DSC_0788-2011-09-28-11-33.jpg

Apple Maple Muffins (With Millet Flour)
Adapted from the Better Homes and Gardens Bread Cookbook, 1963, Double-apple Fantans

1 cup whole wheat pastry flour
1 cup millet flour*
3 teaspoons baking powder
3/4 teaspoon salt
1 teaspoon cinnamon
1/2 cup finely chopped tart apple
1 beaten egg, 3/4 cup milk
1/4 cup oil or melted butter (I used coconut oil)
1/3 cup maple syrup
12 apple slivers for muffin tops
Optional coating for apple topping: 3 tablespoons sugar, 1 teaspoon cinnamon, 1/2 teaspoon nutmeg (I skipped this but will try it next time)

*I bought my millet flour at the local co-op but you can make your own by grinding the grain in a coffee grinder until you have a fine powder.

Preheat oven to 375 degrees F.
Line a muffin pan with paper or silicone liners, or coat with a little oil.
If you plan to coat apple topping with cinnamon sugar, blend those ingredients in a small bowl and set aside.
Combine flours, baking powder, salt, cinnamon, and chopped apple in a large bowl, stirring until completely mixed.
In a separate bowl, blend egg, milk, oil, and maple syrup.
Add liquids to dry mixture and stir until just combined.
Spoon batter into muffin cups.
Top each muffin with an apple sliver, either tossed in cinnamon sugar mixture or plain.

Bake at 375 for 20 minutes, or until the muffins are golden brown on top.
Remove from oven and cool on a wire rack

5 Comments

Filed under muffins

Corn Stew with Bagel Croutons

I did two things that I’m very proud of last week. Really, I’m sure I did more but these two graced my kitchen in one night and were particularly memorable. First, I found an inventive way to use the last of the leftover bagels from my brief stint as a bagel-baker. They had been in the freezer for weeks and Lee had declared them inedible.

Second, I made something in a pot that didn’t turn into chili, as do so many of my would-be soups and stews. This stew spawned from necessity and boredom. I was bored with making the same old things night after night and my dad was coming over for dinner so I wanted to serve him something somewhat special. Still, that special dish needed to be easy and use ingredients I had on hand, since I was getting ready to go out of town. It’s a good thing there were 4 ears of fresh corn in the fridge! I wasn’t about to let those go to waste.

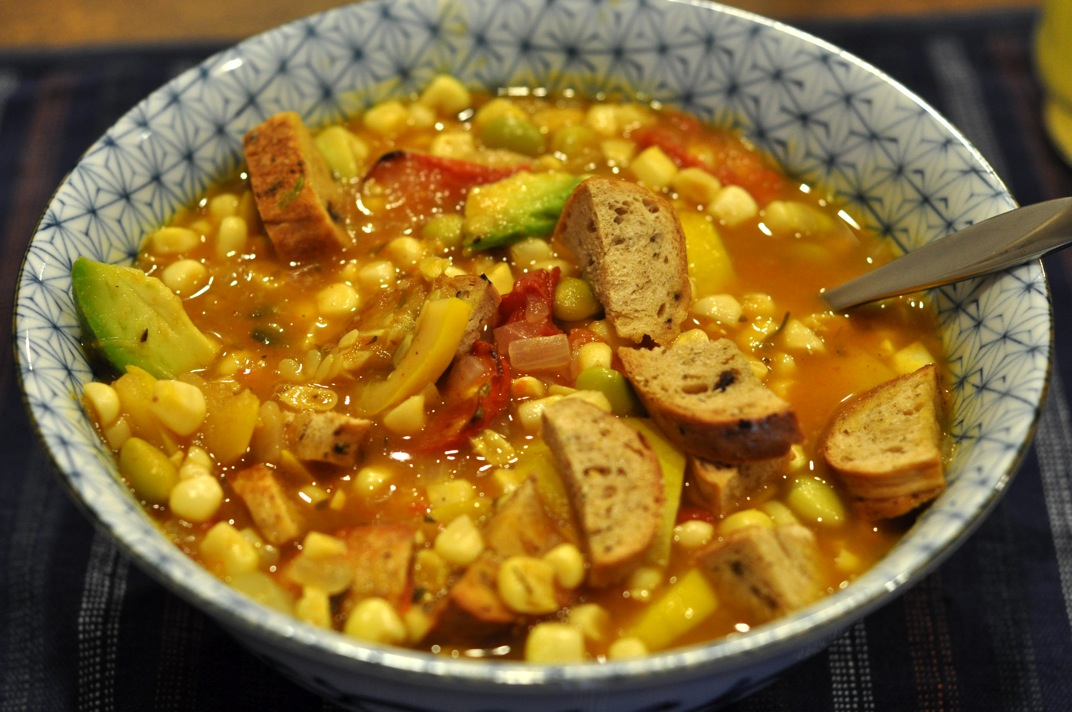
The stew came out thick (thanks to the pumpkin) and chunky (thanks to the corn and squash). I loved the bright red tomatoes against the yellow corn. My dad, Lee, and I really enjoyed it as an early fall dinner that captured some of the sweetness of end-of-summer corn. The bagel croutons were perfect and unique. Unlike regular croutons, they have quite a crust on them, which returns to it’s chewy bagel state when soaked in hot stew for a few minutes. The result was an almost meaty texture that stopped my spoon from gobbling the stew too quickly.

wpid-DSC_0635-2011-09-20-10-49.jpg

Corn Stew

4 ears fresh, sweet corn, husked
1 medium-sized brown onion, chopped
3 cloves garlic, minced
1-2 tablespoons olive oil
1 tablespoon each fresh chives, marjoram, and thyme, finely chopped (adjust to taste)
1 cup canned pumpkin puree
5-6 medium-sized pattypan squash, cut into 1 inch pieces
1 cup frozen, shelled edamame
4 Roma tomatoes, roasted (see below)
4 cups vegetable broth
1/2 teaspoon allspice
1 teaspoon chili powder
Freshly ground black pepper and salt, to taste
1 small avocado, sliced

To roast the tomatoes:
Preheat the oven to 375 degrees F.
Cut tomatoes in half and place them, skin side down, on a lightly-oiled baking sheet. I suggest lining the pan with aluminum foil, as the tomatoes tend to be rather messy.
Bake in the oven for 45 minutes to 1 hour, or until the tomatoes are shriveled and juicy.
Remove from oven and set aside to cool.
When cool, cut each half into two or 3 pieces and set aside. You will add them near the end of cooking the stew.

For the stew:
Cut corn off cobs, gathering it on a cutting board or in a bowl.
Meanwhile, preheat a large saucepan or pot. Add olive oil to coat the bottom of the pan.
Add onions and garlic, cooking until the onion is soft and translucent.
Add corn and continue to cook, partially covered for about 5 minutes, stirring occasionally.
Add herbs, allspice, chili powder, salt, and pepper. Cook about two minutes.
Add broth and pumpkin puree and pattypan squash, stirring well to blend everything together.
Reduce heat to simmer and cook for 10-15 minutes.
Add edamame and roasted tomatoes and cook for 5 minutes, or until edamame are heated through.
Spoon stew into bowls, top with sliced avocado, and serve with bagel croutons or crusty bread.

Bagel Croutons

Day-old (or older) bagels, chopped into 1/2 inch pieces
olive oil
Your preferred spices, or none at all: garlic powder, black pepper, salt, etc.

Preheat oven to 375 degrees F.
Place bagel pieces on a lightly oiled baking sheet.
Use an oil mister to spray pieces with olive oil.
Sprinkle spices, if using over bagel pieces.
(Alternatively, place bagel pieces in a plastic bag. Sprinkle a little olive oil on top, close the bag, and shake it to distribute the oil. Then re-open the bag, add spices, close and shake again.)

Place baking sheet in oven and bake for 10-15 minutes, or until bagel pieces are crisp but not burned. They will continue to crisp-up as they cool.
Allow them to cool on the baking sheet. Store in a sealed container or use immediately on stew.

4 Comments

Filed under other goodies

Chez Panisse Calzone (Recipe File Project #3)

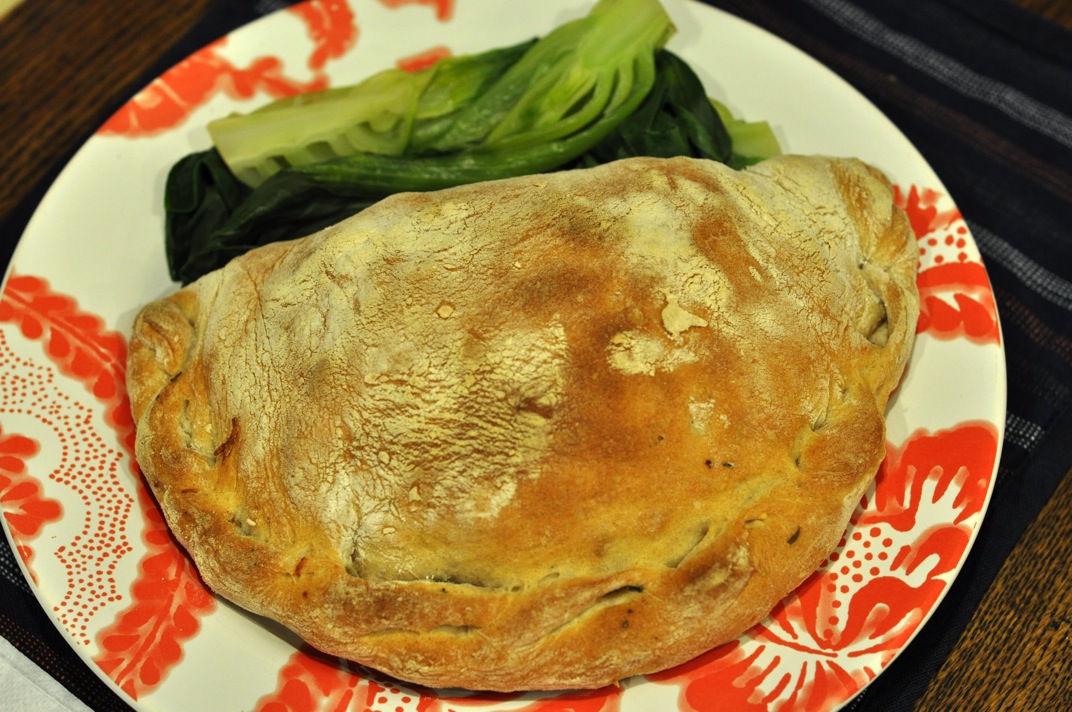
wpid-DSC_0576-2011-09-13-11-16.jpg

My new special celebration dinner: I just found out that I got an internship at a museum!

Lee laughed when I told him what this recipe calls for. “ Three kinds of cheese and prosciutto.” I said. I should have known he’d find that funny. You see, Lee doesn’t eat cheese and I don’t eat meat. Why did I choose to make a recipe from my grandmother’s file that calls for both?

1) I wanted to make something savory rather than sweet.
2) The calzones sounded delicious
3) How could I resist Alice Waters?
4) I thought I could easily adapt the recipe to our diets while remaining faithful to it’s flavors.

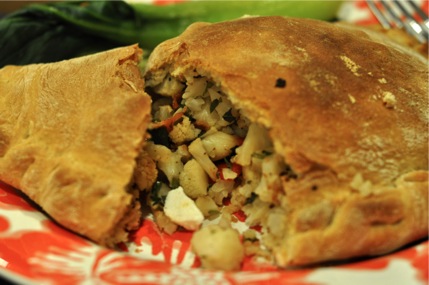
See, I’m not so crazy. I also think I succeeded in accomplishing #4, although it took some thought. I replaced most of the cheese with chopped, roasted cauliflower, adding some veggie cheese to the filling for Lee’s calzone and goat’s milk ricotta salata to mine. The cauliflower made up the bulk of the filling and it’s earthy flavor blended beautifully with all the fresh herbs called for in the original recipe. I guess you could say I replaced the prosciutto with roasted red peppers, mostly for color.

As a baker, the crust was definitely the most exciting part of this recipe for me. I resisted the temptation to mess with it, using all-purpose flour as called for rather than substituting some whole wheat pastry for some of it. The dough began with a rye flour sponge, a technique I’ve never used for pizza crust before. The dough was so, so silky and light! It was incredibly easy to worth with and crisped up beautifully around the calzone filling. Best of all, it did not tear on the chunk cauliflower as I feared it might. This could become my go-to pizza crust!

I made two calzones – or calzoni, as Water’s calls them – a slightly larger one for Lee and smaller one for myself. They were perfect for a special dinner without making us feel stuffed. I’m sure the cheese-filled originals would be outstandingly delicious and much richer.

Why did my grandmother tear this recipe out of The Denver Post’s Sunday Empire magazine? My guess is that she was drawn to the novelty of calzones and the renowned Alice Waters of Chez Panisse, a restaurant she visited in Berkeley while my dad was at school there in the 70’s. Helen liked to make new and different things and these would have been right up her ally.

I wonder if she ever made them, or if the clipping sat in her file all these years without her getting a taste of Chez Panisse Calzone?

wpid-DSC_0581-2011-09-13-11-16.jpg

Chez Panisse Calzone
from Pasta, Pizza & Calzones by Alice Waters, reprinted in The Denver Post Sunday Empire magazine

(Filling)
2 oz fresh California goat cheese, crumbled
2 oz French goat cheese, such as Bucheron or Lezay, crumbled
7 oz mozzarella, grated
2 slices prosciutto, cut about twice as thick as you would for a sandwich or salad, then into a julienne
2 tablespoons fresh, finely cut chives
2 tablespoons fresh, minced parsley
1 sprig fresh thyme, chopped
1 sprig fresh marjoram, chopped
2 small cloves garlic, minced
Coarsely ground black pepper, to taste

Blend all ingredients together in a large bowl.

(Dough)
Lukewarm water
2 teaspoons active dry yeast
1/4 cup rye flour
1 tablespoon milk
2 tablespoons olive oil
1/2 teaspoon salt
1 3/4 cups unbleached all-purpose flour

Make a sponge by mixing together 1/4 cup lukewarm water, yeast, and rye flour. Let it rise 20-30 minutes.
With a wooden spoon, mix together 1/2 cup lukewarm water, milk, olive oil, salt, and all-purpose flour. Add to sponge.
Knead dough on a floured board, adding flour to the board as needed but no more than necessary.
The dough will be light and a little sticky. A soft, light dough makes a light and very crispy crust.
Knead for 10-15 minutes to develop strength and elasticity.
Put dough in a bowl rubbed with olive oil and oil the surface of the dough to prevent a crust from forming.
Cover with a towel and put in a warm place to rise for about 1 hour, or until the dough has doubled in size.
Punch the dough down and let it rise for another 40 minutes.

Place a baking stone, if you have one, in your oven and preheat to 450 degrees F.
On a floured board, roll dough into 1 circle, about 14 inches in diameter, or divide into 2 or 3 circles for small calzoni.
Have the filling ready, at room temperature, and work quickly putting it on half of the dough circle(s).
Moisten the edges with water and fold dough over filling. Fold the dough at the end up onto itself, pinching it together.
Transfer calzones to a heavily floured pizza peel, the back of a baking sheet, or a sheet or parchment paper.
Slide calzones quickly into a preheated, 450 degree oven with a baking stone on a rack close to the bottom.
Bake 15-18 minutes or until brown and crisp.
Remove from oven, brush calzone tops with olive oil, and serve.

My notes and changes: Instead of most of the cheese, I used 1 medium-sized head of cauliflower, roasted at 400 degrees for about half an hour, and then chopped. The soft goat’s milk ricotta salata I used in addition was just what I had on hand and it was delicious! (1/4 cup or so for my calzone) I was able to cut down on the rising times for the dough since I was running short on time. I gave the first rise about 45 minutes and the second 20-30 and it worked fine. You can use a parchment-lined baking sheet if you don’t have a baking stone! (But get a baking stone, it really helps and there are inexpensive ones out there that work fine.)

4 Comments

Filed under other goodies