Monthly Archives: May 2012

Spring oven hash

This is what the light looks like in my dining room at dinner time. That is, this is what it looks like since I broke the cheap plastic blinds and can no longer open them. Little slits of light come through the west-facing window and cast magical shadows on dinner plates. I photograph dinner so rarely (What’s the point when it’s usually a not-so-pretty meal eaten in the half-light?) but I couldn’t let this one go.

At first I was disappointed in my pictures of this glorious meal. Who wants to drool over shadowy potatoes and dimly-lit avocado? I guess I do because when I uploaded my pictures the day after taking them I really, really wanted there to be more potatoes and lima beans in my fridge. The memory of how they tasted was still vivid and I could taste the fresh parsley and melty goat cheese just looking at the photographs.

Sometimes things we throw together on a Sunday night just work. Often they don’t but it’s those bullseye dishes that make cooking a worthwhile endeavor for me. Okay, that’s not entirely true. I love the plain, “boring” comfort foods that I make all the time with whatever is lying around too.

Back to the potatoes. I would like to thank Mariquita Farm for including little, red, new potatoes and a grocery bag full of fresh lima beans in my veggie box last week. I’ve never been much of a potato person but when I eat them I prefer the crisp, new potatoes or sweet potatoes baked to the point of caramalization. Yum.

The potatoes and lima beans worked so well with the fresh herbs in this dish and something about this combination of foods roasting in the oven is the perfect transitional spring meal. I served it for dinner but it would make a perfect bed for eggs at breakfast. When I’m combining a lot of different elements for one meal, it’s nice to have at least one of them in the oven. That makes for fewer pans to manage on the stove.

Spring Oven Hash

Ingredients

  • All your potatoes (I had about 10 small, red ones), cut into halves or quarters so that all pieces are about the same size.
  • 1 cup shelled lima beans
  • 1-2 tablespoons fresh rosemary, chopped
  • Salt and pepper
  • Olive oil
  • 1/4 cup flat-leaf parsley, chopped

Instructions

  1. Preheat oven to 400 degrees F.
  2. Lightly oil a roasting pan or baking sheet, or use a Silpat
  3. Combine all ingredients in a large bowl or plastic bag and toss to evenly coat everything with oil+herbs
  4. Spread mixture on baking sheet and place in the oven.
  5. Cook for 20-30 minutes, stirring 1-2 times part way though.
  6. Remove from oven and stir in parsley. You can serve the hash now or place is back in the turned-off oven to wilt the parsley a bit more.
  7. Serve with goat cheese (or another creamy, flavorful cheese) and maybe an egg or two.
http://blog.muffinegg.com/2012/05/25/spring-oven-hash/

3 Comments

Filed under CSA, other goodies

Chocolate trail mix muffins

I don’t know what I’d do without snacks. Granola bars, fruit, string cheese, and handfuls of nuts sustain me between meals. There’s nothing wrong with having a snack, as far as I’m concerned, and in a lot of cases it’s absolutely necessary to keep body and brain going!

My morning snacks are usually some kind of granola bar, lately these, a handful of trail mix, or various more complicated things if I’m at home. It’s protein and healthy fat that keeps me going through the rest of the morning.

After weeks of packing the same snacks for all my work days I finally got sick of them last week. Not only was I bored with what I was eating, but I was also tired of spending money on pre-made snacks. The solution: make muffins!

Last weekend was a relatively quiet one – perfect for baking. Lee was invited to race on a boat on Saturday and had to work all day Sunday (ah, startups). I stayed home and relaxed with the dog. That was probably our last weekend at home for a while so I soaked up the leisure time while I could. I thought about projects that need doing but didn’t really accomplish much. Finally planting our backyard herb garden still had me feeling accomplished from the weekend before.

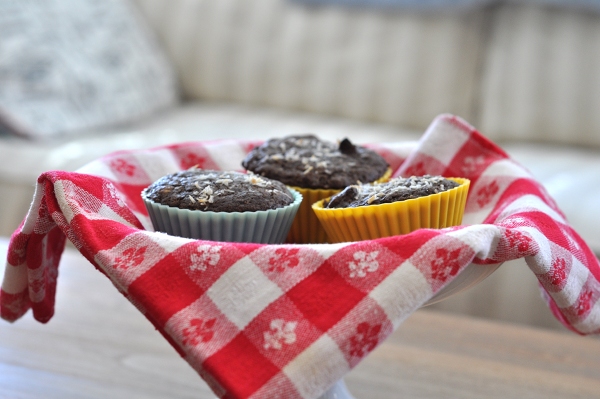
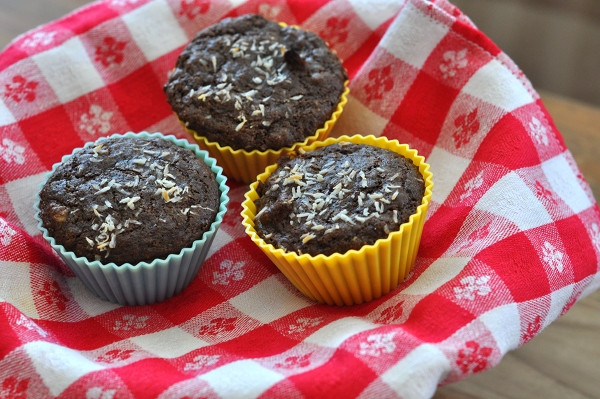
On Sunday I pulled various ingredients out of my ugly pantry cupboards (I swear I’m going to rip those things out one of these days. That’s one of those projects…). I made something new that I hoped would meet my morning snack needs for the coming week. With trail mix as my inspiration and chocolate as my canvas, I chopped, stirred, and sprinkled my way to chocolate trail mix muffins.

Chocolate Trail Mix Muffins

Prep Time: 10 minutes

Cook Time: PT15-18M

Yield: 12 muffins

Ingredients

  • 1/2 cup whole wheat pastry flour
  • 1/2 cup spelt flour
  • 1/4 cup hemp protein powder (or your preferred protein powder, or another 1/4 cup flour)
  • 1/4 cup unsweetened cocoa powder
  • 1 teaspoon baking powder
  • 1 teaspoon baking soda
  • 1/2 teaspoon salt
  • 1 cup buttermilk
  • 1/2 cup coconut oil
  • 1 egg
  • 1/2 cup coconut sugar
  • 1 teaspoon almond extract
  • 1/4 cup almonds, roughly chopped
  • 6 prunes, chopped
  • 1/4 cup sunflower seeds
  • 1-2 tablespoons unsweetened shredded coconut

Instructions

  1. Preheat oven to 375 degrees F.
  2. If your coconut oil is solid, measure 1/4 cup into a small oven-proof dish and place in the oven to liquify while the oven preheats.
  3. In a large bowl, combine flours, protein powder, baking soda, baking powder, salt, and cocoa powder, stirring with a whisk or fork until ingredients are completely combined
  4. Separately, lightly beat the egg in a medium-sized bowl. Then add the buttermilk, sugar, and oil (you may want to allow the oil to cool for a couple of minutes after taking it out of the oven).
  5. Thoroughly blend wet ingredients before stirring in almond extract.
  6. Add wet ingredients to dry and stir gently until barely combined.
  7. Add almonds, sunflower seeds, and prunes and fold into batter, being careful not to over stir.
  8. Spoon batter into a prepared muffin tin (lined with paper or silicon muffin cups or coated with oil).
  9. Sprinkle the muffin tops with shredded coconut.
  10. Bake at 375 for 15-18 minutes or until muffins are firm and the coconut has just begun to brown.
  11. Remove muffins from oven and cool on a wire rack.
http://blog.muffinegg.com/2012/05/22/chocolate-trail-mix-muffins/

2 Comments

Filed under muffins, Uncategorized

Rosemary pine nut focaccia

It’s taken a while but this week I finally feel like I have a balance for my new work-life schedule. Spending three days a week at a desk and two evenings a week sailing makes me feel like all the time in between is taken up by meal prep and dishes. Oh, and working out goes in there somewhere almost every day too. Never mind that Lee works about three times as much as I do, takes a class that the community college, and has a gazillian side projects going at home.

Partly due to our busy schedules, Lee and I haven’t done anything too ambitious on the weekends recently. We’ve worked on projects around the house, visited family in Napa, and ventured North for a hike with Doc.

Doc likes the view.

This week my days off seemed much more productive than normal. Today I feel like an absolute superwoman. Do you know why? I baked bread. True, bread baking used to be a weekly occurrence in my household. I’ve hardly opened my oven (except to roast vegetables) since we got back from Curacao, though, so I’ve been lagging in the bread department.

This totally makes up for it. The Artisan Bread in Five Minutes a Day technique was made for busy schedules like mine. The timetable for this focaccia looked something like this.

  1. Yesterday, mid-day: mix dough and leave on counter to rise; go to the store and to pick up the CSA box
  2. Afternoon: put dough in the fridge along with more vegetables than I can count
  3. This morning: think about bread and look at cookbook; take Doc for a walk
  4. Later this morning: take dough out of fridge and pull off a hunk; flatten it out, top with toppings, and let it sit while the oven preheats
  5. Just before lunch: put bread in the oven; talk to Mom on Skype while it bakes
  6. Noon today: bread comes out of the oven; inhale deeply

There you have it. Technically this focaccia was about 24 hours in the making. I only put a few minutes a day of work into it, though, and I got a lot done in the intervening hours. The best part is that there’s still a bucket of dough in the fridge!

This recipe has been brewing in my mind for a while now. I saw this post from Cake Duchess the other day and immediately wanted to join in on the Bread Baking Society‘s fun. I don’t think I’ve ever set out to make focaccia before, although I’ve certainly made many-a-flat bread that resembled this traditional Italian loaf.

I love the toppings I chose and I love to think about where the inspiration for them came from. The giant rosemary sprig happily living in a jar of water in my fridge came from last week’s Mariquita Farm box. I’ve had pine nuts on the brain ever since reading a book on Native California Indian cooking I bought at work (it’s dangerous to work at  a museum with such an awesome gift store!).

The rosemary, pine nuts, and honey are delicious but so are many other things you could sprinkle on top of your focaccia. Let you mind wander and see what you come up with. I made a whole wheat crust because that’s what I’m into but here’s a more traditional crust from this month’s #BreakingBread hostess.

Rosemary pine nut focaccia (whole wheat)

Ingredients

    For the dough (makes enough for at least four 1 pound loaves)
  • 7 cups whole wheat flour
  • 1 1/2 tablespoons granulated yeast
  • 1 tablespoon kosher salt
  • 1/4 cup vital wheat gluten
  • 3 1/2 cups lukewarm water
  • 1/2 cup olive oil
  • For the Focaccia
  • 1 tablespoon fresh rosemary leaves
  • 1/4 cup pine nuts
  • Olive oil
  • Honey

Instructions

  1. Mix dry dough ingredients in a large bowl or coverable container.
  2. Add oil+water and stir until all flour is incorporated.
  3. Cover dough (not airtight) and leave at room temperature until it rises and collapses (2-3 hours)
  4. At this point, you can pull off some dough and proceed with your focaccia or place all the dough in the fridge and bake the following day. I like to do the latter because the dough is easier to work with when it's cold.
  5. Pull off a grapefuit-sized portion of dough using floured hands. Quickly shape it into a ball and place it on a lightly floured board.
  6. Using your hands or a rolliong pin, roll out the dough into a 1/2-3/4 inch thick oval.
  7. Coat a cookie sheet with oil, parchment, or a silicon mat and place the dough oval on it.
  8. Depending on how quickly your oven preheats and whether you're using a baking stone (not necessary when using a cookie sheet but requires half an hour of preheating time) you might want to turn your oven on to 425 degrees F. and place a roasting pan in the bottom now.
  9. Using the tip of your finger, make indentations all over the top of the focaccia. These will hold oil, honey, and pine nuts!
  10. Scatter rosemary and pine nuts over the dough. I pressed most of my pine nuts into the top a little.
  11. Sprinkle on honey and olive oil to taste, using more olive oil than honey.
  12. If you haven't already, turn on your oven to 425 F. after putting a roasting pan in thet bottom.
  13. Let the focaccia rest for 20 minutes, then place in the preheated oven, pour boiling water into the roasting pan, and quickly close the oven door. I boil water in the teakettle for this.
  14. Bake for 18-25 minutes depending on how thick your focaccia is. It's ready when the top is brown from the honey and the oil.
  15. Cool on a wire rack, slice, and savor.

Notes

Dough recipe for 100% Whole Wheat Bread with Olive Oil from Healthy Bread in Five Minutes a Day

http://blog.muffinegg.com/2012/05/11/rosemary-pine-nut-focaccia/

4 Comments

Filed under Bread