Monthly Archives: June 2012

Yucca Fries

I am one of those people who never intentionally order french fries in a restaurant but almost always grabs a couple off of my dining companion’s plate. That’s only if I’m dining with someone like my husband or mother. I don’t take fries from strangers or mere acquaintances. Are you a fry snatcher?

It’s not that I don’t love a good french fry. Who doesn’t? When they’re crisp but not dry and not too greasy with a little bit of salt and pepper….ah, yum. I hate to turn them down. Hand over the ketchup and nobody gets hurt. The problem with fries is that, in my experience, they are rarely the picture of perfection I just described. They’re soggy, greasey, overly salty, and cold. Presented with a mountain of such fries, will I still eat them? Yes. I’m afraid that if I order fries with my sandwich I’ll eat the whole pile whether or not they’re really good and feel horrible about it afterwards. That’s just what fries do to me.

So, I snatch a few off of Lee’s plates, sampling the goods. If they’re tasty, then I’m content with my nibble. If not, then I’m more than happy that I have salad next to my (veggie)burger rather than fried potatoes.

There does come a time when every girl needs a plate of french fries, or rather, french fry-shaped things that are in fact rather good for you and safe to consume by the plateful. Enter the yucca fry.

A balanced plate: fries+salad+tofu Lima bean sauce

Baked, not fried, these babies entered my dinner repertoire while we were sailing in the Bahamas. I think I ran across the idea of baking yucca (aka cassava) “fries” on Meals and Miles. The funky looking root was everywhere in the Bahamian markets and was undoubtedly the cheapest produce around. It’s naturally high in fiber and other good stuff like vitamin C.

While peeling and slicing yucca can be somewhat tricky (the outer skin has a waxy coating and the inside is alternately crumbly and hard), the result is worth it. Rather than becoming limp during baking, as baked potato “fries” sometimes do, yucca holds it’s shape well and gets crispy/chewy in the oven. I’m getting hungry just thinking about it!

Yucca Fries

Ingredients

  • 2 medium-sized yucca/cassava roots (easier to handle than the big guys)
  • Olive oil
  • Seasonings (whatever you want! This time around I used a little chili powder and garlic powder)
  • Your favorite french fry dips and sauces

Instructions

  1. Preheat oven to 400 degrees F.
  2. Get out a large, rimmed baking sheet
  3. Peel the yucca using a paring knife or vegetable peeler
  4. Cut eat root in half and then slices the halves into sticks of about the same width (1/4-1/2 inch)
  5. Toss yucca into a plastic bag with the olive oil and spices.
  6. Shake and massage the bag until the fries are evenly coated.
  7. Arrange yucca in a single layer on the baking sheet.
  8. Bake for 15-20 minutes, or until fries are gold-brown. You can stir them around part way through but this isn't necessary.
http://blog.muffinegg.com/2012/06/19/yucca-fries/

2 Comments

Filed under other goodies

My Ideal Chocolate Chip Cookies

I think I’m suffering from a blog identity crisis. Scratch that, it’s more like a general life identity crisis coupled with the feeling that I want to do more but I’m already doing too much. Is that even possible?

I want to cook and bake every day, to swim, run, practice yoga, and lift weights. I want to take the dog for a long walk every day. I want to bring mountaineering back into my life but I love sailing multiple days a week. My job is awesome but I wish I could work more and do different things around the museum.

Lee and I should really take that honeymoon we never had (one that does not involve the boat).  We’re also excitedly planning our next trip to Pirat and where we might sail next. Until then, we really want to get somewhere on all our house projects! At some point, we want to have a family.

I want to grow by blogs and share all my recipes, thoughts, and experiences with more people. I don’t really know how to accomplish this, though, and I don’t think I can do everything on my list.

In an ideal world, I’d strategize and plan. Everything would fall into place. In an ideal world, I would bake these chocolate chip cookies every week until Lee and I were sick of them.

This recipe came on a card in my Foodzie box from months ago. A small bag of Red Winter Wheat flour from Community Grains accompanied the recipe. I knew as soon as I looked through the box that I would be making these cookies. Somehow, though, the flour sat in my cupboard for months while I made other recipes. The time just wasn’t right for this one.

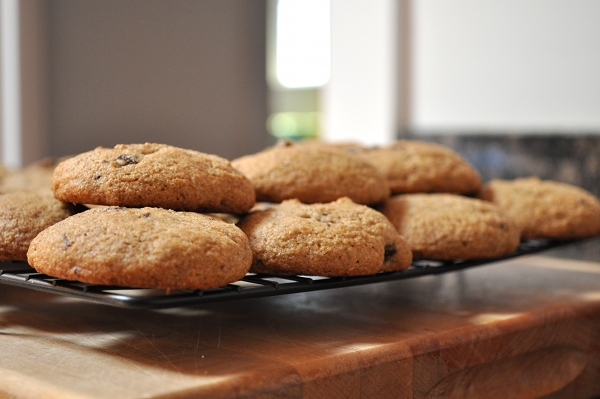
Finally, last week, it was time for cookies. I needed that therapeutic routine of softening butter on the counter, getting out ingredients, measuring them into my grandmother’s mixer, and scooping dough into little balls. Watching that dough transform into perfect cookies in the oven was really just a bonus. I had already eaten enough of it off the mixer paddle to be satisfied.

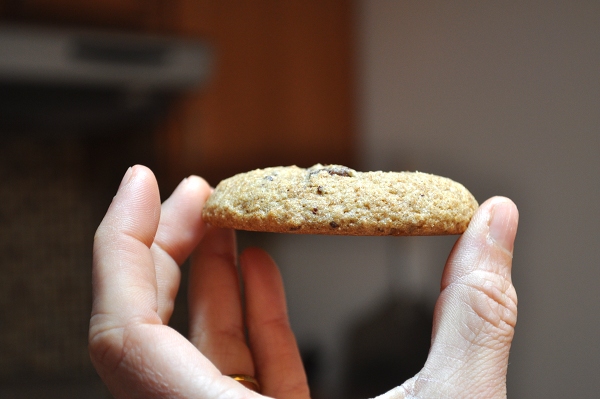
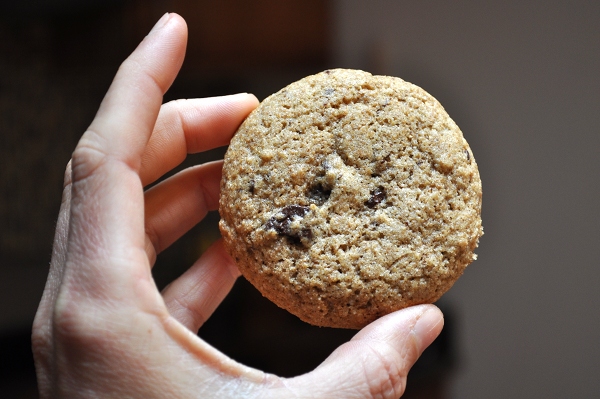
The dough was grainy – in a good way. The cookies are just the right kind of chewy – not that kind that feels like a bite of mostly sugar and butter but the kind where you know you’re really sinking your teeth into something good. It’s almost like each little grain of winter wheat is in there crying out to be savored as a whole food and not just some vehicle for sweet-tooth satisfaction.

I only make a couple of minute modifications to the original Community Grains recipe. I cut down the sugar a little bit and refrigerated the dough for a while before baking. I’ve read that this is a good thing to do (BraveTart know’s all about making a good chocolate chip cookie). I love having perfectly round, thick cookies and chilling the dough makes a big difference!

Make these. They will not disappoint. If you live in California and need some local winter wheat flour, I encourage you to check out Community Grains (or maybe you’re not local but you still want to try some of this fabulous flour).


Whole Grain Chocolate Chip Cookies

Yield: About 2 dozen

Adapted from Community Grains

Ingredients

  • 2 1/2 cups red winter wheat flour
  • 1 teaspoon baking soda
  • 1/2 teaspoon salt
  • 8 oz soft unsalted butter
  • 1 cup brown sugar
  • 1/2 cup granulated sugar
  • 2 eggs
  • 2 teaspoons vanilla extract
  • 12 oz chocolate chunks
  • 1 cup toasted chopped walnuts (optional)

Instructions

  1. In an electric mixer, mix butter, sugars, and vanilla extract on medium-high speed until completely blended.
  2. Switch speed to low, add eggs, and mix until smooth
  3. In a separate bowl, combine flour, baking soda, and salt.
  4. Add dry ingredients to the mixer and mix until just incorporated.
  5. Add chocolate chunks, and, if using, toasted chopped walnuts. You can stir these in with a spatula or using the mixer on slow.
  6. If you have time, cover the bowl with plastic wrap and place it in the fridge for at least half an hour (but the longer the better).
  7. When you're ready to bake, preheat the oven to 350 degrees F.
  8. Line a cookie sheet or two with parchment or a Silpat.
  9. Spoon walnut-sized portions of dough onto the cookie sheets, about 2 inches apart.
  10. Bake for 12-15 minutes or until the edges of the cookies are golden.
  11. Remove cookies from the oven and let them cool for a minute on the pan before transferring them to a wire rack.
http://blog.muffinegg.com/2012/06/11/my-ideal-chocolate-chip-cookies/

6 Comments

Filed under desserts