Author Archives: Rachel

Grandmother's Ginger Cookies

wpid-cimg2296-2010-10-11-20-14.jpg

        I love old things: old clothes, inherited jewelry, old books, pictures, letters, and of course recipes. Recipes are a special kind of inheritance. They pass among family members, across generations, and through history. Special recipes become legendary, especially when the written record is lost. The dish may acquire amazing qualities in memory that outlive it’s physical presence on the family table.
        These cookies are part of my culinary family tree. If I have my stories, grandmothers, and cookie legends right, these were my grandfather’s favorite cookies. My father and grandfather always raved about a certain ginger cookie that my great-grandmother used to make. She was quite a baker. I also hear she made seriously over-the-top amazing cinnamon rolls and the kitchen table was covered with her marble slab for candy making long after she was gone. I remember standing in that kitchen listening to my parents and grandparents try to remember what the cookies were like and figure out where the recipe was. My grandmother always swore she had it somewhere but could never find it.
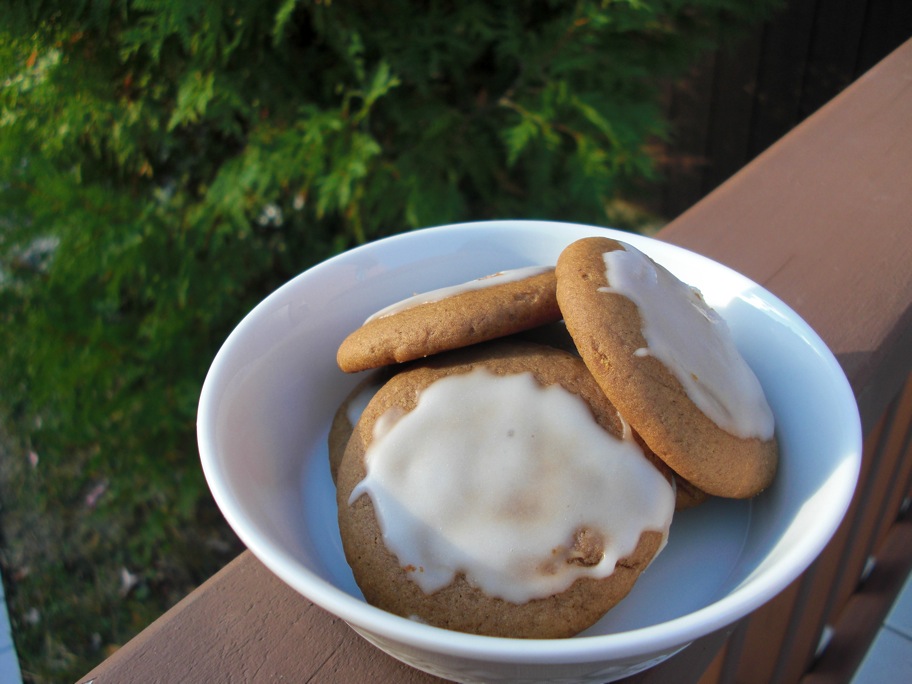
        This is what they said about the cookies: They were like ginger snaps…but not snappy. They were soft. They were also like molasses cookies…but not the dense, sugary molasses cookies you would expect. The cookies had white frosting. I think I also remember my parents and grandparents saying the recipe was not my great-grandmother’s. It actually came from my grandfather’s family but his mother in law made the cookies because he liked them so much (I might be making this part up, memory’s a bit fuzzy!).
        Anyway, a cousin of my dad’s contacted me a few weeks ago and said she had some old family recipes I might want to try. Of course I wanted to try them! She copied the recipes and shipped them off the old-fashioned way. When it arrived, I opened the envelope with excited anticipation, hoping it would contain the legendary ginger cookies. They were in there, along with several gems from my great aunt and a version of my grandmother’s cornbread dressing. The recipe in question was titled “Ginger cookies from RA”. What’s RA? It also indicates that they came from the kitchen of Mrs. McKay in Duluth. Who was Mrs. McKay?
        At first, I was amazed at the simplicity of these cookies. No eggs, no milk, not much in the say of spices? Then I realized this was probably a depression-era recipe crafted to be delicious without certain luxury ingredients. I set out to make a half-batch of my cookie inheritance. Finally I would get to taste them for myself!

wpid-cimg2299-2010-10-11-20-14.jpg

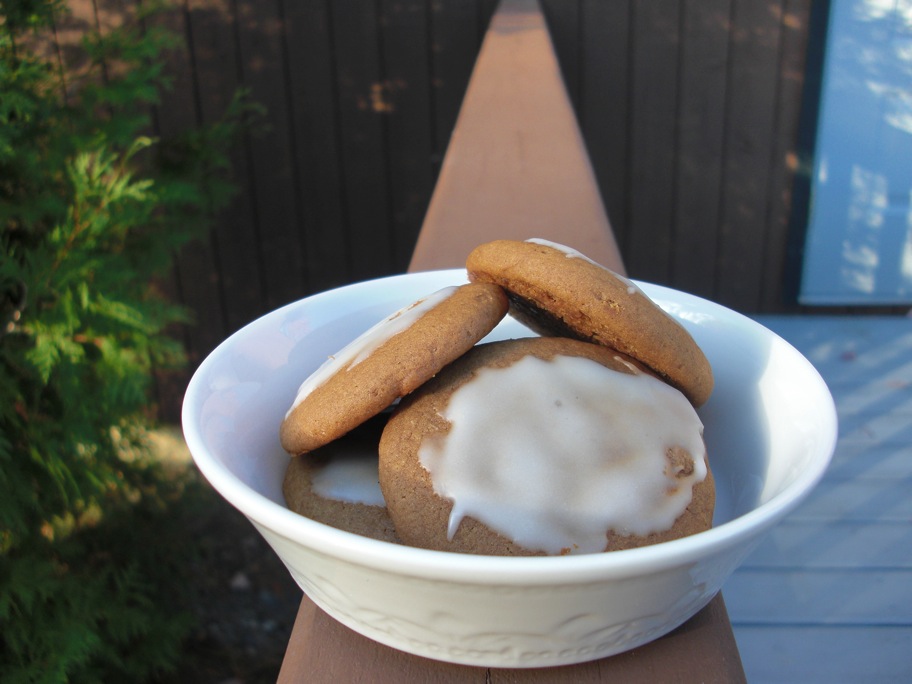
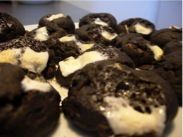
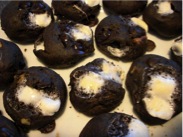
        The verdict: I must say, they are good. They’re definitely different. Lee’s dad took a bite of one with a quizzical look. He wasn’t sure what kind of cookie they were but he guessed molasses. I’d say that sums my family ginger cookies up pretty well: We call them ginger cookies but they’re not very gingery. If you had to guess, you’d say molasses. They’re soft and cake-like. There’s butter in there, and spices.
Two details I have questions about:
        First: the icing – the recipe was very vague about how to make the icing. It definitely calls for powdered sugar and it’s cooked on the stove. The card said to add vanilla and cream and that the frosting was always creamy and good. So how am I supposed to re-create this frosting? I used a simple powdered sugar and water cookie icing but it’s pretty boring.
        Second: According to the recipe I have, “grandmother” cut the cookies with an oblong cookie cutter. Oblong? I envision an oval but i’ve never seen a cookie or a cookie cutter shaped like that. Where does one find an oblong cookie cutter?
At least I have some things to work on!

wpid-cimg2297-2010-10-11-20-14.jpg

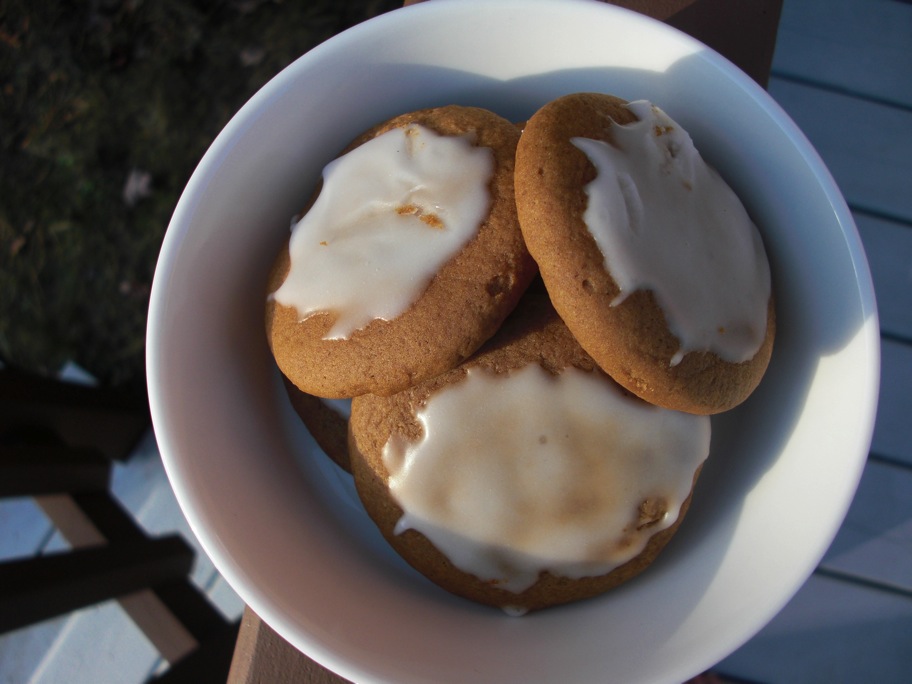
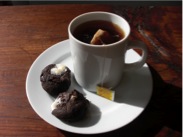
If you like ginger cookies or molasses cookies you will love these cookies. They may not be able to decide what they are but they’re certainly delicious!

Ginger Cookies (The full recipe. I made half)

1 cup lard (I used butter)
1 cup brown sugar
1 cup molasses
1 cup hot water
1 teaspoon ground ginger
1 teaspoon cinnamon
4 teaspoons baking soda
1 teaspoon salt
7 cups flour (give or take)

Preheat oven to 325 degrees F.

The recipe I received doesn’t actually include directions so I guessed on how things go together.

Cream together the butter, sugar, and molasses in a large bowl. (I had issues with this since I don’t have a mixer…woe is me!)
In a separate bowl, sift the flour, ginger, cinnamon, baking soda, and salt together.
Add the hot water to the sugar mixture.
Add the flour mixture to the sugar and water, stirring as you do.
Mix the whole thing up into a nice ball of dough.

The recipe said to roll the dough out and cut it with a cookie cutter but I opted for something simpler since I didn’t have a proper cookie cutter.

Pinch off hunks of dough, roll them between your palms to form balls (bigger than a Whopper but smaller than a ping-pong ball).
Place balls on an oiled cookie sheet or silicone mat/parchment paper covered cookie sheet.
Flatten balls with your fingers till they’re about the size you want the cookies to be. They don’t spread out much at all but the poof up.
Bake at 325 for 15 minutes.

Allow to cool slightly, then ice with your favorite cookie icing (something that hardens when it dries). I just mixed about 2 cups of powdered sugar with 3 tablespoons of water and it made way more icing than I needed. I also left a few cookies un-iced to see what they were like plain. They’re great, of course, so feel free to skip the icing!

15 Comments

Filed under Uncategorized

Buckwheat English Muffins

wpid-cimg2272-2010-10-10-12-48.jpg

wpid-cimg2275-2010-10-10-12-48.jpg

Again with the English muffins. I couldn’t help myself. The first batch was just so good I couldn’t help but try them again! I guess once you’ve gone homemade store bought just doesn’t cut it.
This time I opened my new bag of buckwheat flour, a new flour for me. This particular brand is produced in Maine and had some intriguing recipes on the bag (I’m saving those for later!). Never having worked with buckwheat flour before, I was surprised by the texture. It’s not…floury. It’s a yellowish color and has a sandy texture. The dough I mixed up last night was much drier than the whole wheat version and I was worried about it drying out or not rising overnight. It came out fine though. The dough surface was a little dry this morning but it had risen. It revived when I added the rest of the ingredients and popped it in a warm oven to rise again.

Things I did differently from the first time: I cut the muffins larger. They seem to shrink in circumference when they cook so make them on the big side. Last time they were almost too small for an egg! Cutting the muffins bigger meant I made less of them (11 total). I didn’t burn the first batch in the skillet this time! I made a totally new mistake! I didn’t have the cornmeal out when I was cutting out the circles so I figured I’d just put it in the skillet when I started cooking. Bad idea. First of all, the muffins stuck to the baking sheet I put them on to rise. They needed the cornmeal so they wouldn’t glue themselves down! Second, the cornmeal I put in the hot skillet right before adding my sticky muffins burned after a few minutes. It didn’t really stick to the muffins either. Oh well. I cleaned out the skillet and dusted the sticky side of the remaining muffins before cooking them.

wpid-cimg2263-2010-10-10-12-48.jpg

Once again, these came out slightly sour, crunchy on the outside and holey on the inside. The buckwheat worked well except it made the muffins kind of yellow. I was so starving I snatched a muffin from the first batch out of the skillet, buttered it up, and gobbled it while it was nice and hot!

I decided to submit these to YeastSpotting, which I just discovered the other day. What a treasure trove of bread!

wpid-cimg2271-2010-10-10-12-48.jpg

Buckwheat English Muffins
From Laurel’s Kitchen by Laurel Robertson, Carol Flinders, and Bronwen Godfrey

1 tablespoon active dry yeast
1/2 cup warm water
1/2 cup plain yogurt (I used nonfat greek yogurt)
1/2 cup boiling water
1 teaspoon salt
1 cup buckwheat flour
2 or more cups all-purpose flour (I used about 2 1/2 total with flour for kneading)
1/4 cup fine cornmeal
1/2 teaspoon baking soda

Dissolve yeast in warm water.
Mix yogurt and boiling water in a large bowl. Stir in the yeast mixture, then 1 cup all-purpose flour and 1 cup buckwheat flour.
Cover the bowl with a towel and it this sit in a warm place until the dough doubles in bulk, or leave it overnight (I left mine on the counter overnight). The dough is spongy and will get more sour the longer it sits.
After the dough has doubled in bulk (40-60 min. or overnight), mix in the remaining flour along with the salt and soda. Knead vigorously, adding more flour as needed until you have pliable but slightly sticky dough. Return the dough to the bowl, cover it, and let it rise for a second time (30 min. or more).
Punch the dough down and turn it onto a floured surface. Roll it out to half-inch thickness with a floured rolling pin. Cut it into circles with a four-inch cookie cutter of the end of a one-pound coffee can (my dough made 12 muffins).
Dust both side of the muffins with cornmeal and set on cookie sheets to rise until doubled in bulk (45 min. to an hour or more if the dough is cold).
*Cook on a griddle or skillet at medium-high heat for 3-5 minutes on each side.
Split with a fork, the traditional way, and spread on something yummy!

*I used a cast iron skillet and cooked 3 muffins at a time this time. I used low heat after initially heating the skillet. Watch the muffins carefully as they tend to burn. The cornmeal and seasoned skillet made oil unnecessary. The muffins puff up as they cook so they’re kinda fun to watch.

10 Comments

Filed under other goodies

What is a Brown Betty?

I certainly didn’t know until I set out in search of crisp and found a betty instead.

wpid-cimg2247-2010-10-7-21-271.jpg

        Breadcrumbs instead of flour and oats? Is it a dessert or a breakfast? I still haven’t figured that one out. This is what Wikipedia told me about Brown Bettys. The article says it’s a dessert, usually made with apples, that originated in colonial times. Other recipes I came across said the Brown Betty is a breakfast dish with Southern roots. I love history, especially when it relates to food!
        What drew me to this recipe was the inclusion of cinnamon raisin bread. I’ve been on kind of a cinnamon raisin bread kick recently. I love PB&J on cinnamon raisin and it’s even good for egg sandwiches! Now I know it’s also a delicious addition to baked fruit.
        I made my Brown Betty for dessert but it would make a fantastic breakfast. It’s not sickeningly sweet and all the fruit is a great way to start or end the day. I added some spices and oats to the original recipe. We enjoyed ours with vanilla ice cream, although I thought about toasting a marshmallow in the fireplace and smooshing that on top!

wpid-cimg2248-2010-10-7-21-271.jpg

Gingered Pear-Apple Betty (makes 6 servings)
Adapted from Cooking Light

4 (1 oz) slices cinnamon raisin bread (I used Barowsky’s All Natural)
1/2 cup oats
2.5 cups sliced, pealed pear
2 cups sliced, peeled apple
1/3 cup brown sugar
2 tablespoons crystalized ginger, chopped
1/8 teaspoon allspice
1/4 teaspoon ground ginger
1/2 – 1 teaspoon cinnamon, depending on taste
1/4 cup water
2 tablespoons lemon juice
2 tablespoons melted butter

Preheat oven to 350 degrees F.

Tear bread into small pieces and process in food processor until finely ground.
Mix oats and bread in a large bowl.
Combine 1 cup bread/oats, pear, apple, sugar, allspice, cinnamon, and both kinds of ginger in a bowl, stirring well.
Spoon this mixture into an oiled 11 x 7 in. baking dish.
Combine remaining bread and butter. Sprinkle over the fruit mix in the dish.
Optional: sprinkled a 1/4 cup or so of sliced almonds on top.

Bake, uncovered, at 350 for 40 minutes or until bubbly.
It ends up quite crispy with little to no liquid. (If you want it juicier cover it for half the baking time, then remove cover to brown the top.)

5 Comments

Filed under Uncategorized

Rocky road cookies

wpid-cimg2223-2010-10-6-15-281.jpg wpid-cimg2226-2010-10-6-15-281.jpg
wpid-cimg2239-2010-10-6-15-281.jpg wpid-cimg2224-2010-10-6-15-281.jpg

        Everyone has a favorite ice cream flavor. As a kid, mine was rocky road. I have very vivid childhood memories of standing in front of the counter at Buster’s in South Pasadena, reaching for a rocky road-topped sugar cone. What’s not to love about chocolate ice cream studded with walnuts and tender little marshmallows? The marshmallows were my favorite part. Something about coming across one mid-lick and slurping it out of the melting ice cream made savoring a rocky road cone blissful. Nothing was better than ice cream at Buster’s followed by a romp on the railroad tracks next door. My brother and I left countless pennies to be squished by the trains and retrieved on our next family trip for ice cream.
        Sorry, I guess I’m feeling sentimental. The point is, I came across a recipe for rocky road cookies online and felt a hankering to recreate my favorite flavor combo in a cookie! The recipe I found didn’t quite translate to the rocky road I remembered. The cookies weren’t chocolate and the nuts were peanuts. I fixed the recipe up easily, though, and made a little dent in the half bag of mini marshmallows leftover from Lee’s birthday cake. I ended up with a cake-like chocolate cookie generously filled with carob chips, walnuts, and marshmallows. The marshmallows melt and toast in the oven making for some very sticky, gooey cookies. Oh, and if you use vegan marshmallows like these, my rocky road cookies are vegan!

wpid-cimg2240-2010-10-6-15-281.jpg

Rocky Road Cookies
Adapted from this recipe on VegWeb.com

1 cup all-purpose flour
1/4 cup unsweetened cocoa powder
1/2 teaspoon baking soda
1/4 teaspoon salt
1/3 cup natural turbinado sugar
2 tablespoons coconut oil (or your preferred oil/butter)
3 tablespoons applesauce
1 teaspoon vanilla extract
1 tablespoon ground flax mixed with 3 tbsp water
1/4 cup chopped walnuts
1/4 cup chocolate or carob chips
mini marshmallows

Preheat oven to 375 degrees F.

Sift together flour, cocoa powder, baking soda, and salt.
Combine flax mixture, applesauce, coconut oil, vanilla, and sugar. Mix until smooth.
Add dry ingredients to wet, mixing as you do until a dough forms.
Fold in walnuts and chocolate chips.
Place a couple marshmallows in a tablespoon, scoop up a spoonful of cookie dough, and place the ball on an oiled cookie sheet. This way the marshmallows end up on top of the cookie, don’t stick to the cookie sheet, and get all toasty! You could, of course, just mix a couple handfuls of marshmallows right into the dough.
I got all the cookies on one sheet. They don’t spread out so it you want them to be flatter, press down on the top of each cookie a bit with the back of a spoon.
Bake at 375 for 8-10 minutes.

If these cookies weren’t gone, I’d try crumbling a few into some chocolate ice cream for a real rocky road experience!

1 Comment

Filed under desserts