Category Archives: other goodies

Sweet Pumpkin Pickles

wpid-DSC_0041-2011-10-31-11-43.jpg

Who cares about candy. I want pickles!

I am often guilty of foisting my tastes on other people. When it comes to gifts, I forget that I can only shop for my mom by picking out things that I like. With food, I rant and rave about ingredients I love before pausing to ask if my audience shares my enthusiasm for such things. What? You say you don’t like goat cheese? You can’t stand spicy food? You won’t touch oat bran with a ten-foot pole?
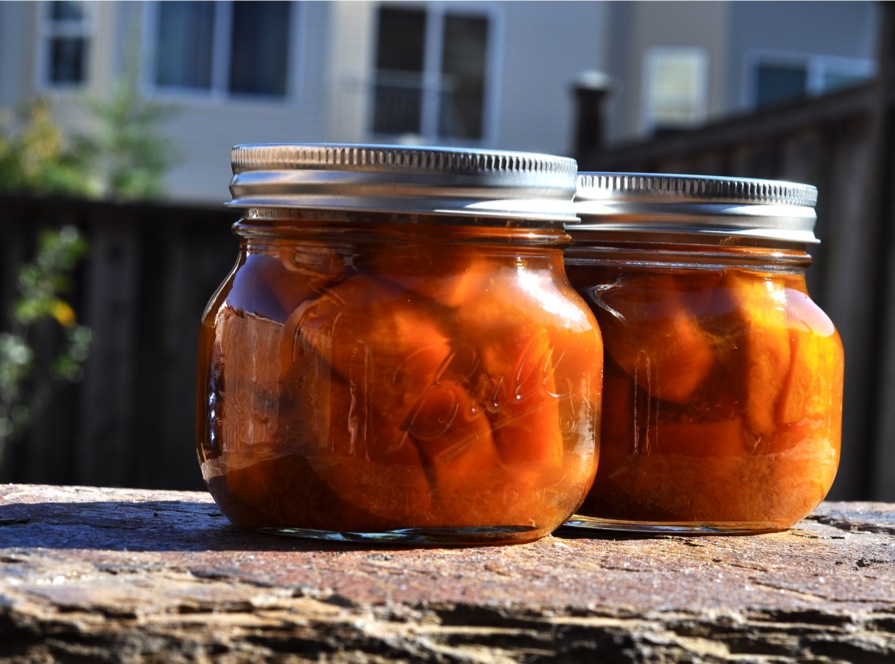
I’m afraid my food obsessions made their way into the birthday gift I gave my aunt this past weekend. I thought what what to get her all month, waffling between making something and buying something. Eventually I settled on homemade jams and jellies. I picked out a couple of jars that I already had but I wanted to make one more thing. A canning recipe had been high on my to-make list for weeks and this was the perfect time to try it. Who wouldn’t want pumpkin pickles for their birthday?

Ummm, probably a lot of people. I considered the possibility that my aunt might not share my love for unusual pickles and all things pumpkin. The recipe won, though. I had to make it and once I had, I had to share the delicious thing I’d discovered.

wpid-DSC_0049-2011-10-31-11-43.jpg

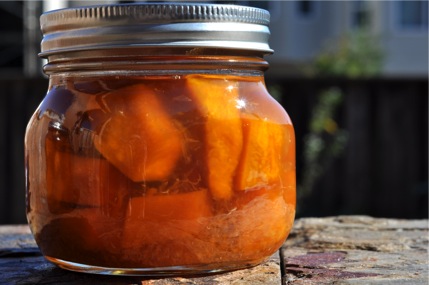
I don’t really know what my aunt thought of the squat pint jar of deep-orange pumpkin cubes when she pulled it out of the gift bag. I think she guessed that it was cheese. She thanked me for the homemade jams and pickles and I do think they were the right gift. I can’t help but wonder when she will open the jar of pickles and breathe that sweet, spicy hit of vinegar.

I know when I opened one of my remaining jars, that sweet scent brought the sights, smells, and sounds of fall to mind. Cinnamon, allspice, and cloves tickled memories of Halloweens past when everything was orange, black, and ghostly white. I tasted gingerbread, felt the custard of pumpkin pie on my tongue, and saw my mom stirring spiced cider on the stove. I heard candy wrappers and crunchy leaves rustle.

wpid-DSC_0052-2011-10-31-11-43.jpg

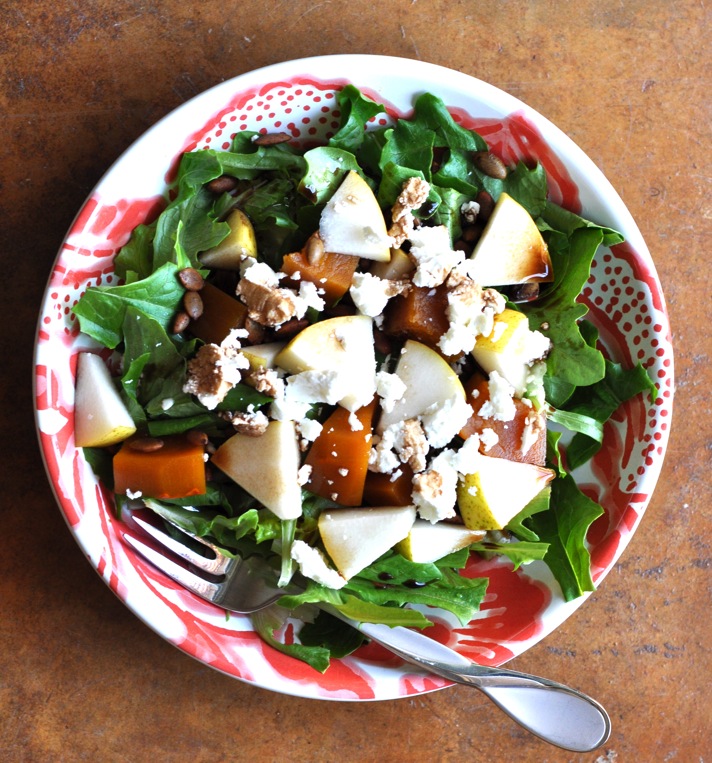
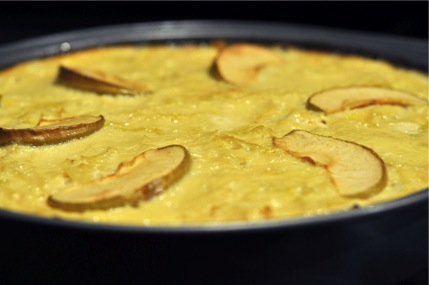
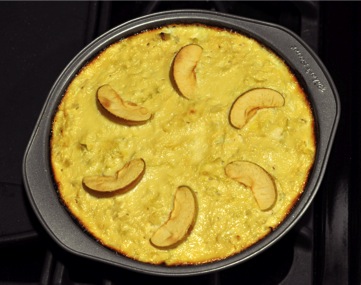
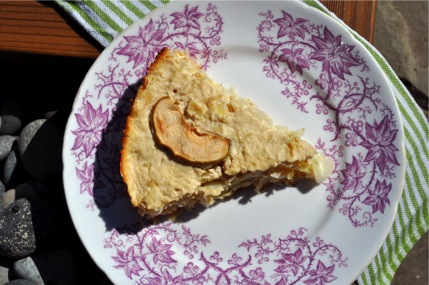
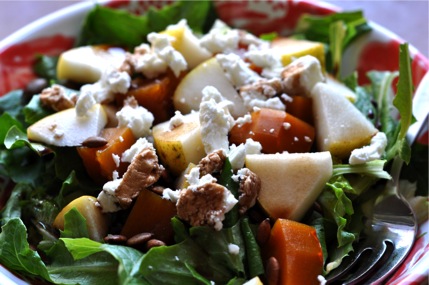
A few hunks of pickled pumpkin went into a green salad for my lunch today. Another went straight to my mouth or a taste test and I was blown away. The pickling process seemed too simple and quick to have produced something so delicious. If my first bite of pickle was an explosion of fall flavor, then every bite of salad was a complete fall extravaganza in my mouth. All I can say is make these pickles and then make some version of this salad – at least something including the pickles, pears, goat cheese, and pumpkin seeds. I don’t want to be the only one out here enjoying sweet pumpkin pickles this fall!

wpid-DSC_0056-2011-10-31-11-43.jpg

Sweet Pumpkin Pickles
From Ball Complete Book of Home Preserving
Makes about 6 pint (500 ml) jars

2 cinnamon sticks
12 whole allspice
10 whole cloves
1 lemon
6 cups (1.5 L) granulated sugar
4 cups (1 L) white vinegar
24 cups (6 L) seeded peeled pie pumpkin or butternut squash (3/4 in cubes)

  1. Prepare canner(large pot that will hold all your jars covered with water), jars, and lids. (heat the water and sanitize jars if you are reusing them. Then place jars in warm oven)

Place cinnamon sticks, allspice, and cloves in a small cheesecloth sack or tea ball
Zest lemon into a large saucepan that you will use to cook the pickles. Remove lemon segments from the white pith and surrounding membrane, discarding the membrane and pith (like you would grapefruit). Coarsely chop the remaining pulp. Add this and any juice from the lemon to the saucepan as well.
Add sugar, vinegar, and the spice bag to the lemon rind, pulp, and juice in the saucepan. Bring to a boil over medium-high heat, stirring occasionally. Cover, reduce heat, and boil gently for 10 minutes.
Add pumpkin cubes, return to a boil, and cook for 3 minutes (till heated through). Discard spice bag.
Pack hot pumpkin into hot jars with a generous 1/2 inch (1 cm) of headspace.
Ladle hot syrup into jar to cover pumpkin, maintaining 1/2 and inch of headspace.
Remove air bubbles if necessary.
Wipe jar rim, center lid on jar, and screw band on until resistance is met, then tighten to fingertip-tight.
Place jars in canner, making sure they are completely covered with water. Bring to a boil and process for 20 minutes. Remove canner lid, wait 5 minutes, then remove jars.
Leave jars out to cool before storing. The center of each lid should be suctioned down so they don’t “pop” when you press on the lid.

For more information on canning, see the USDA Complete Guide to Home Preserving. The Ball Complete Book of Home Preserving is also a great instructional and recipe resource.

5 Comments

Filed under condiments, other goodies

Naturally sweetened carrot rice pudding bites

wpid-DSC_0873-2011-10-11-18-30.jpg

Those look good, don’t they? Or maybe I’m the only one who thinks prickly little hunks of healthy stuff look appetizing. Humor me.

Grab a carrot, pull that bucket of dates off the top shelf in your pantry (What? You don’t have a huge container of dates in your pantry? Well go get some!) Put those cashews you’ve been munching on for days to good use. I know you have leftover rice or some other grain in your fridge.

This isn’t so much a recipe post as it is a post about creativity. I’ve been thinking a lot about creativity over the past couple days. Training for my new museum internship started this week and learning through creative design is the institutions main focus.

Creativity…design…those are two crucial aspects of blogging as well as more aspects of our life than we probably realize. They have always been intimidating words for me. I’ve never considered myself to be an “artsy” person and in certain circumstances I’ve felt uncomfortable pressure to be “creative”. Design? How could I ever design anything?

So far, what I’ve learned about creativity in my internship is more relevant to this blog than I thought it would be. I have fresh motivation and renewed ambition. I cannot wait to see what I can really do with this blog if I let loose and break free of how I think things should be. Let’s just find out where this goes.

What does this have to do with carrot rice pudding bites? Carrot rice pudding bites are what happens when I let myself get creative with food. I have some kind of craving for a particular taste, flavor, shape, or texture. I have certain ingredients at my disposal. I really, really want to use something because it’s been in the fridge for bordering-on too long. I look at some recipes – thumbing through cookbooks and clicking through bookmarks online. In the end, I get pull out some ingredients, mash them together in a bowl, smoosh them into a mini-muffin tin, and bake them.

wpid-DSC_0874-2011-10-11-18-30.jpg

How do they taste? Pretty good for being a total experiment in culinary creativity. Did Lee and I eat all of these tasty bites? You betcha – every last sticky-sweet little bite.

Unfortunately, I have not quite mastered the practice of writing down what I’m doing when I’m experimenting in the kitchen. Thus, I don’t have a recipe. That said, I think wads/bites/hunks/balls like this are best made as free-form, creative, recipe-free items. Here are the basic components and a method that seemed to work for me at least once.

Naturally Sweetened Carrot Rice Pudding Bites

dates: 10 small pitted
cashews: 1/2 cup, raw

Chop these up in a food processor. Pour this mix into a bowl and add the rest of the ingredients.

carrot: 1 medium, grated
cooked brown rice: maybe 1 1/2 – 2 cups
spices: allspice, cinnamon, nutmeg, cloves, ginger…you know, those yummy ones…as much or as little of them as you like
flour, whatever kind you want (I used millet flour): 2 tablespoons
egg, beaten: 1 (or make it vegan with 2 tbsp flaxseed meal + 1/4 cup water)

scoop “dough” into a lightly oiled mini muffin pan or onto a cookie sheet (also lightly oiled or lined with parchment/Silpat)
Bake at 375 F. for 10-12 minutes, or until muffins/balls are firm and starting to brown.

Munch away! These are surprisingly sweet for containing no processed sugar.

4 Comments

Filed under muffins, other goodies

Sourdough Anything Coffee Cake

wpid-DSC_0925-2011-10-6-10-402.jpg

That may look like the bubbly surface of a strange planet but it’s not. Wouldn’t it be nice if there was a planet entirely composed of coffee cake? It would have a caky core rich with sourdough, a bubbly fruit layer, and a sweet, mottled crust of buttery crumbs. I’d live on that planet.

Sorry for the random space reference. I guess I’ve been spending too much time in the science museum. It sure is nice to be back in museums, though! I’ve managed to snag and internship in one and a volunteer position in another. I’ll take all the unpaid experience I can get if it puts me in a situation to learn and network in my chosen field.

One of my chosen field’s, that is…baking/blogging being the other one.

wpid-DSC_0924-2011-10-6-10-402.jpg

Okay, I’m dying to talk about this coffee cake. Could it look and more scrumptious? Maybe I’m just flabbergasted by it because I rarely make coffeecake and am unused to the beautiful, indulgent-looking breakfast/brunch/dessert (yes, you have my permission to eat this for all those meals). I say indulgent looking because this coffee cake isn’t going to make you feel like you just ate half a dozen doughnuts. There’s butter and sugar in there, for sure, but in much more modest amounts that you would think. Hey, there’s fruit too, any kind of fruit you want!

The secret: sourdough starter! I’ve been experimenting with using my started in a few things other than crusty bread loaves and have been very pleased with the results so far. It seems to be a good replacement copious amounts of fat in recipes. This is the first blog-worthy product and it is more than worthy. This coffee cake stops time when you cut a slice, sit down with a fork and a cup of coffee, and push everything else aside. You can also just eat hunks of cake straight from the pan with your fingers. i’ve tried it both ways.

wpid-DSC_0760-2011-10-6-10-402.jpg

One reason I delved into the land of coffee cakes, where I do not often venture, is that Peet’s was kind enough to send me two bags of new medium roast ground coffees and a mug through the FoodBuzz Tastemakers program. I am in love with the first bag I opened, Cafe Solano, and have been enjoying it every morning with my cereal. Being the only coffee drinker in the house, I have a lot of brewing and sipping to do! Rest assured, fellow Peet’s fans, there will be more coffee-oriented posts to come!

You can get your hands on some excellent Peet’s medium roast coffee with this coupon http://www.peetscoffee.com/medium-roast-offer/

wpid-DSC_0769-2011-10-6-10-402.jpg

Really, the zippy Cafe Solano roast with “floral notes and a subtle fruit essence”, as Peet’s experts describe it, is perfect alongside this fruit-studded coffeecake, whichever kind of fruit you use. I was very happy to find that this medium roast coffee has intense flavor without being overpowering or bitter. There are places for dark and light roast coffee in the world but sometimes the middle is best.

wpid-DSC_0927-2011-10-6-10-402.jpg

Sourdough Coffee Cake
Adapted from The Galley Wench on Food.com

1 1/4 cups whole wheat pastry flour
1/2 cup sugar
1 1/2 teaspoons baking powder
1/3 teaspoon salt
1/4 cup butter, softened
1 cup sourdough starter
1 beaten egg
1 teaspoon vanilla
about 2 to 2 1/2 cups fruit of choice, chopped/sliced, preferabley fresh or frozen (I used chopped frozen rhubarb)

Topping:
1/2 cup flour (more whole wheat pastry or anything else you feel like using)
1/4 cup packed brown sugar
1 tablespoon ground cinnamon
1/4 cup butter, softened

Preheat oven to 350 degrees F.
In a medium bowl, combine flour, sugar, baking powder, and salt. Stir till well blended.
Cut in 1/4 cup butter until mixture resembles course meal.
Separately, mix together sourdough started, beaten egg, and vanilla.
Add went ingredients to dry, stirring until completely incorporated.
Pour batter into a lightly oiled baking dish (I used an 11×7 dish).
Evenly distribute fruit on top of batter.
Mix topping in a small bowl, blending flour, cinnamon, and sugar, then cutting in butter.
Sprinkled topping over fruit.

Bake at 350 degrees for 45-50 minutes, or until the edges of the cake are brown and the top is evenly cooked.

Bake a coffee cake, brew some coffee, and settle down with your goodies and a juicy book. Enjoy fall!

5 Comments

Filed under desserts, other goodies

Cabbage Pie: Recipe Swap

wpid-DSC_0837-2011-09-30-15-16.jpg

I am thrilled to be participating in Burwell General Store’s Recipe Swap for the first time this month. I’ve seen many creative dishes come out of this group in the past and I’m honored to be able to join in!

wpid-recipeswap_slaw-2011-09-30-15-16.jpg

The original recipe from All-Day Singin’ and Dinner on the Ground

For the swap, everyone had to start with the above recipe for Hot Slaw and make their own version, that is, one that changed/added/deleted some ingredients or maybe tweaked the technique. When I first saw the recipe I thought it sounded oddly appealing. I guess it helps that I like cabbage. It reminded me of a Mexican restaurant’s not-quite-cooked cabbage slaw that my mom and I have always loved. The sweet and sour elements of the dressing were familiar but cooking it into a custard was not.

I’ve never actually made custard on the stovetop before. I know, I know, I should really do something about that but this didn’t seem like the right recipe for testing my whisking skills. Instead, I thought, why not make a custard with which I’m familiar: a pie. Pumpkin pie is custard, right? That’s how my chain of logic went, anyway.

wpid-DSC_0822-2011-09-30-15-16.jpg

It helped that the recipe gave cooks an option to add cream, which, in my mind, was essential to turning this slaw into a pie. The most difficult thing to decide was how much vinegar to retain in my baked custard. I wasn’t sure if too much vinegar would keep the pie from setting or make it too bitter. I also had a tough time deciding on a crust. I don’t make a lot of pies and mostly steer clear of buttery pie shells. I opted for a crust from a tofu quiche recipe I once made. It uses cooked bulgar and made a very nice crust for the quiche. It didn’t turn out quite as well with this pie, however. I think I needed to bake it longer or just go for a regular-old, traditional crust.

wpid-DSC_0820-2011-09-30-15-16.jpg

I could go on about how skeptical my mom, who visited last week, was about turning a slaw into a pie. I reiterate that my husband tries not to eat dairy but tell you that he made an exception in the that department for the sake of pie experimentation. Someone had to help me eat this thing! You get the picture. There’s a lot to say about this pie but I’m going to stop myself and present the recipe before I go on and on.

wpid-DSC_0845-2011-09-30-15-16.jpg

Cabbage Pie

1/2 a small to medium-sized head of green cabbage, finely chopped
1 apple, chopped except for a few slices for the top of the pie
1 can evaporated milk (I used 2%)
2 eggs
2 tablespoons sugar
1/4 teaspoon nutmeg
1/3 cup white or apple cider vinegar

For the crust:
1/2 cup bulgar
1 cup water

Bring water for bulgar to a boil in a small saucepan.
Add grains and cook, covered, on low for 15 minutes, or until all the water is absorbed.
Towards the end of the cooking time, preheat oven to 375 degrees F.
When bulgar is cooked, pour it into an oiled pie plate and press it down with your fingers and/or the back of a spoon to for a crust over the bottom and up the edges of the pan. It’s okay if you can’t get it all the way up the edges.
Place pie plate in oven and bake for 10-15 minutes, or until the crust is crisp and slightly brown.

Meanwhile, add chopped cabbage to a large skillet or saucepan over medium-high heat. Cover and cook, stirring occasionally, until the cabbage is tender.
Add chopped apple and nutmeg to cabbage, cook for another couple of minutes, then remove from heat and set aside to cool.
In a bowl, beat eggs and add milk, sugar, and vinegar, beating everything together well.
Your crust should be out of the oven at this point – pour the cabbage into the pie crust, spreading it evenly throughout the pan.
Pour milk mixture over cabbage, distributing it evenly.
Place 6-8 apple slices on top of the pie before placing it in the oven.
Bake at 375 degrees F for about 45 minutes, or until the center of the pie is set and the top is golden brown.
Slice and serve!

To be honest, I had no idea how this would taste. If it was completely inedible I was going to change some things and make it again. Happily, the pie was more than edible – it was good! The pie was surprisingly sweet, which makes me think more vinegar would be a good idea. The texture and flavor was fantastic, though. It really tasted like slaw in a pie! The apple was a nice addition and I’m glad I added nutmeg, a spice that always pairs well with greens.

You may encounter skepticism if you serve this pie to friends and family. Don’t let them deter you! Cabbage pie is a novel, healthy, vegetarian main dish that is perfect for a chilly fall night.


19 Comments

Filed under other goodies