Category Archives: other goodies

Buttery Buttermilk Scones and Sourdough Disasters

wpid-DSC_0033-2011-07-21-11-52.jpg

Given the choice, I usually like to start with the bad news. I won’t bore you with my sad story, though, so today I’ll start with the good stuff!

See those little brown peaks on the surface of these scones? Those are crispy mountains of buttery flavor and beneath them are melt-in-your-mouth soft, crumbly centers. All that texture and flavor came from only a small amount of butter and a generous glug of buttermilk!

I don’t know what inspired me to buy buttermilk the other day but once it was in the fridge I had to find something to do with it. While scones may not be the obvious application I think they are my new reason to buy buttermilk. As a bath for chew oats and the main liquid ingredient in the scone batter, buttermilk is a winner with all it’s tangy richness.

This was a totally spontaneous baking foray and I’m very happy with how it turned out. I think I’ll be making these scones over and over again with different mix-in combinations. Cherry chocolate chip is on the horizon!

wpid-DSC_0032-2011-07-21-11-52.jpg

Buttermilk Scones with Dates

3/4 cup all purpose flour
1 cup whole wheat flour
1 cup rolled oats
2 tablespoons baking powder
1/4 teaspoon salt
1/3 cup butter, softened
1 1/4 cup buttermilk
2-4 tablespoons agave nectar
About 6 medjool dates, chopped

Combine oats and buttermilk in a medium-sized bowl and leave in the fridge for at least one hour.

Preheat oven to 425 degrees F.
Thoroughly mix dry ingredients in a large bowl.
Add butter in small pieces and cut it into the flour mixture using a pastry blender (two knives or a wire whisk work too).
Stir chopped dates and agave (to taste, for desired sweetness) into the buttermilk and oats (you could also add the dates at the beginning of the soak time to soften them up).
Add liquid ingredients to dry ingredients and stir until just blended. You might need to add a splash of milk to moisten things up (I did).
Spoon the batter onto a greased cookie sheet.
Bake at 425 F. for 12-15 minutes, or until your scones have little brown peaks on top.

I highly recommend eating one of these as soon as you take them out of the oven for the maximum buttery goodness!

And now for the tragedy.

wpid-DSC_0027-2011-07-21-11-52.jpg

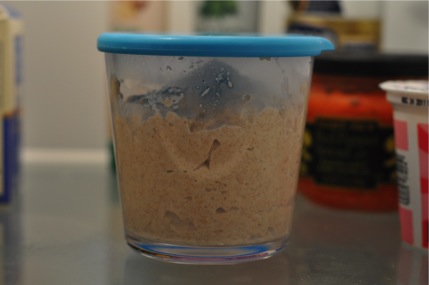
I had a major screw up in my baking few mornings ago. I blame it on the 6 am body pump class that exhausted me to the point that I could not function normally for the rest of the day. I returned from class, ate a hearty cereal, yogurt, and fruit breakfast (of course there was coffee involved too), and prepared to make something with my happy, well-fed sourdough starter.

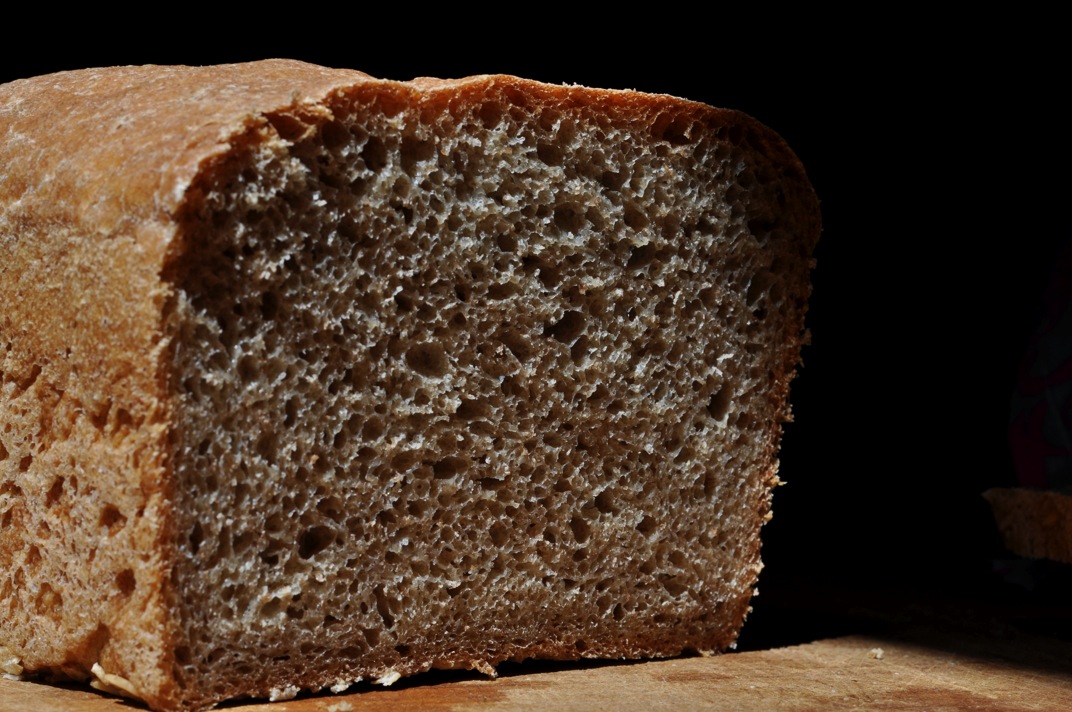
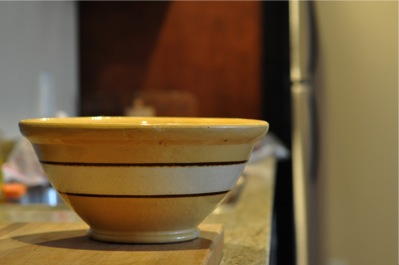
I have been feeding my starter the night before baking with it. I mix up the sour contents of the jar in the back of my fridge and pour them into the GIANT bowl (with quite a history that I’ll get to later). Then, per my starter’s parent’s directions, I add a cup of all-purpose flour and a cup of water. After mixing thoroughly with a whisk, plastic wrap and a tea towel go on top of the bowl and I stash it away in a corner of the kitchen for the night. In the morning a cup of this mixture goes towards baking and the rest (or whatever fits in the jar) goes back in the fridge. This method has been working well for me.

I fed my starter properly on the night before the incident but the next morning I skipped a step. I was so absorbed in weighing my flour and testing the water temperature that I completely forgot to remove all but one cup of the starter to save for future baking. My entire batch of starter was half-blended with white, wheat, and rye flour plus a dash of olive oil and some water before I realized what I’d done. It’s a good thing no one was around to hear me cry.

wpid-DSC_0030-2011-07-21-11-52.jpg

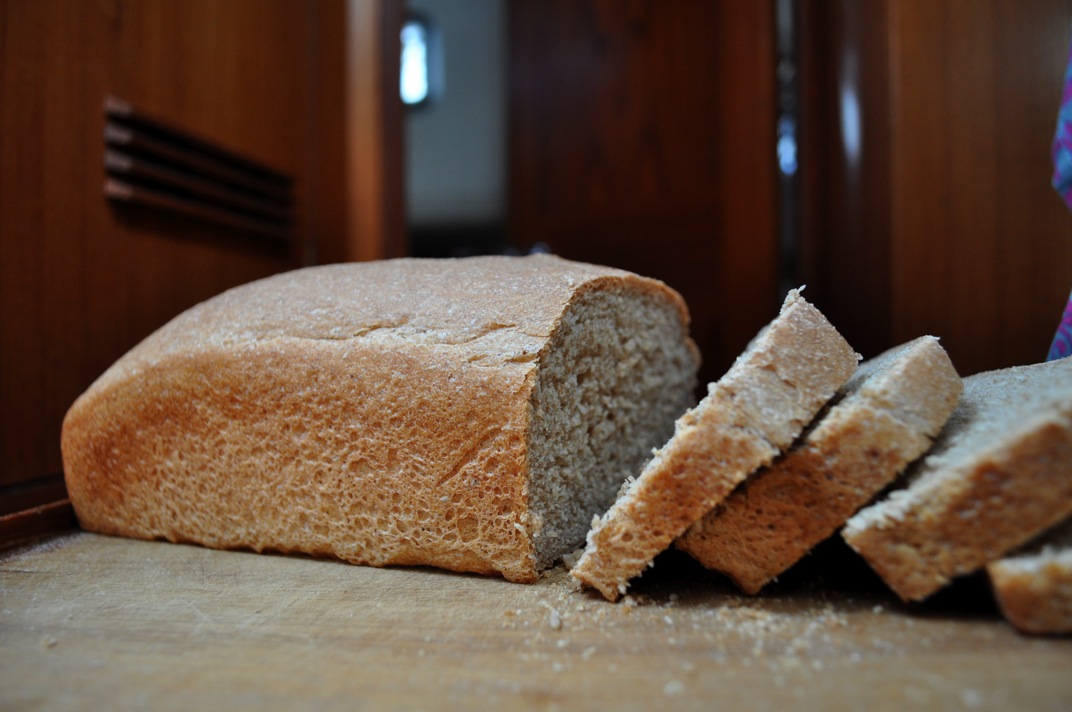
I woefully slopped some dough in my starter jar, just in case it was salvageable. So far, that dough hunk’s future looks promising. I fed it a cup of water and half a cup of all purpose flour, then filled my jar and used the rest to make pizza crust last night. The crust rose beautifully and tasted fantastic! I’m crossing my fingers for my starter’s future.

3 Comments

Filed under Bread, other goodies

Curried Lentil Muffin Loaves

wpid-DSC_0427-2011-03-7-07-41.jpg

Split in half on homemade bread – leftover lentil loaf sandwich.

        Laziness is the mother of invention. Last night I was a little slow to start fixing dinner. I wasn’t sure if we were having a potluck with our sailing buddies or not so I planned a dish that I felt good about serving to other people. Most things I make don’t fall into that category.
        I started cooking the lentils for a loaf I’d fixed and enjoyed a couple of times in the past. When we learned that a potluck was not on the agenda that night, Lee and I went for a swim and came back to a pot of cooked lentils. At that point, I was feeling very lazy about making the full-fledged lentil loaf. It was supposed to take at least 45 minutes to cook and I was hungry. Since I no longer had to worry about making my dinner presentable to others, I decided to have some fun. What are muffin cups for but to cut down on cooking time and make a meal fun?
        The first step was to spice up the recipe a bit. The previous times I had made this loaf, I was disappointed with the flavor and knew it wasn’t living up it it’s potential. The recipe already included raisins and nuts so curry powder seemed like the perfect spice to add. The spice combination I came up with is by no means traditional curry flavoring. I just pulled jars off the spice rack, adding what I liked and what I thought might taste good. Really, the spices and their amounts are up to your individual taste. I do, however, highly recommend the raisins and nuts. They may seem like strange ingredients to some but they add the perfect crunch and sweetness to the lentils. Unfortunately, I didn’t have any cashews on hand. I considered trying macadamia nuts, the only plain nuts I have right now, but decided to hoard my minimal supply instead.
        Lee downed three “Texas-sized” muffin loaves and I was satisfied with two. That left one to experiment with as leftovers (and a chance for me to take a picture during the daytime). The loaves were delicious and very filling with a side of random sauteed veggies. Lee and I split a baked plantain for dessert, my first foray into plantains. I’m definitely going to get more of this Caribbean staple at the market today! It might become a favorite dessert and I’m eager to try other plantain preparations.

Curried Lentil Muffin Loaves
Adapted from Food.com

1 cup dried lentils
3 cups water

1 medium brown onion, chopped
3 cloves garlic, crushed or minced
2-3 teaspoons curry powder
1 teaspoon cumin
1/4 teaspoon ginger
1/4 teaspoon turmeric
2 eggs, lightly beaten (or equivalent egg replacer for a vegan version)
2 tablespoons flour
1/2 cup raisins
1/2 cup unsalted cashews, if you’d like

Rinse and sort lentils.
Combine lentils and water in a medium saucepan and bring to a boil; reduce to simmer and cook for about 1 hour, or until the lentils are cooked and the mixture is thick.
Set lentils aside.
Preheat oven to 350 degrees F.
Saute garlic and onion in a skillet until the onion is translucent.
Add the onion mixture, spices, raisins, nuts (if using), flour, and eggs to the saucepan of lentils or combine all the ingredients in a large bowl if the saucepan is not big enough.
Mix thoroughly and pour into 6 lightly oiled jumbo muffin cups. You can also make one large loaf or 12 regular-sized muffins, just adjust the baking time accordingly.
Place muffin cups on a cookie sheet if using silicon cups and bake in 350 degree oven for 35-45 minutes (on the longer end of this range for larger cups and 45+ minutes for a loaf).

Remove from oven and allow to cool. Gently remove muffins from tin or individual cups and serve with chutney or any sauce that suites your fancy.

2 Comments

Filed under muffins, other goodies

Who is this person who bakes all the time?

wpid-DSC_0351-2011-02-27-19-04.jpg

        I love what I’m doing. I love being on the water and being free. That said, I really miss full-size kitchens, high-speed internet, and grocery stores. I’m torn between loving this life and trying to do things that don’t come easily on a boat.
        At least I have bread. I find comfort and redemption in my every-other-day baking routine. I may not be able to put together a fresh, green salad but I can bake a loaf of delicious bread. After two astoundingly successful loaves my bread ego has risen to match their lofty heights.
        What began as a cookbook recipe is now decidedly my own recipe. I’ve changed flour types, baking pans, and techniques to suit my taste and needs. After experimenting with the French Bread and Tuscan Loaf in Joy of Cooking, I found the most success with my Tuscan Loaf-inspired creation. With only my bare hands and some ingredients I carried here from Maine, I produced something with crust, springiness, chewiness, flavor, and nutrition!
        I don’t know what Lee and I love more: the smell of bread baking overpowering the usual boat smells or sandwiches made with fresh, warm slices. I like my first slices topped with tahini and Lee prefers butter.
        I’ll start with the original recipe, then give my own. When I made my loaf yesterday I weighed the flour so I am listing those weights as well.

wpid-DSC_0355-2011-02-27-19-04.jpg

Tuscan Loaf
From Joy of Cooking by Irma S. Rombauer and Marion Rombauer Becker

Mix in a large bowl:
        2 cups lukewarm water (85 F)
        1 cup whole wheat flour
        3/4 cup all-purpose flour
        1 package (2 1/2 teaspoons) active dry yeast
Cover the bowl with plastic wrap and let rise at room temperature for 8-12 hours.

Stir in:
        2 1/2 cups all-purpose flour
        1 tablespoon olive oil

Adding up to 1 cup more flour as needed, mix until a soft, slightly sticky dough forms.
Knead by hand for 15 minutes (dough should be very elastic but a little sticky).
Transfer dough to oiled bowl and turn once to coat.
Cover bowl with plastic wrap and let rise and room temperature until doubled in volume (2 hours).
Punch down dough and knead briefly.
Shape into an oval loaf by stretching and tucking dough underneath itself.
Lightly oil a baking sheet and sprinkle it with cornmeal.
Place loaf on baking sheet, brush surface with oil and cover with plastic wrap.
Let rise at room temperature until more than doubled (1 1/2 hours).
When the imprints of your fingers remain in the loaf when pressed, it is ready to bake.
Preheat oven to 425 F. Set a baking pan on the lowest oven rack.
Score the top of the loaf with a crosshatch pattern and place it in the oven.
Immediately add 1 cup hot water to the baking pan and close the oven.
Bake until the bottom of the loaf sounds hollow when tapped (about 40 min).
Cool completely on a rack.

wpid-DSC_0360-2011-02-27-19-04.jpg

(I still can’t believe I can make bread) Bread
Adapted from Tuscan Loaf above

Mix in a large bowl:
        2 cups lukewarm water (85 F)
        1 cup whole wheat flour (4 oz)
        3/4 cup all-purpose flour (3.8 oz)
        1 package (2 1/2 teaspoons) active dry yeast
        2 teaspoons vital wheat gluten
Cover the bowl with plastic wrap and let rise at room temperature overnight. (I put mine in a cupboard that gets quite warm during the day)

The next morning, stir last nights mixture and add:
        1 cup wheat flour (4 oz)
        1 cup all-purpose flour (4.2 oz)
        1/2 cup buckwheat flour (3.7 oz)
        2 teaspoons vital wheat gluten
        1 tablespoon olive oil

Adding up to 1 cup more flour (I added 4-5 oz this time) as needed, mix until you have soft, sticky dough.
Knead by hand for 15 minutes. The dough should not quite come un-stuck from your hand.
Transfer dough to oiled bowl and turn once to coat.
Cover bowl with plastic wrap and let rise in a warm place until doubled in volume (around 2 hours – I’ve left it for less and more time).
Punch down dough and knead briefly.
Lightly oil a loaf pan and sprinkle a pinch of oats over the bottom.
Shape dough into a loaf and place in pan.
Brush the top of the loaf with oil, cover lightly with plastic wrap, and leave in a warm place to rise until the top of the loaf is 1/2 to 1 inch above the edge of the pan.
Preheat oven to 425 degrees F.
Place loaf on center rack and bake for about 40 minutes, or until the top and bottom sound hollow when tapped.
Remove bread from pan and cool on a wire rack.

8 Comments

Filed under other goodies

Bread of Necessity

wpid-DSC_0289-2011-02-17-19-02.jpg

I know that homemade bread used to be, and for many still is, a necessity. When there’s no place to buy a loaf of bread there is only one option if you want a sandwich: make your own! I now find myself forced to develop my bread-baking skills or go without one of my favorite foods.
A couple of weeks ago I attempted French baguettes. The dough was a success but the loaves didn’t fit in my tiny boat oven. They were short, fat, and smooshed together on the baking sheet. I liked the way the dough went together so much, though, that I went back to the recipe when our store-bought bread ran out this week. However, this time I threw the whole hunk into a loaf pan that easily fit in the oven.
After mixing, kneading, waiting, kneading more, waiting more, and finally baking, I pulled my best loaf to date out of the oven. This is the first time my bread has actually developed a crust! The rich brown, wheat loaf had a genuinely crunchy/chewy exterior and nicely textured crumb. It was still a little on the short side, perhaps because I insist on using whole wheat flour and perhaps because I didn’t wait long enough for the second rise.
At any rate, Lee and I fresh, hot slices of bread with butter as part of our lunch yesterday. We also shared a couple slices with visiting sailors and they were especially impressed by the crust. When they asked how I’d done it, I could only say that I had followed the directions…sort of. I did not pour boiled water into a pan in the bottom of the oven as the Joy of Cooking suggests. I did, however, put my bread into a 400-degree oven for 15 minutes and then turn the temperature down to 350 for another 30 minutes of baking. I suppose that’s where the crust came from!
I think what I like most about this recipe is that I don’t have to worry about water temperature or proofing the yeast. The water in our boat’s tanks is as room temperature as it gets. Everything just goes together in a big bowl. I don’t mind the kneading as long as the dough isn’t to sticky.
Now that this loaf is almost gone I have a sponge starter in the warm galley cabinet all ready for a new and different bread!

wpid-DSC_0286-2011-02-17-19-02.jpg

French Bread
From Joy of Cooking

Makes 2 baguettes (or one large loaf)

Combine
4 cups all-purpose flour (I got away with 2 cups wheat flour and 2 cups white wheat flour)
2 teaspoons salt
1 package (2 1/2 teaspoons) active dry yeast

Make a well in the center of these ingredients and pour in
1 1/2 cups water, at room temperature

Stir thoroughly until the dough is soft and elastic, about 12 minutes on low in a mixer (I kneaded mine for 12-15 minutes).
Cover dough with a clean cloth or place in an oiled bowl, turning once to coat with oil and then covering with plastic wrap.
Let rise in a warm place (75-85 degrees F) until doubled in bulk (about 2 hours).
Punch down the dough and shape into baguettes or into one loaf.
To shape baguettes, divide the dough in half on a floured surface and shape into 2 rectangles. Roll each rectangle away from you, pressing outward at the same time, to form a long, thin loaf.
Place baguettes on a greased cookie sheet, leaving room for them to double in size, cover with a clean, floured cloth and let rise in a warm place until somewhat less than doubled. Score the tops of the loaves.
If you are making a single loaf, shape the dough accordingly and place in a lightly oiled loaf pan.

Preheat oven to 400 degrees F
Preheat a baking pan in the bottom of the oven and fill it with 1 cup of steaming hot water.
Bake bread on center rack for 15 minutes, then reduce the heat to 350 and make for about another 30 minutes, or until the crust is golden brown and the bottom of the loaf sounds hollow when tapped.
Five minutes or so before the bread is done, brush the top with 1 egg white beaten with 1 tablespoon cold water (I skipped this; no egg whites to spare).
Remove loaf/loaves from oven and let cool completely on a rack.

1 Comment

Filed under other goodies