Tag Archives: breakfast

Cherry-Filled Sourdough

wpid-DSC_0287-2011-12-7-13-28.jpg

        I have a lot of food boundaries. Some of them are more like barriers (I think this term has a slightly negative connotation) and some are lines that I think it’s better not to cross. I spend a lit of time breaking down the barriers and testing the boundaries of my cooking and eating habits. Comparing now to my eating disordered past, I think I only have my big toe dipped in the food restriction waters, while I was up to my neck several years ago.
        Still, old barriers remain and I chip away at them every day. Take cheese, for example. I used to eat the most processed, light, fat-free, bleugh cheese ever, and then only in minuscule amounts. Right now, I have exactly 5 kinds of cheese in my refrigerator…wait, make that 4. I finished the feta for lunch today. I love cheese and I’ve learned to eat real-food kind of cheeses (no more nasty processed stuff) in reasonable amounts.
        I could go on but I think one confession is enough for one post. Oh, but then there’s the whole reason I started talking about boundaries/barriers in the first place: Pie filling! You know the stuff in the can that you can just pour into a crust and voila, you have a pie? I don’t think I had ever bought or baked with canned pie filling until Duncan Hines sent me coupons for their baking mixes as well as Comstock Wilderness Fruit Fillings through the Foodbuzz Tastemaker program last month.
        Canned pie filling was on the other side of pretty much every food boundary I have. First and foremost it’s a non-homemade route for baking, which I try to avoid. Second, it’s got to be loaded with high-fructose corn syrup and probably doesn’t have much real fruit in it anyway. Third, fruit pies aren’t my favorite. I’m a pumpkin girl all the way.
        As soon as I brought myself to pie filling level in front of the supermarket shelves (on the floor), Comstock surprised me. Some of the cans looked newer and were labeled “More Fruit” and “No high-fructose corn syrup”. What? Really? Huh, maybe this stuff isn’t that bad after all.
        I chose a can of Cherry “More Fruit” filling and immediately started thinking of how I was going to use it. Pie was too obvious. I wanted to make bread, sourdough bread to be specific. It struck me that the sweet, gooey fruit filling would be a perfectly odd partner for tangy, dense sourdough. Thus, the cherry-filled sourdough loaf was born!
wpid-DSC_0277-2011-12-7-13-28.jpg

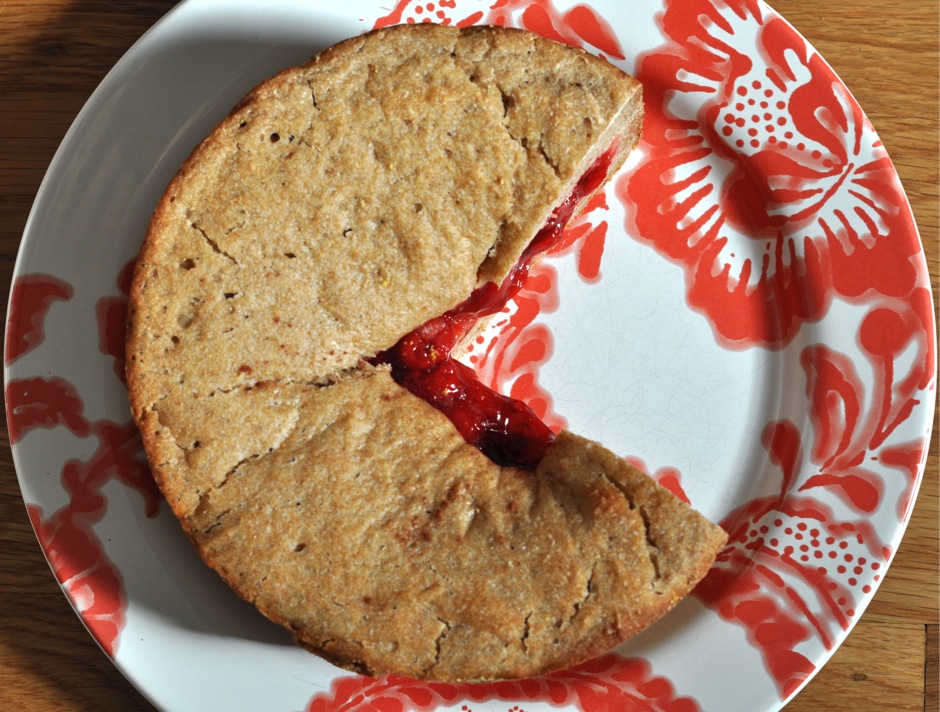
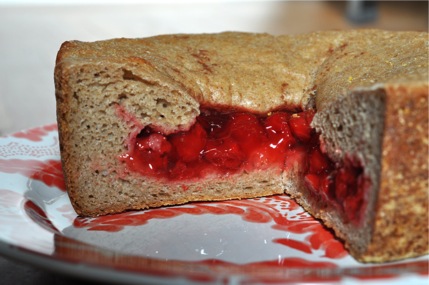
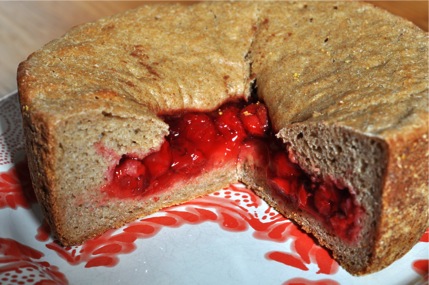
        It may look like a cherry pie collided with a loaf of bread to produce this bizarre offspring. I like to imagine both things flying through the air in my kitchen…but that would be messy. Instead, I simply made a small batch of wet dough with my sourdough starter, layered half of it on the bottom of a round baking dish, poured in about half the can of fruit filling, and then made a ring around the edge of the filling with the remaining dough. After some more rising and some oven time, I had a sweet, doughy thing that I didn’t know how to eat. Fork? Hands? Hands won but it was messy.
        The sourdough is very sour (I used a lot of starter) and the cherries are very sweet. Together, though, they are the perfect winter breakfast or brunch flavors. One reason I chose the cherry filling was that cherries are no longer in season so I can’t actually make a cherry pie from scratch right now. That’s the perfect excuse for using a canned convenience food, in my opinion. Cherry pie filling is such a Christmasy color that it’s nice to have it around this time of year, even if it isn’t made from seasonal produce.
This isn’t really a recipe, since I totally improvised the sourdough bread and I think everyone who makes sourdough has their own way of doing it. If you have a starter, make a whole grain dough with a high moisture content and open a can of pie filling. If you don’t have a starter, put it on your Christmas list!
wpid-DSC_0280-2011-12-7-13-28.jpg

Hearty Cherry-Filled Sourdough Bread

1 batch of your favorite sourdough, made with a little less flour or more water so it’s wet enough to spread over the bottom of a pan.
1 can Comstock Wilderness Fruit Filling (More Fruit, no high fructose corn syrup!)

Prepare dough, allow it to rise once. Punch down.
Coat the inside of a baking dish with oil and then stone-ground cornmeal, semolina flour, or regular flour.
Divide dough in half and gently spread half of it over the bottom of the baking dish.
Spoon about half of the can into the center of the dough in the dish, leaving at least an inch of dough around the edge of the filling.
Lay the rest of the dough all the way around the edge of the filling so that it makes kind of a barricade between the fruit and the sides of the baking dish.
Cover dish and allow bread to rise for another couple of hours, or until the top dough circle has expanded to almost cover the filling underneath.
Preaheat oven to 425 degrees F. Bake bread for 25-30 minutes, or until it’s golden-brown on top and the edges have pulled away from the dish somewhat.
Cool on a wire rack until the dish is no longer hot to the touch, and the fruit filling is somewhat set (not too liquidy). Then remove loaf from dish and continue to cool on rack.
Slice like a pie and serve!

The only thing that would have made this better is chocolate. Why didn’t I think to add chocolate? You could always spread some Nutella on each slice or sprinkle dark chocolate chips onto the bottom dough layer before adding the cherries. Now that would be decadent!

4 Comments

Filed under Bread

Fresh or Frozen?

Freezers are wonderful things. They hold ice cream, home cooking put by for later, and frozen convenience foods. Some might say there’s no place for the latter in a the healthy, local, sustainable kitchen. Just look at the ingredients and nutrition label on a frozen lasagna…yeah, they have a point.

Still, I buy things from the frozen foods aisle and I consider myself a relatively healthy shopper/eater. Sometimes, you just need something easy and the freezer is one of the best places to find real food with a longer shelf life than a head of lettuce. Here are a few frozen foods I love:

    1. Veggie burgers: While I’ve dabbled in homemade veggie patties and enjoyed my creations, I still like to have store-bought veggie burgers on hand. They’re one of my favorite go-to easy, fast dinners and make great hot lunches too. Recently, I’ve been buying a big package from Costco, which cuts down on excess packaging and makes the price a little more attractive.
    2. Ice cream, of course: I’m actually trying to cut down on my ice cream consumption. It got a little out of hand when we moved ashore from the boat and I was just so thrilled to have ice cream at my fingertips again! Don’t take this frozen treat for granted!
    3. Frozen spinach: This is my new favorite thing to put in smoothies. With a bag of frozen spinach in the freezer I know I can always make a green smoothie, even if I don’t have fresh greens on hand. Frozen chopped greens also make the smoothie colder and thicker than fresh greens. My favorite combo these days is frozen spinach, frozen mango, whey protein powder, and almond milk. It makes for a wonderfully thick smoothie that I like to eat with a spoon.
    4. Frozen edamame: snacking heaven. I don’t know how else you’d keep edamame around.
    5. The occasional frozen dinner…I feel kinda guilty about this one but I can’t help myself. My indulgent, lightning-fast comfort food for nights when I just don’t feel like cooking or don’t have time is frozen mac and cheese. I try to buy the natural/organic brands. It makes me feel better to know I have one of these in the freezer in case of a dinner emergency.
    6. Misc. frozen veggies: I’m a sucker for brussels sprouts and, lately, lima beans. I have a favorite tofu/lima bean spread/dip recipe that I’ll share here eventually.

Recently, the Foodbuzz Tastemakers program sent me a coupon for a Green Giant Valley Fresh Steamers frozen vegetable + sauce dish. Normally I’d steer clear of any sauced vegetable in the frozen food aisle. I was happy to see that the ingredient lists aren’t too weird – there’s mostly just veggies in there! I was also thrilled to find macaroni and cheese with broccoli among the selection. While that doesn’t exactly qualify as enough vegetables for a meal to me, it is a great example of how to incorporate more green stuff in normally not-so-green meals (even my guilty pleasures!).

The Steamer I tried tonight was good! It served Lee and I as a side dish. The sauce was light and with the addition of eggs tortillas, and a few more vegetables (since I cannot get enough of them) made a tasty dinner. I do wish there were more veggies in the bag. The whole thing was about as many veggies as I normally eat in one sitting.

Simple dinner: scrambled eggs and Garden Vegetable Medley + some

additional vegetables + whole wheat tortillas to stuff = sort of egg and veggie fajitas

(This would make an awesome breakfast too!)

1 Comment

Filed under other goodies

Maple Cinnamon Rolls for a recipe swap birthday

I’m going to start referring to my recipes as “Engineer-Tested”. It’s true. I usually deliver a substantial amount of baked goods to my husband’s work. Shut in their tiny warehouse office, the engineers, designers, and whoever else is around always seem happy to eat whatever I bring them. I like to think that I’m contributing to the incredible things these super smart people do.

wpid-DSC_0109-2011-11-6-12-20.jpg

This week the engineers tested a very special recipe for me. I brought over half my celebratory Maple Cinnamon Rolls, baked in honor of the Recipe Swap’s first birthday. This may only be my second month in the swap, but a talented group of bloggers has been putting unique spins on retro recipes for a whole year! I’m so glad Christianna of Burwell General Store had the brilliant idea to start the swap last year and I hope it will keep going for years to come. I just got started!

A birthday deserves a cake, of course, so our starting recipe this month is for Maple Syrup Cake.

“Maple molasses”, aka, maple syrup (I googled it), sugar, butter, spices…why mess with a good thing? Well, I guess that’s not the point. According to the rules of the recipe swap, I had to change something. Believe me, I’ll be making this cake straight up at some point. For this post, I turned the typical birthday dessert (cake) into my family’s typical birthday breakfast (cinnamon rolls).

My mom denies this, but she used to make cinnamon rolls for my brother and I to eat on our birthday mornings. She claims it was only my brother that got cinnamon rolls and maybe she’s right. The point is, I associate cinnamon rolls with birthdays, almost more so than white-iced cakes topped with plastic toys and candles. I love the smell of spice and layers of soft bread swirled with sweet, sticky cinnamon.

My mom made her birthday breakfast cinnamon rolls from the tube, which is perfectly fine with me. Last year, though, I found a cinnamon rolls recipe that I will probably make for the rest of my life. It comes from the Horn of the Moon Cookbook by Ginny Callan, which I found in a thrift store. These rolls were actually my first post in MuffinEgg, making them especially appropriate for this blog-related birthday. The bread is light and fluffy and the filling, made according to the original recipe, is not too sweet. If you’re after that really dark, sweet cinnamon swirl, there is nothing stopping you from putting a few spoonfulls of brown sugar on your dough before rolling it up.

Only three left by the time I took my pictures. They’re that good.

Of course, this time I had maple syrup cake on the brain so my favorite cinnamon rolls got a maple-y twist. There’s maple syrup in the dough and between it’s layers. In fact, maple syrup is the only sweetener in these cinnamon rolls. As an added bonus, I threw in a vanilla bean (not literally. I scraped the seeds out and threw them in). I have a huge package of vanilla beans and keep forgetting to use them. Cinnamon roll dough with vanilla beans…yum. If you have some, try it!

The original instructions suggest doubling the recipe and freezing half the cinnamon rolls before baking. I think this is a brilliant idea. I can’t really imagine a situation where you would want to make only 8 cinnamon rolls and not even put more away for a rainy day. I doubled the recipe for you here, so if you really want a small batch you can halve the ingredients or check out my first cinnamon roll post.

Maple Cinnamon Rolls
Adapted from Horn of the Moon Cookbook by Ginny Callan

Dough

1/2 cup milk (I used vanilla soy milk)
1/2 cup mashed peeled sweet potato
4 tablespoons butter
4 tablespoons maple syrup
3 teaspoons yeast
4 tablespoons warm water
2 eggs
1 teaspoon salt
2 cups unbleached white flour
1 1/2 cup whole wheat flour
Optional: seeds scraped from one vanilla bean

My Free-Form Filling

2-4 tablespoons coconut oil
2-4 tablespoons maple syrup
2 teaspoons ground cinnamon
1/4-1/2 cup chopped walnuts

Bring milk to a boil in a small saucepan. When it reaches a boil, turn off heat and add potato, butter, and maple syrup.
Next, combine yeast and warm water in a medium bowl. Stir to dissolve.
Add the potato mixture to the yeast and water.
Beat in egg, salt, and vanilla bean.
Add 1/2 cup unbleached white flour, mixing well. Then add the remaining white and wheat flour.
Knead until smooth and elastic.
Cover and leave someplace warm to rise until doubled in size (this takes about 1 hour).

Preheat oven to 375 degrees F.
Punch down dough and knead on lightly floured surface. Then let it sit for another 10 minutes.
Roll out to 1/4 inch thickness in an approximately 9×15 in. rectangle-ish shape.
Spread coconut oil over the dough. My coconut oil was soft enough that I could spread it around with my fingers.
Drizzle with maple syrup and spread the syrup around with the back of a spoon
Sprinkle with cinnamon and walnuts.
Roll dough up from the longer side so you have a long roll.
Cut into 1 inch thick slices (or whatever size gives you 16 rolls) and set rolls in a baking dish or two (you can put one in a plastic bag and then in the freezer for later).
Bake 15 minutes or until lightly browned.

I like to top my cinnamon rolls as needed. The engineers got a simple powdered sugar glaze on theirs. I ate some rolls plain and sprinkled others with powdered cinnamon sugar. You could also spread more coconut oil or butter and maple syrup over warm rolls before serving (like pancakes but maybe better).


25 Comments

Filed under other goodies

Chocolate Hazelnut Muffins

What these muffins are not:

  1. at all Nutella flavored or including Nutella as an ingredient
  2. pumpkin muffins

Duh, they’re not pumpkin muffins. Why not? I’m still holding out, still not baking with pumpkin until I feel ready to fully embrace fall. I am determined to find the other flavors that bring this season to mind.

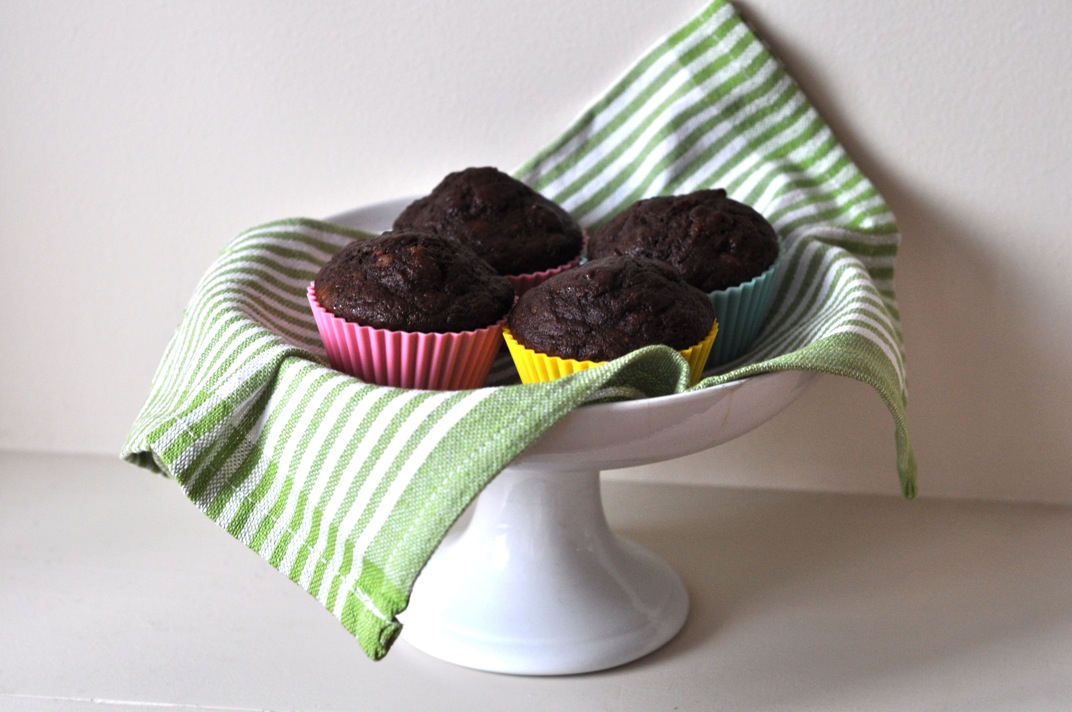
wpid-DSC_0010-2011-10-16-17-00.jpg

Toasted hazelnuts are a fall flavor, right? I can’t say that I’ve ever purchased or even thought much about hazelnuts until I filled a sack with raw ones from the bulk bins last week. I was inspired by this post from The Healthy Foodie to make my own hazelnut butter. Before I knew it, the nuts were in a batch of muffins rather than jars of homemade spread. Next time, hazelnuts.

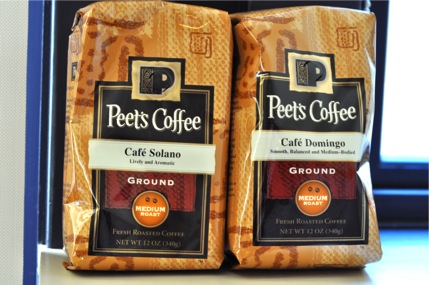
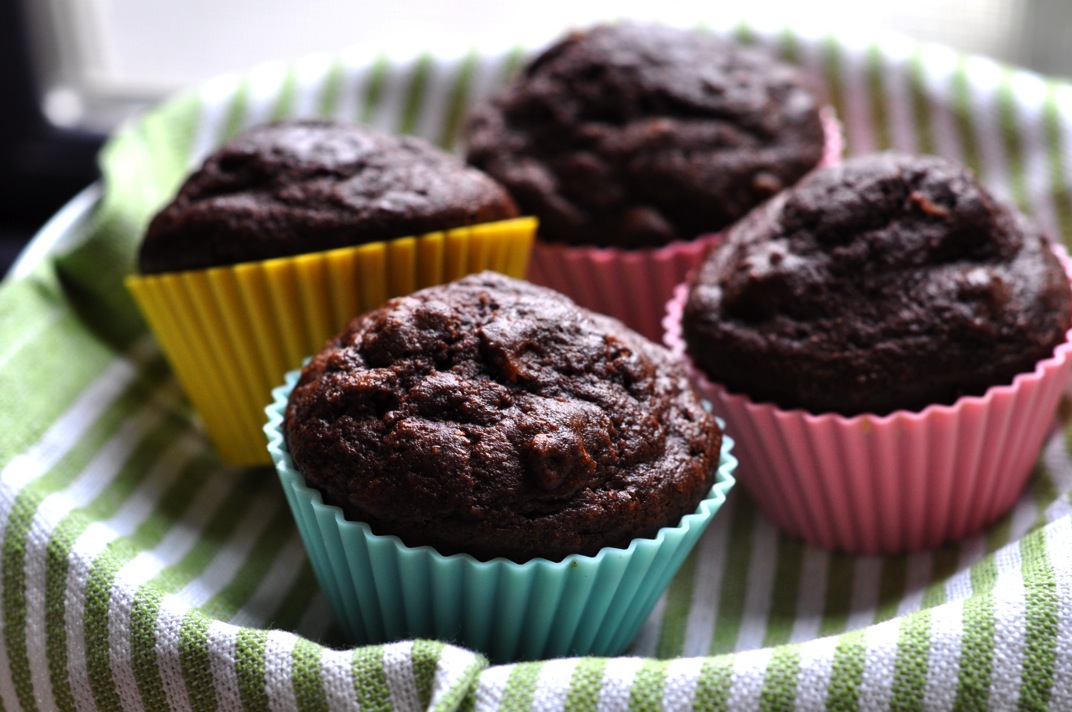
If you want something light but chocolatey, with some crunchy nuts and rich hazelnut flavor (which I might describe as sweet and sophisticated) then these muffins are for you. I’ll be honest. I was going for a mocha hazelnut muffin but somehow the coffee flavor didn’t make it to my taste buds. I didn’t miss it. I had Peet’s Cafe Domingo to sip alongside my mid-morning snack muffin…or dessert…or quick, healthy breakfast.

wpid-DSC_0760-2011-10-16-17-00.jpg

Peet’s sent me these new roasts as part of the FoodBuzz Tastemakers program. They also sent this coupon for you, my lovely readers!

wpid-DSC_0769_2-2011-10-16-17-00.jpg

The balanced blend of Central and South American coffees in Cafe Domingo had the “pure coffee taste” that Peet’s touted in literature on their new medium roast coffees. It doesn’t take a culinary genius to realize that coffee and chocolate snuggle up together to make a perfect buzz of nourishment and, for me, comfort. That may seem like a statement full of contradictions but a good cup of coffee and a chocolatey, nutty, healthy muffin really do trigger happy, calm feelings in me no matter what time of day I’m consuming them.

I broke out my mini Cuisinart for this operation. I often forget that I have a food processor, since I lived without it for so long on the boat. The mini size is perfect for chopping nuts and other ingredients that aren’t too voluminous. I’m also much more likely to get it out and use it when it’s small and clean-up is therefore easier! Still, sometimes I wish I had a big food processor : (

On a related note, I’m getting my new(old) mixer at the end of the month! My mom and aunt retrieved it from my grandmother’s house last month. I can’t wait to have this all-important device for a baker and I will think of my grandmother’s lemon bars ever time I use it (lemon bars were probably the last thing she baked for me, maybe the last thing she ever baked).

wpid-DSC_0019-2011-10-16-17-00.jpg

Muffins were the perfect thing to bring me comfort this week. It’s been tough adjusting to my two internships that occupy a full 3 days of the workweek! I know, I’m a wimp. It’s just been a long time since I’ve had a “job” to go to. I’m surviving, though. I baked muffins. I took them with me. I commuted by bike, bus, and BART. I made claymation movies and helped middle schoolers with science projects. Most of my food became mobile but I managed not to starve. As a busy fall workday-tested recipe, I give these muffins an A+!

Chocolate Hazelnut Muffins
Adapted from Joy of Baking.com

1 3/4 cup flour (I used 1 cup whole wheat pastry and 3/4 cup wheat)
1/2 teaspoon baking powder
1 teaspoon baking soda
1/4 teaspoon cinnamon
1/2 teaspoon salt
1/4 cup cocoa powder
2 eggs
1/2 cup buttermilk (or regular milk soured with a splash of vinegar)
1/2 cup unsweetened applesauce
1/4 cup strong, black coffee
1/3 cup agave nectar or honey
1 teaspoon vanilla extract
1 cup toasted hazelnuts, finely chopped

Check out this post for great instructions on roasting hazelnuts, or buy them already roasted.
Once you have your nuts taken care of, chop them finely by hand or in a food processor. Set aside.

Preheat oven to375 degrees F.
In a large bowl, whisk together flour, baking powder, baking soda, cinnamon, salt, and cocoa powder.
Separately, beat eggs, buttermilk, applesauce, agave, and coffee, stirring in vanilla at the end.
Pour liquid ingredients into dry mixture and stir gently, folding in hazelnuts and stirring just until batter is barely combined.
Spoon batter into prepared muffin cups and bake for 18-20 minutes, or until the tops of the muffins are firm and a toothpick inserted in the center of one comes out clean.

Although I didn’t try it, I’m betting these would be delicious with a little peanut butter spread on them!

2 Comments

Filed under muffins