Tag Archives: gadgets

Toll Houses

wpid-DSC_0253-2011-12-4-15-54.jpg

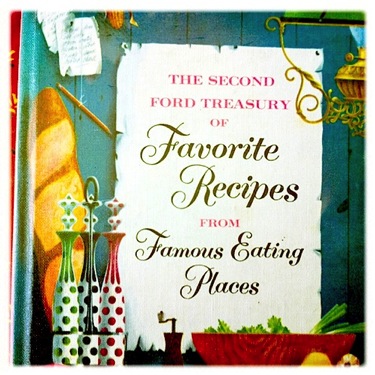
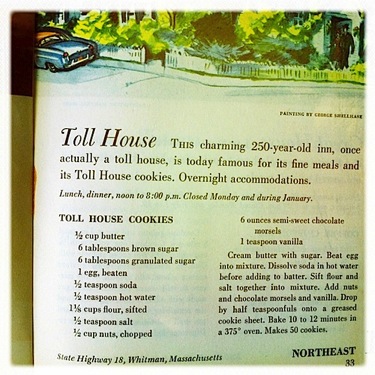
This month’s Recipe Swap recipe made me smile. It also appealed to my nerdyness with a little geographical and historical context lesson. Christianna at Burwell General Store decided to start the swaps second year with a new cookbook. A group of brave bloggers received this vintage recipe from a very unique cookbook:
wpid-recipeswap_ford_bookcover-2011-12-4-15-54.jpg

wpid-recipeswap_tollhouse-2011-12-4-15-54.jpg

        I didn’t do a ton of baking as a kid but I do remember making Toll House chocolate chip cookies with my mom. I know they were Toll House because I remember reading the recipe off of the yellow bag. Though it didn’t happen often, for me cookie baking meant valuable lessons in how to use the stand mixer. It was big, heavy, more than a little scary with all those moving parts, and absolutely essential for perfect cookies.

Until very recently, I didn’t have a mixer of my own. My grandmother’s KitchenAid coming to live with me just happened to correspond with this cookie recipe swap. Creaming butter and sugar has never been so satisfying!
Oh but wait, I didn’t use butter in my Toll House cookies. There are two explanations for this:

  1. I wanted to use a “healthier” fat and just experiment with a different version of the traditional cookie.
  2. I forgot to buy butter.

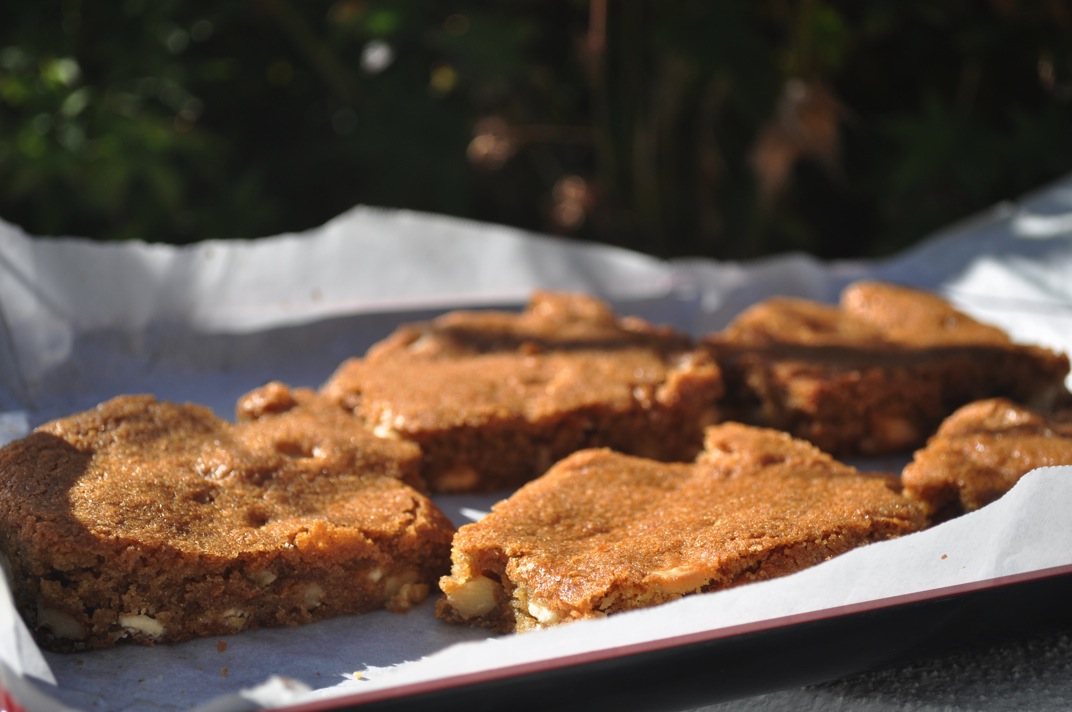
I’d say the real reason is some combination of the above…but mostly number 2. Butter was on the grocery list. I meant to use it, really I did. I’m just not a big butter user so it didn’t make it into my basket. No problem. I had coconut oil! Since it’s solid at room temperature and has such a lovely flavor, I sometimes substitute coconut oil for butter in my baking. While it’s not the same as something made with butter, I think the flavor and texture of these cookies is outstanding.
wpid-DSC_0246-2011-12-4-15-54.jpg

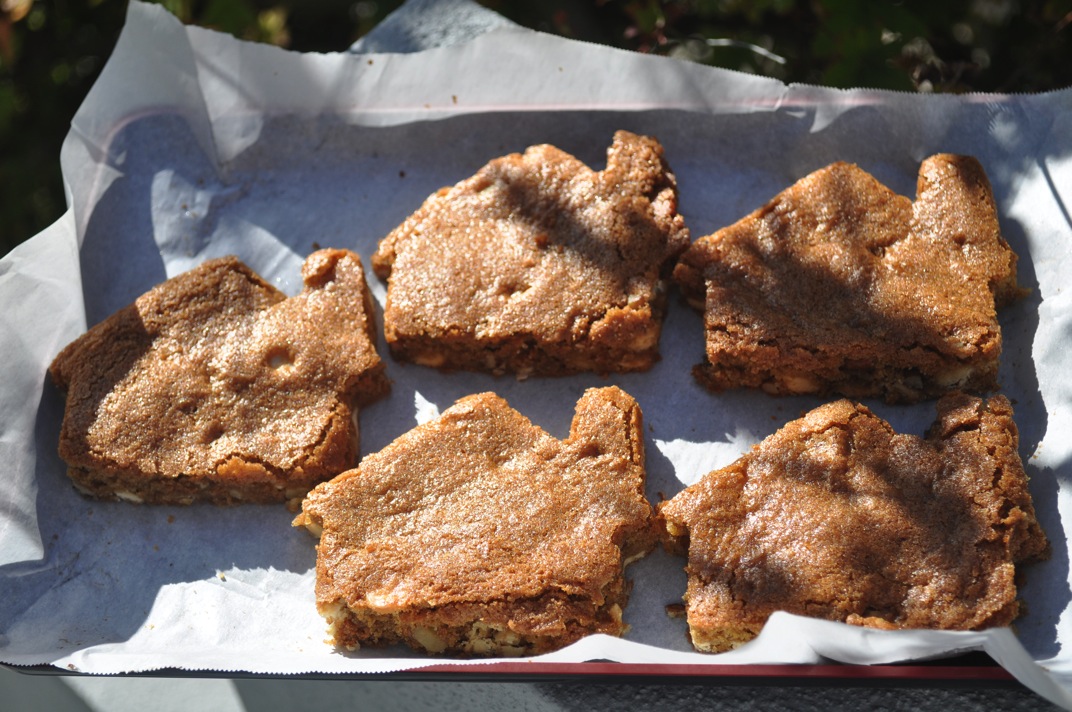
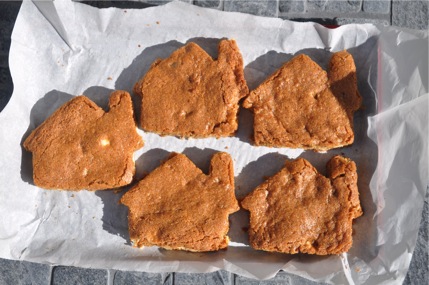
        Now comes the part where I explain the houses. You see, my husband is such a sweet guy, he randomly buys me cookie cutters (this just started recently). Last month he added a house-shaped cutter to my small collection. That, of course, made me smile because we were about to buy our first house! We moved in a week or so ago so I’m feeling very homey and grounded nowadays. The house cookie cutter came out as my play on Toll House cookies and to share a little of my new home love with everyone.

I changed a few other things besides the shape and fat in my cookies. I used white chocolate chips in place of regular, vanilla bean instead of vanilla extract, and whole wheat pastry flour instead of all-purpose. This recipe is small – a nice size for a cookie recipe (unless it’s Christmas and you’re trying to feed lots of people). I baked all the dough in a pyrex dish lined with parchment and then cut the houses out of the giant sheet cookie. This worked pretty well but only made 5 houses + trimmings. The house cookies are big. I’d share one with 1 or 2 other people. The trimmings are perfect for snacking on while you’re snapping your cookie pictures or for crumbling over ice cream…yum!
wpid-DSC_0248-2011-12-4-15-54.jpg


Toll House Houses
Adapted from The Second Ford Treasury of Favorite Recipes from Famous Eating Places

1/2 cup coconut oil
6 tablespoons brown sugar
6 tablespoons granulated sugar
1 egg, beaten
1/2 teaspoon baking soda
1/2 teaspoon hot water
1 1/8 cup flour, sifted (I used whole wheat pastry)
1/2 teaspoon salt
1/2 cup nuts, chopped (I used walnuts and pecans)
1/2 cup white chocolate morsels
1 teaspoon vanilla (I used the seeds scraped from 1 vanilla bean)
Cranberries would have been a good addition. Add some if you want! They’ll be pretty!

Preheat oven to 375 degrees F.
In the bowl of a stand mixer, cream together coconut oil and sugar.
Add egg and vanilla bean scrapings.
Dissolve baking soda in hot water and then add to batter.
Sift flour and salt together and add to mixer a little at a time until completely incorporated.
Stir in nuts and chocolate morsels.
Line a baking dish (mine is 11×7 in. but a bigger one would be better) with parchment paper.
Spread cookie dough over paper to cover the bottom of the dish. The dough will be relatively soft so this is actually pretty easy.
Bake at 375 for 15-20 minutes or until golden brown.
Remove from oven and let cool. You can lift the “cookie” out of the dish and onto a wire rack using the parchment paper.
Once the cookie is cooled, cut out house shapes in as efficient a pattern as possible.
Start looking for a giant milk moat for your houses!

16 Comments

Filed under desserts

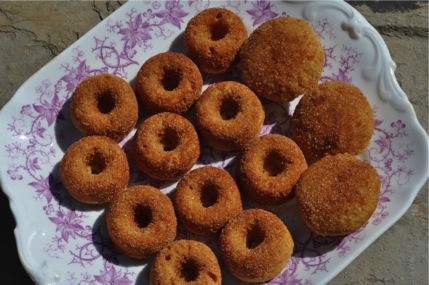
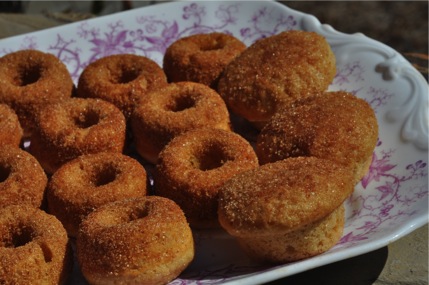
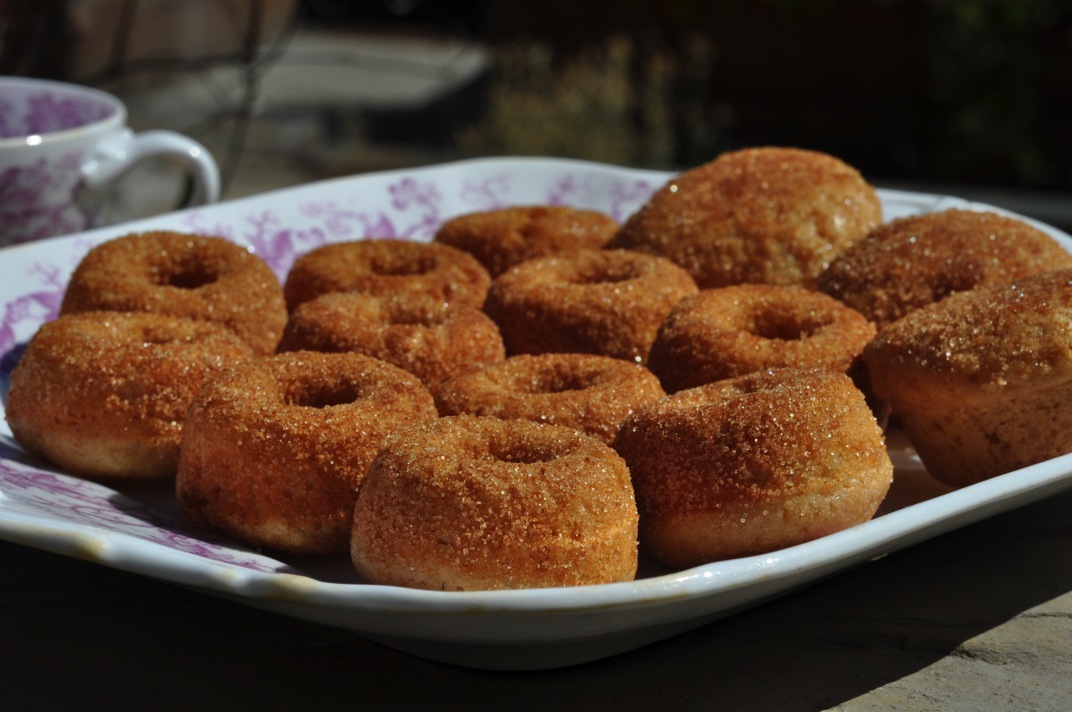
Here a donut, there a donut, wait, isn’t that a muffin?

wpid-DSC_0414-2011-09-6-11-39.jpg

Among the many kitchen goodies I acquired thanks to our wedding gift card bounty was a mini doughnut pan. I’d seen the baked doughnut hype all over the blogosphere and I wasn’t about to miss out on the fun! You don’t need a doughnut pan to bake versions of these traditionally fried goodies. There are plenty of yeast-raised recipes out there that call for cutting out doughnut shapes and baking them on a cookie sheet. That variation is next on my list of doughnuts to make!

I opted for a mini doughnut pan because I was afraid full-sized doughnuts would just be too much. If you must know, I haven’t eaten a doughnut in…years, and the thought of one, even a baked one, kind of sends me over the edge. I figured that mini doughnuts would be slightly less scary and allow for easier portion control. Plus, their cute!

wpid-DSC_0417-2011-09-6-11-39.jpg

I perused many doughnut recipes to christen my pan but in the end the one on the package seemed like a logical starting place. I’d start simple. The batter game together easily and none of the ingredients were that extreme (a tiny amount of butter and reasonable amount of sugar). I used whole wheat pastry flour and it worked beautifully. I also ditched the vanilla glaze called for on the package in favor of simple cinnamon and sugar, which was by far my favorite doughnut topping back in the day.

Batter mixed, pan oiled, oven pre-heated – I was ready! Wait, how am I supposed to get the batter into these tiny doughnut molds?

I spooned in batter a tiny bit at a time, quickly discovering that getting the stuff in there was a time consuming task if I didn’t want to just glop batter over what was supposed to form the hole in my doughnuts. Along the way, I also realized that I was totally overfilling the molds. Oh well, I thought, we’ll just see what happens.

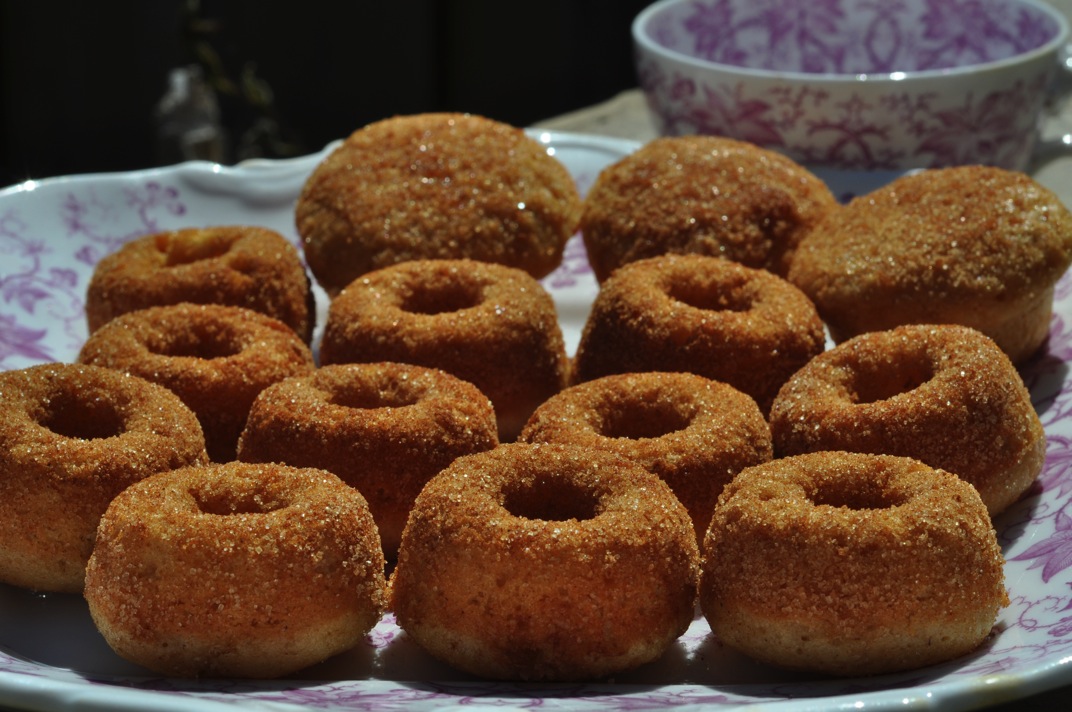
What do you think happened? I made mini muffins with holes in the bottom! Yay! They were certainly cute, especially with cinnamon sugar on top, but they were certainly not doughnuts.

wpid-DSC_0419-2011-09-6-11-39.jpg

Okay, mini doughnuts, take two: I had a little less than half the batter left so I scaled back on my mold filling. This time it looked like a more reasonable amount. I also tried dusting the tops of a couple doughnuts with cinnamon sugar before baking.

The result? Donuts! When removed the doughnuts from the pan they were still a little over-puffed and fat on top (what I made the bottom) but I dredged them in topping and sampled some. I give the doughnut taste and texture an 8 out of 10. The nutmeg, the spongy cake, the spic, sweet topping – it’s all there. While my doughnuts may be a little asymmetrical, they are hard to resist!

Based on my mixed experience with my mini doughnut pan I have this advice:

  1. Buy a regular sized doughnut pan unless you really, really want tiny, tiny doughnuts for some reason.
  2. If you insist on going small, get two mini doughnut pans. Then you can make a full recipe (this recipe was supposed to make 24 doughnuts) without having to refill the same pan.
  3. Consider using a pastry bag to squeeze your batter into the doughnut molds. This would really, really help but I don’t have one.
  4. Do not over-fill your molds! They really only need about 1 to 1.5 teaspoons to end up the proper shape.
  5. This recipe says it makes 24 doughnuts but really it would make 24 mini muffins with doughnut bottoms. Consider halving the recipe if you only have one pan.
  6. If you spray the doughnut molds with oil (which you should), then the part that was in the mold will stick to sugar toppings without additional butter dredging, as is often called for.
  7. Make doughnuts, whatever shape they are and however you make them. They are GOOD!

wpid-DSC_0424-2011-09-6-11-39.jpg

Baked Mini Cake Doughnuts (From Wilton Mini Doughnut Pan)
Makes 24 mini doughnuts

1 1/4 cups cake flour, sifted
1/2 cup granulated sugar
1 1/4 teaspoon baking powder
1/8 teaspoon ground nutmeg
3/4 teaspoon salt
1/2 cup buttermilk
1 egg, lightly beaten
1 1/2 tablespoons butter, melted

Preheat oven to 425 degrees F.
Spray Mini Doughnut pan with nonstick cooking spray

In a large mixing bowl, sift together flour, sugar, baking powder, nutmeg, and salt.
Add buttermilk, egg, and butter.
Stir until just combined.
Fill each doughnut cup approximately half full.

Bake 4-6 minutes, of until the tops of the doughnuts spring back when touched.
Let cool in pan 4-5 minutes before removing.
Finish with topping of your choice (glaze + sprinkles or cinnamon sugar, or something else!). You may need to brush a little butter on your doughnuts to get sugar to stick.

I didn’t use this glaze but here’s the recipe in case you want to try it.

Vanilla Glaze ( also from Wilton Mini Doughnut Package)

1 cup confectioners sugar
1 tablespoon milk
1/2 teaspoon vanilla extract

Stir all ingredients together until sugar is completely dissolved.
Use immediately to glaze doughnuts.

5 Comments

Filed under other goodies

Starting with A

My grandmother organized her recipes and newspaper clippings alphabetically. It seems appropriate to start with the A’s in my quest to sort through and cook from her file.

Today I made labels for the sections in the new folder I got last week. Then I went through the papers that had fallen out of the old folder. Most of them came from the A,B, and C sections but a few were difficult to categorize (an obituary in a recipe file?).

There are some really, really old handwritten recipes in the B’s and C’s. Bread, cake, and cookies were ever popular with my grandparents and great grandparents! I think looking at these old recipes will always take my breath away and leave me more than a little awestruck at what I’m holding. I promise, those slips of paper, ingredient lists, and vague instructions will be on here soon.

Until then Lee and I are off on a weekend visit to my aunt’s house. I can’t wait to relax by the pool and catch up with my aunt. I also have the urge to do come canning before the summer is over so hopefully I can pick up some jars on our travels.

Next week I’ll be making something using this lovely kitchen inheritance.

wpid-DSC_0059-2011-08-5-16-35.jpgwpid-DSC_0063-2011-08-5-16-35.jpg
wpid-DSC_0062-2011-08-5-16-35.jpgwpid-DSC_0061-2011-08-5-16-35.jpg

Does anyone want to guess what I’ll be making?

5 Comments

Filed under inspiration and musings